Lead paint is a serious health hazard that can cause serious health problems, especially in children. Lead paint was commonly used in homes built before 1978, and it can still be found in many older homes today. Removing lead paint from your home is an important step in creating a safe and healthy environment for your family. This guide will provide information on the safety and strategies for removing lead paint from your home, as well as tips on how to prevent lead paint exposure in the future.
The Dangers of Lead Paint: What You Need to Know Before Removing It
Lead paint is a serious health hazard that can cause a range of health problems, including learning disabilities, behavioral problems, and even death. It is important to understand the dangers of lead paint before attempting to remove it from your home.
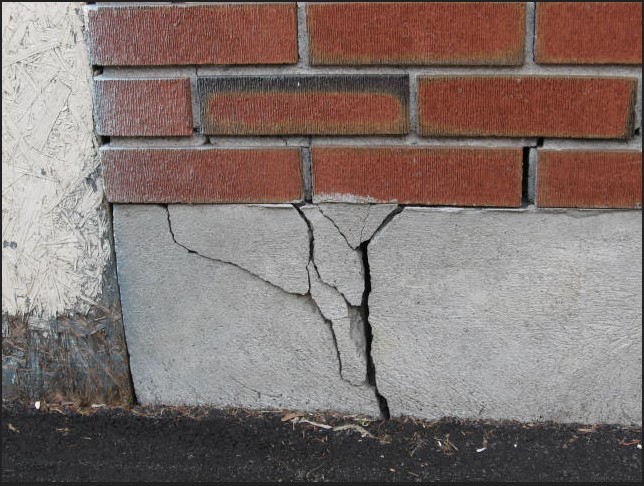
Lead paint was commonly used in homes built before 1978, and it can still be found in many older homes today. Lead paint can be found on walls, ceilings, doors, windows, and other surfaces. It is important to note that lead paint can be a hazard even if it is not flaking or chipping.
Lead paint can be dangerous if it is disturbed or ingested. Ingesting lead paint can cause lead poisoning, which can lead to serious health problems. Lead poisoning can cause learning disabilities, behavioral problems, and even death. In addition, lead paint dust can be inhaled, which can also cause lead poisoning.
If you suspect that your home contains lead paint, it is important to have it tested before attempting to remove it. Professional lead testing services can determine if lead paint is present in your home and can provide advice on how to safely remove it.
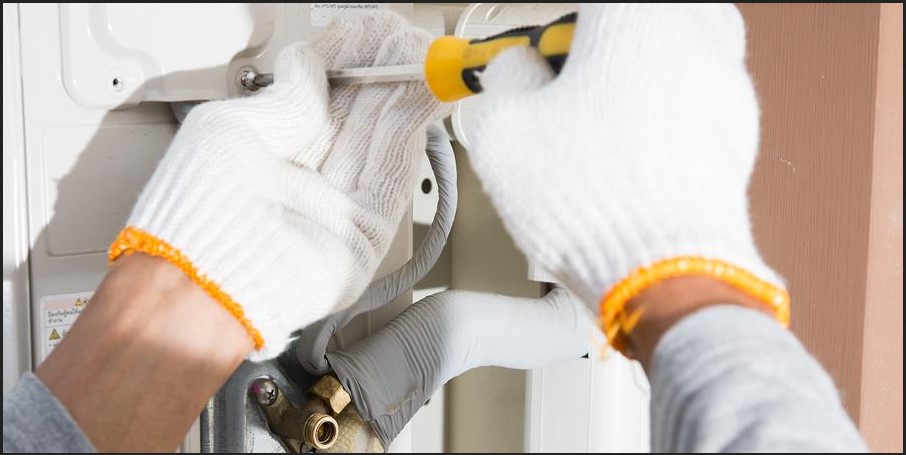
If you decide to remove lead paint yourself, it is important to take the proper safety precautions. Wear protective clothing, such as a respirator, gloves, and goggles. Make sure to keep children and pets away from the area while you are working. It is also important to use the proper tools and techniques to remove the lead paint.
Lead paint can be a serious health hazard, so it is important to understand the dangers before attempting to remove it. If you suspect that your home contains lead paint, it is important to have it tested and to take the proper safety precautions if you decide to remove it yourself.
Strategies for Safely Removing Lead Paint from Your Home: Tips and Tricks for a Healthy Home
Lead paint is a common hazard in many older homes, and it can be dangerous if not handled properly. If you have lead paint in your home, it is important to take the necessary steps to safely remove it. Here are some tips and tricks for safely removing lead paint from your home and creating a healthier environment.
1. Test for Lead Paint: Before you begin any work, it is important to test for lead paint. You can purchase a lead test kit from your local hardware store or hire a professional to test for lead paint in your home.
2. Wear Protective Gear: When removing lead paint, it is important to wear protective gear such as a respirator, gloves, and protective clothing. This will help to protect you from any lead dust or fumes that may be released during the removal process.
3. Use the Right Tools: Make sure you use the right tools for the job. A heat gun, chemical stripper, or a wet scraping method can be used to remove lead paint.
4. Contain the Area: It is important to contain the area where you are working to prevent lead dust from spreading throughout your home. Use plastic sheeting to cover the area and seal off any openings.
5. Clean Up Thoroughly: After you have finished removing the lead paint, it is important to clean up thoroughly. Vacuum the area with a HEPA filter vacuum and use a damp cloth to wipe down any surfaces that may have been exposed to lead dust.
6. Dispose of Waste Properly: Make sure to dispose of any lead paint waste properly. Contact your local waste management company for information on how to safely dispose of lead paint.
By following these tips and tricks, you can safely remove lead paint from your home and create a healthier environment. Remember to always wear protective gear, use the right tools, contain the area, clean up thoroughly, and dispose of waste properly.
Conclusion
Removing lead paint from a home is a difficult and potentially dangerous task. It is important to take the necessary safety precautions and use the appropriate strategies to ensure a healthy home. Professional lead paint removal services should be consulted if the job is too large or complex for a homeowner to handle. With the right safety measures and strategies, lead paint can be removed safely and effectively from a home.


 Recent research shows that people in the south west of England spend just 23 hours deciding which house to buy – compared to 29 hours deciding what to wear or which place to go on a date. The survey by HSBC also shows that people take much longer to work out where to go on holiday – a total of five days – than where they want to live. Buying a house in the south west is one of the biggest financial decisions you will make in your life and it pays to spend some quality time working out if the property is right for you. Here are some tips for making up your mind – and remember, it doesn’t matter if it takes longer than 23 hours.