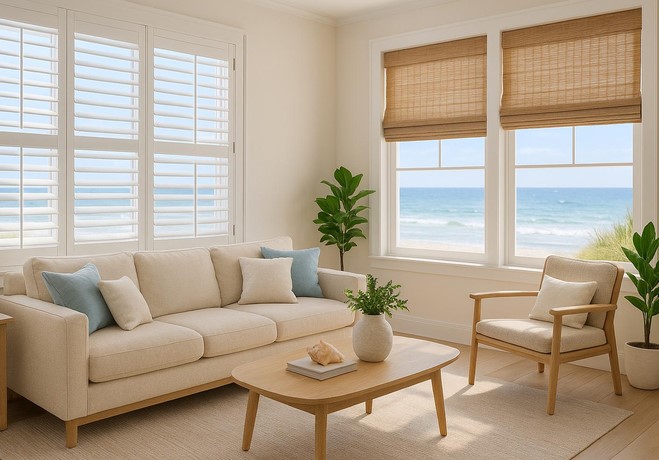
Sustainable Light Filtration: Architectural Depth with Plantation Shutters Wood

Source:https://aaablindandshutterfactory.com

Back in 2018, I inspected a sun-drenched coastal home in Charleston where the owners were paying nearly $600 a month in summer cooling costs. Their south-facing living room featured massive architectural windows fitted with cheap, off-the-shelf plastic blinds that had warped and yellowed under intense UV radiation. The room felt like a greenhouse, forcing their air conditioner to run continuously without a break. We removed those brittle synthetic blinds and retrofitted the openings with custom plantation shutters wood assemblies crafted from sustainable American basswood. Within a month, their indoor ambient temperature dropped by 7 degrees, their HVAC system stopped short-cycling, and their monthly power bill dropped by 18%.

Over my 10+ years in structural renovations and custom finish carpentry, I have seen almost every window treatment trend come and go. Yet, nothing rivals solid timber shutters when it comes to combining passive thermal control, acoustic dampening, and permanent architectural depth. Choosing plantation shutters wood is not merely a decorative upgrade—it is a long-term investment in your home’s thermal envelope and structural value.

The Physics of Light Filtration: How Louver Dynamics Control Thermal Drift

Standard fabric drapes and aluminum blinds offer an “all-or-nothing” approach to light control: either your space is flooded with blinding sun glare, or you are sitting in complete dark isolation. Solid timber shutters operate on a completely different principle of passive dynamic filtration.
Think of plantation shutters wood louvers like an adjustable camera lens aperture integrated directly into your building’s facade. By angling the wooden blades, you bounce direct ultraviolet radiation upward toward the ceiling, diffusing harsh glare into soft ambient illumination while maintaining complete visual privacy at street level.
From a building science perspective, solid wood acts as a natural thermal insulator. When closed, the dense cellular structure of real timber creates a trapped air barrier between the glass pane and your living space, significantly raising the overall window assembly’s thermal resistance (R-value) and cutting down convective drafts.

Timber Science: Selecting the Ultimate Hardwood Substrate

Not all wood species belong in a window frame. Because window openings undergo extreme temperature fluctuations—from freezing glass panes in winter to scorching direct sun in summer—selecting the right wood species is critical to prevent twisting, bowing, or joint failure over time.
  • American Basswood (Tilia americana): The undisputed gold standard for custom window shutters. Basswood features an ultra-tight, uniform grain, exceptional dimensional stability, and a high strength-to-weight ratio. It resists warping under solar heat, takes stain and paint impeccably, and originates from sustainably managed forests.
  • Paulownia Timber: Often called the “aluminum of hardwoods,” Paulownia is an ultra-lightweight, fast-growing timber with remarkable natural insulating properties. Its deep, expressive grain patterns make it an outstanding choice for rich, stained finishes.
  • Poplar Wood: A dense, cost-effective hardwood best suited for painted finishes. While heavier than Basswood, Poplar offers high impact resistance, making it ideal for high-traffic family areas or children’s bedrooms.
Avoid cheap finger-jointed pine or composite MDF (Medium-Density Fiberboard) when seeking true longevity. MDF shutters are notoriously heavy, sag on their frame hinges over time, and swell permanently if exposed to minor window condensation.

Anatomy and Structural Engineering of Custom Wood Shutters

A high-end timber shutter panel is a masterpiece of traditional joinery engineered to withstand thousands of opening and closing cycles without racking out of square.
  • Mortise and Tenon Joinery: Look for shutter frames (stiles and rails) locked together using deep mortise and tenon joints rather than simple dowels or surface screws. This traditional woodcraft prevents panel sagging and keeps the shutter square across decades of daily use.
  • Louver Profiles and Sizes: Louver widths typically range from 2.5 inches (traditional style) to 3.5 inches (contemporary standard) and 4.5 inches (modern architectural style). Larger louvers offer clearer exterior views and maximize passive airflow when fully open.
  • Tilt Rod Mechanics: You can choose between a classic center-mounted wooden tilt rod or a concealed rear tilt strip. Concealed mechanisms offer a clean, minimalist aesthetic and allow more uninterrupted light transmission across the timber surface.

Precision Fitting Protocol: Measuring and Installation Mechanics

Installing plantation shutters wood frames requires tight tolerances. Even a 1/16-inch variance across a window frame can cause panel binding or light leakage along the perimeter.
  1. Check Frame Squareness: Measure diagonally from corner to corner in an ‘X’ pattern across your window casing. If the two diagonal measurements differ by more than 1/4 inch, you must utilize an outside mount frame or employ custom timber shims to square up the opening.
  2. Establish Depth Clearances: Ensure your window casing has sufficient recess depth to accommodate the louver rotation (typically 2.5 to 3.5 inches of clear depth) without hitting window crank handles or tilt-in sash latches.
  3. Secure the Shutter Frame: Assemble the four-sided shutter frame (Z-frame or L-frame), square it within the opening using a laser level, and drive structural screws into solid wall framing timber—never into hollow drywall alone.
  4. Hang and Align the Panels: Drop the panel hinge pins into place and adjust the hinge tension screws until the panels meet perfectly in the center without rubbing or requiring force to latch.

Expert Advice: Pro Tips and Hidden Pitfalls

Pro Tip: Perform a Three-Point Width and Height Audit
Never take a single measurement when ordering custom window shutters. Windows in older homes settle over time, creating subtle hourglass or trapezoid shapes. Always measure width and height at three distinct points (top, middle, bottom for width; left, center, right for height) and use the smallest measurement when specifying inside-mount plantation shutters wood orders.
Hidden Warning: Beware of High-Moisture Sinks
While solid wood shutters are ideal for living rooms, dining spaces, and bedrooms, avoid installing 100% natural timber shutters directly inside high-humidity zones like small, unvented steam bathrooms or immediately above kitchen splash sinks. Continuous direct water contact and trapped humidity will eventually cause natural wood finishes to check or delaminate. Use moisture-resistant composite synthetic shutters specifically in wet splash zones, and reserve fine timber shutters for dry architectural spaces.
Upgrading your home with plantation shutters wood elevates both your daily living comfort and your property’s long-term market valuation. By choosing stable hardwood species like Basswood, insisting on mortise and tenon joinery, and executing precise frame measurements, you secure a timeless architectural feature that filters light beautifully for decades.
Are you planning a window refresh or trying to decide between inside and outside mounting for your specific room layout? Share your window dimensions or project challenges in the comments below, and let’s get your home restoration plans built right!
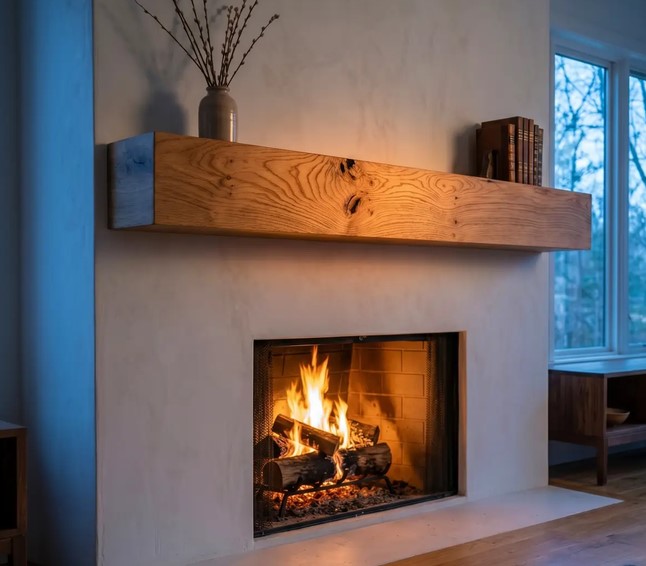
Architectural Focal Points: Elevating Interior Value with the Floating Mantel Wood

Source:https://www.appalachianwoods.com

A few winters ago, I walked into a newly remodeled living room in Denver where the homeowner had spent nearly $15,000 on floor-to-ceiling floor tiles and a sleek modern fireplace insert. Yet, despite the massive budget, the room felt sterile, top-heavy, and oddly unfinished. It was missing an anchor. We sourced a live-edge white oak timber, hollowed it out for weight management, and mounted a custom floating mantel wood piece directly onto the masonry studs. The moment we dropped that timber onto its hidden steel bracket, the entire room clicked into place, transforming a cold showroom into a warm, inviting living space.

Over my 10+ years in structural renovation and interior styling, I have learned that a fireplace without a mantel is like a picture frame without a top border—it lacks balance and structural intent. Installing a high-quality floating mantel wood beam is one of the highest-ROI micro-renovations you can execute. It commands immediate visual attention, anchors your room’s design language, and adds tangible resale value without requiring a full structural overhaul.

The Design Psychology Behind Floating Mantel Wood

In interior design, every primary living space needs a designated anchor point—a single feature that catches the eye the moment you cross the threshold and guides your visual flow. Fireplaces naturally serve this role, but without a heavy horizontal element to ground them, the vertical visual weight can overpower the rest of the decor.
Think of a floating mantel wood beam as an architectural bridge. It creates a subtle visual boundary that separates the intense heat and masonry work below from the media displays or artwork hanging above.
When selected and proportioned properly, a timber mantel enhances your living space in three distinct ways:
  • Proportional Balance: It breaks up tall vertical accent walls, stone veneer, or tile runs, bringing the scale of high ceilings down to a comfortable human level.
  • Material Warmth: Wood brings organic grain, rich texture, and warmth into spaces otherwise dominated by cold materials like brick, concrete, glass, or stone.
  • Functional Utility: Beyond aesthetics, a solid mantel acts as a thermal shield, deflecting rising convective heat away from delicate wall-mounted electronics and artwork.

Selecting the Right Lumber: Solid Beams vs. Hollow Box Construction

Not all wood mantels are constructed the same way. The choice between a solid timber beam and a hollow box mantel dictates your mounting strategy, weight restrictions, and overall material cost.

Solid Hardwood Beams (The Heavyweight Contenders)

Solid beams cut from reclaimed barn timbers, white oak, walnut, or Douglas fir offer unmatched authentic texture, natural checking (weather cracks), and dense grain patterns. However, a solid 6-foot oak beam can easily weigh between 80 to 120 pounds. Installing a solid beam requires direct structural access to wall framing studs and heavy-duty steel mounting hardware.

Hollow Box Mantels (The Versatile Architectural Solution)

A hollow box mantel is crafted by mitering three pieces of 3/4-inch hardwood lumber around an internal mounting cleat. When built with continuous grain matching along the folded edges, it looks identical to a solid timber while weighing up to 70% less. This makes it an ideal option for modern drywall installs, brick retrofits, or DIYers working without additional crew support.
  • Solid Timber: Unmatched physical mass, authentic distress marks, extreme durability, requires heavy structural anchoring.
  • Hollow Box: Lightweight, easier DIY installation, allows hidden routing for cables and LED accent lighting, cost-effective.

Structural Engineering: How to Mount Floating Mantel Wood Securely

The biggest point of failure I see in DIY mantel installations is inadequate mounting hardware. A heavy wooden beam attached with simple drywall anchors or light brackets will eventually sag, tilt forward, or pull away from the wall under its own leverage.
To calculate the structural leverage (cantilever load), remember that the further your mantel projects out from the wall, the more downward force it exerts on your wall studs.

Step 1: Locate and Prepare Structural Framing

Never rely on hollow wall anchors or simple masonry plugs for a heavy mantel. Locate your wall studs using a high-grade stud finder and mark their exact centers. For masonry or brick fireplaces, you must anchor directly into solid brick or concrete using heavy-duty expansion anchors—never into the soft mortar joints.

Step 2: Install a High-Capacity Floating Mounting Bracket

For solid wood beams, use a precision-engineered steel bracket featuring a thick backplate welded to solid steel rods (typically 1/2-inch to 3/4-inch diameter). Drive 3-inch or 4-inch structural lag screws directly into the center of each wooden wall stud.

Step 3: Mortise and Fit the Timber

For a solid timber, bore deep, precise receiver holes into the back edge of the wood using a drill guide to match the spacing of your steel rods. Slide the timber onto the rods until it sits completely flush against the finished wall. For hollow box construction, secure a wooden french cleat or mounting block to the studs, then slide the hollow mantel over the cleat and drive trim screws through the top edge to lock it into place.

Clearance Protocols: Fire Codes and Thermal Protection

Before driving your first lag screw, you must consult local building codes and the National Fire Protection Association (NFPA) standard NFPA 211 regarding clearance to combustibles.
Standard fire safety codes generally dictate that all combustible materials—including your floating mantel wood—must maintain a minimum distance from the top of the fireplace opening:
  • Standard Clearance: Maintain at least 12 inches of vertical clearance between the top of the firebox opening and the bottom edge of a wooden mantel.
  • The Projection Rule: For every inch your mantel projects out from the wall surface, many local codes require adding an extra inch of clearance above the standard 12-inch baseline (e.g., an 8-inch deep mantel may require 16 to 20 inches of vertical clearance depending on local code amendments).

Expert Advice: Pro Tips and Hidden Pitfalls

Pro Tip: Pre-Bake Your Reclaimed Lumber
If you are sourcing authentic reclaimed barn wood for your mantel, ensure it has been professionally kiln-dried. Reclaimed wood stored outdoors can harbour powderpost beetles or retain high moisture levels. Installing un-kilned wood indoors can introduce pests into your home framing and cause the timber to warp, twist, or split severely as it adjusts to your home’s air-conditioned environment.
Hidden Warning: Beware of Convective Heat Traps for Above-Mantel TVs
Mounting a television directly above a fireplace is extremely popular, but rising heat can quickly fry sensitive TV electronics. A floating wood mantel acts as a physical heat deflector. Ensure your mantel extends at least 2 to 3 inches beyond the front profile of your wall-mounted TV. This forces rising hot air out and away from the screen, keeping internal TV temperatures within safe operational limits.
Adding a floating mantel wood beam to your home bridges the gap between raw structural engineering and refined interior aesthetics. By selecting the right timber profile, respecting clearance codes, and securing your mounting brackets directly into solid framing, you create a timeless architectural focal point that adds lasting warmth and value to your home.
Are you planning to install a solid timber or a lightweight hollow box mantel for your fireplace project? What kind of wood species or finish are you leaning toward? Drop your questions and ideas in the comments below, and let’s get your project built right!

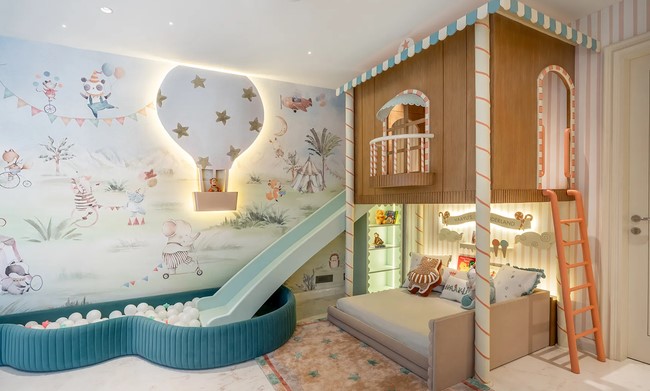
Curating Educational Environments: Enhancing Atmosphere with Nursery Wall Decals

Source:https://assets.architecturaldigest.in/photos

A couple of years ago, I stepped into a newly renovated nursery in suburban Chicago that felt more like a sterile clinical waiting room than an inspiring space for early learning. The parents had invested heavily in sustainable hardwood floors and zero-VOC paint, but left the perimeter walls blank out of fear of damaging the finish or causing visual clutter. Within three hours, using high-grade nursery wall decals, we transformed those cold walls into an interactive safari biome featuring height-chart giraffes and tactile alphabet accents. The immediate shift in how warm, engaging, and alive the room felt was remarkable.

Over my decade working in structural restoration and interior styling, I have learned that wall graphics are far more than simple stickers—they are versatile, cost-effective tools for environmental psychology and early childhood development. When applied correctly, they turn static drywall into a dynamic learning canvas without the permanence or expense of hand-painted murals.

The Science of Visual Ergonomics: Why Nursery Wall Decals Matter

Early childhood spaces require a delicate balance between sensory stimulation and restful calm. Overstimulating a room with aggressive paint colors can overload a toddler’s nervous system, while overly plain rooms lack the visual cues necessary to spark curiosity and cognitive growth.
Think of high-quality nursery wall decals like modular visual anchors in an interactive storybook. Instead of committing to an expensive, permanent painted mural that your child will outgrow in two years, decals allow you to layer thematic, educational elements that evolve alongside their cognitive milestones.
When strategically placed, these graphics support several early developmental areas:
  • Depth Perception & Visual Tracking: High-contrast geometric or animal decals give infants clear focal targets to track while lying in a crib or during tummy time.
  • Spatial Literacy: World map decals, solar system layouts, and grid-based alphabet graphics introduce early concepts of scale, geography, and categorization.
  • Interactive Engagement: Wall-mounted growth charts and interactive height trackers turn physical development into a fun, hands-on daily routine.

Material Science 101: Vinyl vs. Fabric Nursery Wall Decals

Not all wall graphics are engineered equally. In my early days on job sites, I made the mistake of specifying cheap promotional vinyl for a client’s nursery, only to watch it curl away after three weeks due to seasonal humidity shifts. Understanding substrate materials ensures your investment stays firmly on the wall without releasing harsh chemicals.

Poly-Woven Fabric Decals (The Gold Standard)

Made from finely woven polyester threads, fabric decals offer a premium matte texture that eliminates reflection from room lighting. They are naturally tear-resistant, repositionable dozens of times, and do not stretch or warp during application. Most importantly, high-end fabric graphics utilize water-based inks and solvent-free acrylic adhesives that are completely odorless.

Calendered Polyvinyl Chloride (PVC) Decals

Standard vinyl decals are budget-friendly and widely available. However, lower-grade PVC formulas rely on plasticizers to maintain flexibility, which can lead to shrinkage over time. If you opt for vinyl nursery wall decals, verify that they are labeled as monomeric-free, low-VOC, and backed with removable acrylic adhesive rather than permanent solvent adhesives.
  • Fabric Decals: Ultra-durable, zero glare, 100% repositionable, wrinkle-resistant, eco-friendly.
  • Vinyl Decals: Crisp color reproduction, moisture-resistant, budget-conscious, best suited for smooth, non-textured surfaces.

Strategic Design: Curating Educational Zones

To maximize both aesthetic harmony and educational value, divide the room into functional activity zones. Avoid clustering all graphics onto a single wall; instead, distribute them according to how your child interacts with the space.

The Eye-Level Rule for Early Learners

A common mistake homeowners make is hanging wall graphics at adult eye level (around 55 to 60 inches from the floor). For a toddler, this means constantly straining their neck upward.
  • Infant Zone (0–12 Months): Position high-contrast shapes 18 to 24 inches above floor level or beside the changing area where infants spend awake time.
  • Toddler Zone (1–3 Years): Anchor educational graphics—such as alphabet lines or animal biomes—between 24 and 36 inches from the floor.
  • Preschooler Zone (3–5 Years): Place complex maps, solar systems, and interactive growth charts from 36 to 48 inches high to match their expanding line of sight.

Professional Installation Protocol: How to Apply Decals Flawlessly

Installing nursery wall decals appears simple, but achieving a smooth, bubble-free application that lasts for years requires careful surface preparation.

Step 1: Deep Clean the Substrate

Wipe down the target wall using a solution of 70% isopropyl alcohol and 30% water. Avoid standard household sprays, as they leave behind slick silicone residues that destroy adhesive bonds. Allow the wall to dry completely for two hours.

Step 2: Establish Your Baseline

Use a laser level or spirit level paired with painter’s tape to mark a straight horizontal reference line. Avoid aligning decals with door frames or baseboards, as architectural trims in homes are rarely perfectly level.

Step 3: Hinge Technique Application

Position the decal with painter’s tape along its top edge to create a temporary “hinge.” Peel the backing paper downward in small increments while smoothing the decal onto the wall from the center outward using a felt-edge squeegee.

Step 4: Edge Burnishing

Once applied, run your thumb or a soft micro-fiber cloth firmly along all die-cut edges. Applying firm pressure activates the pressure-sensitive acrylic adhesive, ensuring a tight seal against ambient humidity.

Expert Advice: Pro Tips and Hidden Pitfalls

Pro Tip: Respect the 21-Day Paint Curing Window
If you have recently repainted the nursery, wait at least 21 to 30 days before applying any nursery wall decals. Even if paint feels dry to the touch within hours, it undergoes a chemical process called off-gassing. Trapped moisture and outgassing solvents will break down decal adhesives, causing graphics to bubble, peel, or pull off paint upon removal.
Hidden Warning: Beware of Modern “Scuff-Resistant” Paints
Many modern interior paints feature stain-repellent or fluoropolymer-based technologies (often marketed as “washable matte” or “scuff-defense”). These paints are designed to repel dirt, but they also repel wall adhesives. If your walls have stain-resistant coatings, choose poly-woven fabric decals with high-tack removable adhesives or perform a small tape test in an inconspicuous corner first.
Transforming a nursery into an enriching educational haven does not require expensive structural renovations or messy paint jobs. By selecting high-quality, low-VOC nursery wall decals, respecting visual ergonomics, and following proper surface preparation, you create an adaptable space that inspires curiosity every single day.
What design themes or educational concepts are you planning for your nursery project? Have you run into challenges with tricky wall textures or paint finishes? Share your experiences and questions in the comments below!

Curating Executive Memorabilia: Professional Presentation via the Shadow Box Frame

A C-suite executive once invited me into his newly renovated office to inspect what he described as his “wall of achievements.” Hanging there were invaluable career milestones: a vintage brass key to his first manufacturing plant, a hand-signed founding charter, and a heavy ceremonial medal.

Source:https://encrypted-tbn0.gstatic.com

The problem? He had crammed these three-dimensional treasures into standard, flat picture frames using clear packing tape and raw luck. The glass was bowed, pressing flat against the raised brass, and the weight had caused the backing board to buckle outward. What was meant to project legacy instead looked like a hasty DIY experiment.

We immediately stripped those pieces down and rebuilt the display using archival-grade custom framing. Over my ten years of hands-on custom framing, carpentry, and interior installations, I’ve learned that two-dimensional prints belong in standard frames, but true milestones carry depth. Preserving three-dimensional history requires the structural engineering of a proper shadow box frame.

The Engineering Behind Depth: What Makes a Shadow Box Different?

To the untrained eye, a shadow box frame looks like a thick picture frame. In reality, it functions more like a mini architectural display case sealed against environmental degradation.

Think of a standard picture frame like a flat piece of paper pressed against a windowpane. A shadow box, on the other hand, operates like a miniature museum room. It utilizes internal perimeter spacers or a deep rebate (rabbet) to hold the glazing far away from the artwork, creating a sheltered air pocket.

+------------------------------------------+
|  Glazing (Glass / Acrylic)               |
+--+------------------------------------+--+
|  |  Internal Spacer                   |  |
|  |                                    |  |  <- Sealed Air Gap (Depth)
|  |  [ Mounted 3D Object ]             |  |
+--+------------------------------------+--+
|  Backing Board (Acid-Free Mat / Foam)   |
+------------------------------------------+

Why Depth Protection Matters

When a 3D object touches glass directly, thermal condensation gets trapped against the object’s surface. Over time, that trapped moisture causes mildew, metal oxidation, and irreversible ink transference.

By suspending the object inside a deep chamber, you stabilize temperature fluctuations and protect organic fibers like silk, wool, leather, or historical parchment.

Material Selection: Choosing the Right Enclosure

Not all shadow boxes are created equal. When framing executive memorabilia, material selection directly affects the lifespan of the items inside.

1. Frame Moulding: Hardwood vs. Composite

For heavy executive artifacts—such as ceremonial gavels, military swords, or thick bronze medallions—density is critical.

  • Hardwoods (Oak, Walnut, Cherry): These timbers hold heavy structural fasteners and resist warping under tension.

  • MDF or Polystyrene Composites: Fine for light paper, but the corners often split under the strain of heavy 3D mounting hardware.

2. Glazing Choices: Standard Glass vs. Archival Acrylic

Conservation Clear Glass99%ModerateHigh-value documents, autographs, and textiles.Museum Acrylic (Tru Vue)99%HighHeavy artifacts, seismic zones, and high-traffic offices.

Glazing Type UV Protection Shatter Resistance Best Used For
Standard Float Glass ~45% Low Low-value decorative items away from sunlight.

Pro Tip: In high-end executive suites with large floor-to-ceiling windows, always opt for anti-reflective, museum-grade acrylic. It eliminates harsh overhead light glare, making the item visible from any angle in the room.

Reversible Mounting Techniques: Preserving Value

The cardinal rule of high-value framing is simple: Every mounting method must be 100% reversible. If your mounting technique permanently damages the item, you haven’t preserved history—you’ve ruined it.

Never use hot glue, double-sided foam tape, or commercial epoxy on items of personal or monetary value. Here are the professional techniques we use on job sites:

The Sink-Matting and Thread-Barring Method

For textile items like corporate jerseys or ceremonial sashes, use hand-sewn sink-stitches with unbleached cotton thread through acid-free foam board. This distributes weight evenly without tearing fibers.

Brass Micro-Form Mounts and Wire Ties

For heavy, hard objects like brass keys, coins, or ceremonial shears, use brass rods coated in inert heat-shrink tubing. Form the rods around the object, thread them through the backing board, and secure them on the rear with steel washers. The vinyl coating prevents metal-on-metal scratching.

Composition and Layout: Arranging Your Executive Display

An overcrowded shadow box frame looks chaotic; an underfilled one looks accidental. Achieving visual balance requires thoughtful spatial hierarchy.

The Focal Anchor Principle

Place the largest, heaviest item slightly off-center toward the bottom or directly in the lower-third dead center. This grounds the composition visually. Secondary items—such as archival photographs, brass nameplates, or commemorative coins—should orbit the primary object.

+------------------------------------------+
|  [ Archival Photo ]    [ Commemorative ] |
|                        [     Coin      ] |
|                                          |
|         +----------------------+         |
|         |  Focal Anchor Item   |         |
|         |  (e.g., Key / Gavel) |         |
|         +----------------------+         |
|                                          |
|            [ Engraved Plate ]            |
+------------------------------------------+

Color contrast

Choose neutral background mats—such as conservation-grade linen or suede in deep navy, charcoal, or warm cream. High-contrast backgrounds make gold, silver, and dark wood objects pop off the back panel, creating a striking 3D silhouette.

Expert Advice: Hidden Pitfalls to Avoid

Throughout my decade in home improvement and custom framing, I have seen beautifully mounted shadow boxes ruined by two simple installation oversights:

Hidden Pitfall 1: Ignoring Wall Anchor Shear Strength

A solid oak shadow box frame loaded with glass, backing, and heavy metal artifacts can easily weigh between 15 to 30 pounds. Never rely on standard drywall anchors or adhesive strips. Always drive heavy-duty French cleats into structural wall studs.

Hidden Pitfall 2: Off-Gassing from Cheap Backing Boards

Standard cardboard or untreated plywood backing emits acidic off-gassing over time, turning white paper yellow and corroding polished silver. Always insist on 100% acid-free, lignin-free alpha-cellulose or rag backing boards.

Elevate Your Space with Purpose

Preserving career milestones in a custom shadow box frame bridges the gap between historical preservation and interior design. When done right, it converts personal achievements into executive artwork that commands respect and inspires future goals.

Take a look around your workspace today. Are your proudest moments tucked away in drawers or squeezed behind flat glass? Measure your pieces, select an archival shadow box with the right depth, and display your legacy properly.

Have a unique executive artifact or family heirloom you’ve been wanting to frame? Drop a comment below with what you’re working on, and let’s discuss the best mounting strategy for it!

Strategic Spatial Planning: Maximizing Utility with the Corner Sofa Layout

Source:https://i.shgcdn.com

I still remember walking into a client’s newly renovated brownstone a few years back. They had spent a fortune on high-end finishes, but the living room felt claustrophobic, awkward, and somehow both cluttered and empty. In the center sat a traditional three-seater sofa flanked by two heavy armchairs. The traffic flow was broken, corners were completely dead space, and nobody could watch TV without craning their necks.

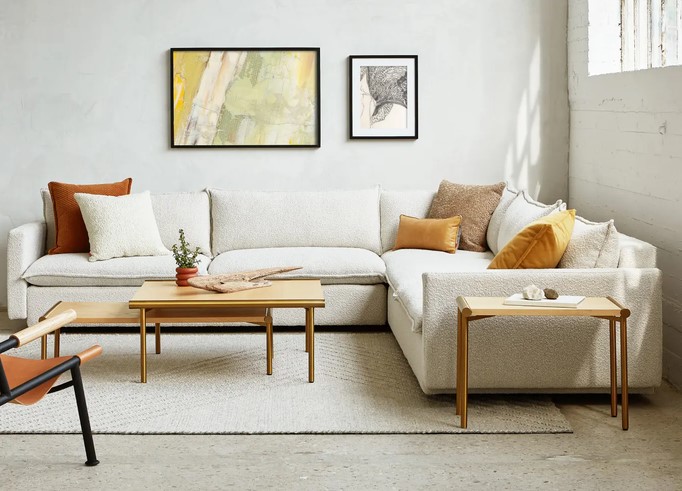
We swapped that fragmented setup for a custom sectional, and the transformation was immediate. By shifting to a thoughtful corner sofa layout, we reclaimed nearly 30% of their usable floor area while doubling the seating capacity.

In my over ten years of hands-on interior reconfiguration and structural remodeling, I’ve learned one absolute truth: space isn’t just about square footage; it’s about spatial dynamics. Choosing and placing an L-shaped or U-shaped couch isn’t merely a decorating choice—it is an exercise in strategic spatial planning.

Why Corners Are the Most Undervalued Real Estate in Your Home

In standard residential architecture, room corners are the ultimate dead zones. Most homeowners treat them as an afterthought, stuffing them with an awkward tall lamp, a dusty houseplant, or worse, leaving them entirely vacant.

Think of your living room like a game of Tetris. When you drop floating, blocky pieces into the center of the grid, you create unusable gaps around the edges. A corner sofa layout acts like that long straight piece you’ve been waiting for—it anchors the room, anchors the perimeter, and instantly opens up the central canvas.

+------------------------------------+
| [ Corner Sofa ]                   |
|  |                                |
|  |           Open Floor           |
|  +-----      Space                |
|                                   |
|   [Coffee Table]                  |
|                                   |
+------------------------------------+

The Geometry of Visual Comfort

From a behavioral standpoint, humans naturally gravitate toward edges when looking for security and relaxation—a phenomenon environmental psychologists call “prospect-refuge theory.” Anchoring your main seating module against two intersecting walls or using the return of an L-shape to partition an open-plan layout creates a psychological sense of enclosure without building physical walls.

Deciphering Layout Formats: Right-Arm Facing vs. Left-Arm Facing

The single most common expensive mistake I see homeowners make is ordering the wrong orientation. Understanding modular anatomy is critical before you spend a single dollar.

  • Left-Arm Facing (LAF): When you stand directly facing the sofa, the sectional arm is on your left side.

  • Right-Arm Facing (RAF): When you stand directly facing the sofa, the sectional arm is on your right side.

  • Reversible/Universal Sectionals: These feature a floating ottoman cushion that can be moved from side to side, ideal for renters or frequent rearrangeers.

       LEFT-ARM FACING (LAF)                 RIGHT-ARM FACING (RAF)
     +---+-----------------------+         +-----------------------+---+
     |   |                       |         |                       |   |
     | A |     Main Seating      |         |     Main Seating      | A |
     | r |                       |         |                       | r |
     | m |                       |         |                       | m |
     +---+---+-------------------+         +-------------------+---+---+
     |       |                                                 |       |
     | Chaise|                                                 | Chaise|
     |       |                                                 |       |
     +-------+                                                 +-------+

Strategic Placement Options

  1. The Classic Perimeter Hug: Placing both backs of the L-shape against structural walls. This maximizes open central floor area, making it ideal for compact apartments or media rooms.

  2. The Zone Divider: Placing one back against a wall while the long return floats out into the room. This effectively separates an open-concept space into distinct living and dining zones without blocking sightlines.

  3. The Floating Island: Placing the entire sectional away from all walls, centered around a focal point like a fireplace or architectural window. This requires a generous footprint (at least 15×20 feet) to maintain balance.

Technical Measurements: Clearance, Scale, and Traffic Flow

A common design pitfall is choosing a sectional that chokes the room’s circulation. To ensure your space remains functional, you must adhere to standard architectural clearance guidelines.

Sofa to TV Screen1.5x Screen Diagonal2x Screen DiagonalPrevents eye strain and maintains optimal viewing angles.Side Wall Clearance2 inches4–6 inchesKeeps drapes functional and prevents fabric abrasion.

Spatial Variable Minimum Clearance Ideal Clearance Why It Matters Primary Walkways 30 inches 36–42 inches Allows two people to pass without shuffling sideways.
Sofa to Coffee Table 14 inches 16–18 inches Reachable for drinks without bumping knees when sitting.

Pro Tip: Before buying, use painter’s tape to outline the exact dimensions of the sofa on your floor. Leave it taped down for 48 hours. Walk around it, live with it, and see if you hit your shins while making your morning coffee. Tape never lies.

Styling and Scale: Balancing Bulk with Visual Lightness

Because an L-shaped sofa carries substantial visual weight, it can easily overpower a small to mid-sized room if not balanced correctly. Here is how professional designers offset that bulk:

1. Elevate with Exposed Legs

Choose a frame with raised, exposed legs (wood or metal) rather than a skirted base that sits flat on the floor. Seeing the floor extend underneath the furniture tricks the brain into perceiving more spatial volume.

2. Choose the Right Fabrication

Heavy, dark velvet or dark leather can make a corner sectional look like a black hole in the corner of the room. Opt for textured, light-neutral upholstery—such as performance linen, bouclé, or soft woven tweeds. Use throw pillows and blankets to introduce high-contrast accent colors and rich textures.

3. Pair with Rounded Secondary Elements

Since a corner sofa layout introduces rigid 90-degree right angles to your space, soften those lines with organic shapes elsewhere. Pair the sectional with a round coffee table, an oval accent rug, or a curved arc floor lamp to break up monochromatic geometry.

Hidden Pitfalls to Avoid

Over the last decade on job sites, I have rescued dozens of living rooms from easily avoidable layout mistakes. Here are two critical warnings to keep in mind:

Hidden Pitfall 1: Radiator and Vent Obstruction

Never push a sectional flush against HVAC floor vents, baseboard heaters, or radiators. Doing so blocks airflow, drives up heating costs, and presents a genuine fire risk or fabric degradation hazard over time. Always maintain a minimum 6-inch buffer from heating elements.

Hidden Pitfall 2: The Doorway Trap

Measure your doorways, stairwells, and elevator doors before ordering! Sectional frames are wide and rigid. I’ve seen custom sectionals left sitting on city sidewalks because the delivery team couldn’t clear a tight 90-degree turn in an entry hallway.

Executing Your Layout Plan

Transforming your space with a corner sofa layout isn’t just about buying new furniture; it’s about reclaiming how you live in your home. By mapping your traffic flow, respecting spatial clearances, and selecting the proper arm configuration, you turn an awkward corner into the functional heart of your floor plan.

Take out a tape measure this weekend, mark out your floor, and evaluate your room’s true potential.

Have you faced challenges fitting an L-shaped sofa into your living room layout? Drop your room dimensions or questions in the comments below, and let’s troubleshoot your space together!

Refined Light Filtration: Enhancing Atmosphere with the Sheer Voile Curtain

Source:https://bunny-wp-pullzone-dspfxhl1bz.b-cdn.net

You’ve just finished painting your living room the perfect shade of “warm sand,” but as the afternoon sun hits the window, the space feels like a harsh, overexposed hospital wing. The glare off the TV is blinding, and your neighbors have a front-row seat to your Sunday nap. You don’t want to block the light entirely with heavy drapes—you just want to tame it.

In my decade of helping homeowners balance aesthetics with function, I’ve found that the most underrated tool in the designer’s kit isn’t an expensive lamp or a piece of art; it’s the sheer voile curtain. I’ve walked into multi-million dollar penthouses where the windows felt “naked” and cold, only to see the entire room transform into a soft, ethereal sanctuary simply by adding a layer of voile. It’s the “Instagram filter” of the interior design world.


What is Voile? Understanding the Textile Science

To the untrained eye, any thin fabric is a “sheer.” But in the trade, we know that the sheer voile curtain is in a league of its own. The word “voile” comes from the French word for “veil,” and that is exactly how it functions.

Technically, voile is a lightweight, plain-weave fabric usually made from 100% cotton or a cotton-polyester blend. What makes it special is the high-twist yarn. Because the threads are twisted tighter than standard fabrics, voile is crisper and more durable than chiffon, yet softer and more graceful than organza.

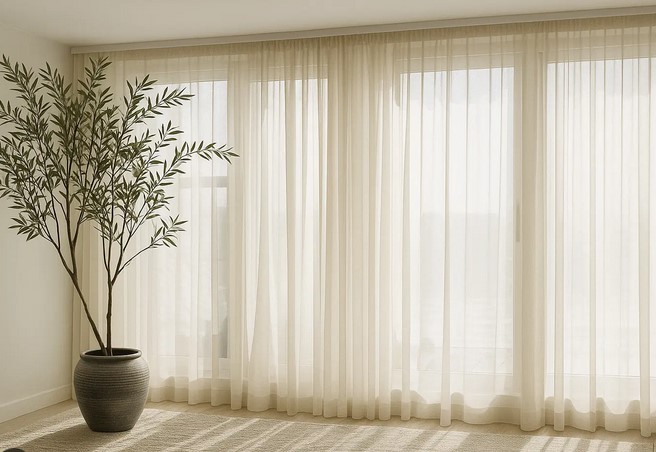
Think of it like this: if standard curtains are a heavy winter coat, a sheer voile curtain is a high-quality silk scarf. It doesn’t hide the window; it dresses it, allowing the architecture of your home to breathe while softening the edges of the outside world.


The Master of Light Filtration and Privacy

The biggest misconception I encounter is that “sheers don’t provide privacy.” While it’s true they aren’t “blackout” solutions, they provide what I call “daytime social privacy.”

Breaking the Glare

During the day, a sheer voile curtain scatters incoming sunlight. Instead of a single, harsh beam of light hitting your floor and fading your expensive rug, the voile spreads that light across the room. This creates a luminous, “glowy” effect that makes small rooms feel significantly larger.

The One-Way Mirror Effect

Because of the way light reflects off the fine weave, it is very difficult to see into a house through voile during the day, yet you can still see the shapes of the trees and sky outside. It’s like wearing a pair of high-end sunglasses; you see the world clearly, but the world can’t see your eyes.


Practical Applications: Where Sheer Voile Shines

Over the years, I’ve developed specific strategies for using these curtains that go beyond just hanging them on a rod.

The Layering Strategy (The “Hotel Look”)

If you want that high-end, luxury hotel vibe, use a double-rod system. Place the sheer voile curtain on the inner rod (closest to the glass) and a heavier blackout drape on the outer rod. This gives you total control:

  • Daytime: Drapes open, sheers closed (soft light + privacy).

  • Nighttime: Both closed (total darkness + insulation).

Softening the “Hard” Rooms

I often recommend voile for kitchens and bathrooms with frosted glass. These rooms are full of hard surfaces—tiles, stone, and metal. Adding a voile tier or café curtain introduces a “soft” element that breaks up the visual hardness, making the space feel more lived-in and welcoming.


Technical Considerations: Choosing and Measuring

Don’t let the “lightness” of the fabric fool you; precision is key when installing a sheer voile curtain.

  • Fullness is Everything: This is the #1 mistake beginners make. To get that beautiful, billowy ripple, you need “2.5x to 3x fullness.” This means if your window is 40 inches wide, you should buy 100 to 120 inches worth of curtain panels. Anything less looks skimpy and “cheap.”

  • Header Styles:

    • Rod Pocket: Great for a casual, gathered look.

    • Grommet: Modern and easy to slide, but the metal rings can sometimes look too heavy for the delicate fabric.

    • Back Tab: My personal favorite for voile. It creates a clean, pleated look without the need for rings or hooks.


Expert Advice: Maintenance and Longevity

Tips Pro: The “Anti-Static” Hack

Synthetic voile can sometimes cling to the window or develop static electricity, making it “stick” to the screen. When you wash them, add a small amount of liquid fabric softener to the rinse cycle, or lightly mist them with a mix of water and softener while they hang. This keeps them draping perfectly even in dry weather.

The Hem Check

Because voile is so light, it can “fly” around when a breeze comes through. Check the bottom hem when purchasing. Professional-grade sheer voile curtains often have a “weighted lead line” sewn into the bottom hem. This invisible weight ensures the curtain hangs straight and doesn’t get sucked out of the window if the wind picks up.


Caring for Your Voile: A Contractor’s Guide

I’ve seen beautiful curtains ruined in a single laundry cycle. Because of that high-twist yarn we talked about earlier, you have to treat voile with respect.

  1. Dust Regularly: Voile acts like a filter for your home’s air. It will trap dust and pollen. Take them down and shake them outside once a month.

  2. The Delicate Wash: Always use a mesh laundry bag. Wash on a “Gentle” or “Handwash” cycle with cold water.

  3. The “Hang Dry” Trick: Never put voile in the dryer. The heat can shrink the polyester fibers or melt them. Take them out of the wash while they are still damp and hang them directly back on the rod. The weight of the water will “pull” out any wrinkles as they dry, saving you hours of ironing.


Why Every Home Improvement Project Needs a “Soft Finish”

When we talk about “Home Improvement,” we usually talk about hammers, drills, and floorboards. But I’ve learned that a house isn’t a home until you control the atmosphere. The sheer voile curtain is the final layer of any renovation. It hides the imperfections of an old window frame and highlights the beauty of the natural light you’re paying for.

It’s an affordable upgrade—often costing less than a single gallon of premium paint—but the impact on your mood and the “feel” of your room is immeasurable. It’s about moving from “harsh reality” to “refined comfort.”


Conclusion: Ready to Light Up Your Space?

Whether you are trying to hide a boring view or simply want to stop the glare on your laptop screen, the sheer voile curtain is the most elegant solution in the book. It’s functional, timeless, and surprisingly easy to maintain once you know the pro tricks.

What room in your house feels the “harshest” right now? Is it a sun-drenched bedroom or a sterile-looking office? Try swapping your old blinds for a set of high-fullness voiles and watch the atmosphere change instantly. If you have questions about rod placement or finding the right fabric blend for your climate, ask away in the comments—I’m here to help you get that perfect glow!

Compact Bedroom Ideas: Maximize Space in Small Bedrooms

Source:https://www.thespruce.com

Living in a small space can be a challenge, especially when it comes to creating a comfortable, functional, and aesthetically pleasing bedroom. However, with the right approach, even the tiniest of rooms can be transformed into a cozy and well-organized sanctuary. Compact bedroom ideas are essential for making the most of limited space while ensuring the room feels open and inviting. Whether you’re working with a studio apartment, a small guest room, or a cozy bedroom in a shared living space, there are plenty of clever ways to maximize every square inch of your room.

The key to designing a compact bedroom lies in smart furniture choices, effective organization, and strategic use of colors and lighting. In this article, we will explore a variety of innovative techniques and practical solutions to help you make your small bedroom feel more spacious and functional. With a few adjustments and creative thinking, you can turn your compact bedroom into a peaceful and efficient retreat.

1. Choose Multi-Functional Furniture

When working with limited space, one of the best strategies is to opt for multi-functional furniture pieces that can serve more than one purpose. This will allow you to maximize both your floor space and storage options, making your small bedroom more versatile and organized. Here are a few ideas to consider:

a. Storage Beds

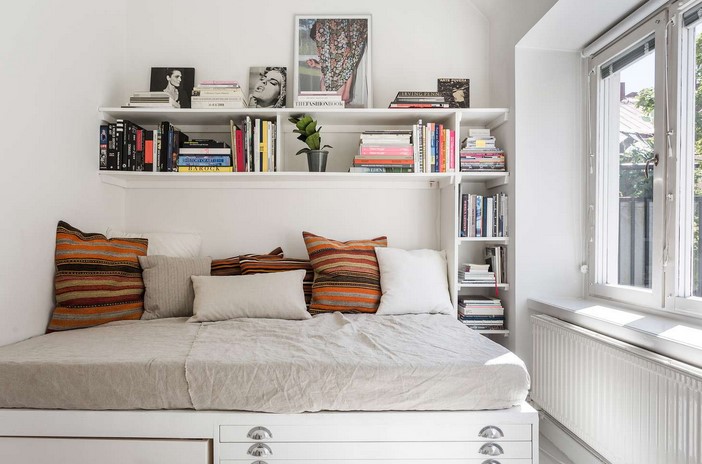
A bed is often the largest piece of furniture in a bedroom, so choosing one that incorporates built-in storage can be a game-changer. Storage beds come in many forms, such as platform beds with drawers underneath or lofted beds that create space for a desk or seating area below. These beds provide extra storage for clothes, linens, or other personal items, helping to keep the room tidy and free of clutter.

b. Foldable or Wall-Mounted Desks

If your bedroom serves as both a sleeping and working area, a compact desk can be a great addition. However, in a small room, a bulky desk can take up valuable space. Wall-mounted desks or foldable desks can be tucked away when not in use, allowing you to create more floor space when needed. These types of desks are ideal for small spaces and help maintain an uncluttered look.

c. Convertible Furniture

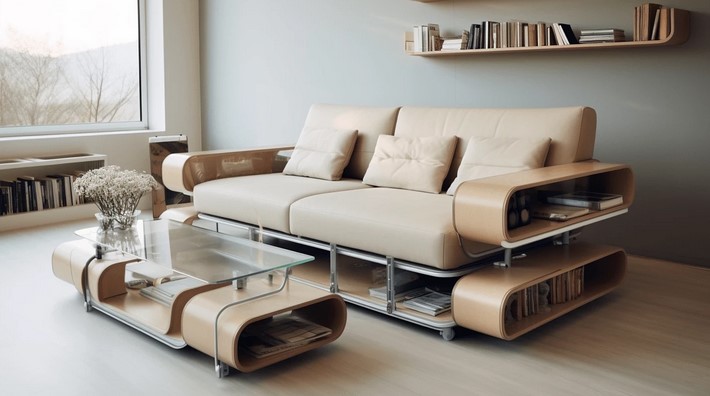
Consider furniture pieces that can easily convert from one function to another. A fold-out couch or sofa bed can serve as both seating during the day and a bed at night. Ottomans with hidden storage or convertible coffee tables that can transform into dining tables are also excellent space-saving solutions.

2. Use Vertical Space for Storage

In small bedrooms, utilizing vertical space is essential for maximizing storage while keeping the floor area open. Walls are your best friend when it comes to creating storage solutions that don’t take up precious space on the ground. Here are a few ways to incorporate vertical storage:

a. Wall-Mounted Shelves

Wall-mounted shelves or floating shelves can be used to store books, decorative items, or personal accessories. By keeping your shelves high on the walls, you free up space for walking around the room and ensure that your belongings are organized without taking up floor space. This also adds a stylish and modern touch to the room’s decor.

b. Hanging Storage

You can also take advantage of hanging storage solutions such as hooks, pegboards, or hanging baskets. These can be used to store accessories, bags, or hats, helping to keep them off the floor and creating more room to move. Another option is to use a hanging rod for extra clothes storage in place of a bulky wardrobe.

c. Tall Furniture Pieces

Opting for taller furniture, such as a tall dresser or a narrow bookshelf, can provide ample storage without taking up too much of your precious floor space. Tall dressers are great for storing clothes and linens, while a vertical bookshelf can be used to organize books, plants, or decorative pieces.

3. Create the Illusion of Space with Colors and Lighting

The right color palette and lighting choices can dramatically change the perception of space in a small room. By choosing light colors and incorporating clever lighting techniques, you can make your compact bedroom feel larger and more airy.

a. Light Colors and Neutrals

Light colors, such as whites, pastels, and light grays, help to reflect natural light and make a room appear more open and spacious. If you prefer to add some color, opt for soft tones like light blue, mint green, or soft peach, which are calming and won’t overwhelm a small space. Additionally, neutral tones for furniture and bedding help to create a cohesive, streamlined look.

b. Mirrors

Mirrors are a powerful design tool for creating the illusion of space. Strategically placing a large mirror on one wall can make the room feel more expansive by reflecting light and giving the impression of depth. A mirrored headboard or mirrored furniture pieces can also add a touch of sophistication while making the room appear more open.

c. Layered Lighting

Proper lighting can make a small bedroom feel more welcoming and spacious. Layer your lighting with a combination of overhead lights, task lighting (such as table lamps or wall sconces), and accent lighting (like LED strips or fairy lights). This will not only help illuminate the room but also create a warm and inviting atmosphere. Consider using dimmer switches to adjust the lighting depending on your mood or time of day.

Additional Tips for Maximizing Space in Small Bedrooms

  • Keep it Clutter-Free: The key to making a small bedroom feel larger is to keep it as clutter-free as possible. Invest in storage solutions that help you organize your belongings out of sight. Use baskets, under-bed storage, or storage bins to keep your items neatly tucked away.
  • Go for a Minimalist Aesthetic: A minimalist design approach can help reduce visual clutter and create a sense of calm. Focus on essential furniture pieces and avoid overcrowding the room with unnecessary decor. Keep the design clean and simple, using only items that serve a functional purpose or add significant aesthetic value.
  • Use Multi-Purpose Rooms: If your small bedroom doubles as an office or guest room, consider creating distinct areas within the same space. Use area rugs, curtains, or furniture placement to visually separate the sleeping and working zones, making the room feel more organized and purposeful.

Maximizing space in a small bedroom doesn’t mean sacrificing comfort or style. With the right approach, compact bedroom ideas can help you make the most of every inch of space while ensuring that the room remains functional, comfortable, and visually appealing. By choosing multi-functional furniture, utilizing vertical space for storage, and creating the illusion of space with colors and lighting, you can create a small bedroom that feels open, airy, and serene. With a little creativity and thoughtful design, even the smallest bedroom can become a cozy retreat that meets all of your needs.

Compact Storage Ottomans: Multi-Functional Furniture for Small Spaces

Source:https://turn.am

5Small living spaces can be a challenge, especially when it comes to organizing and maximizing every inch of your home. One clever solution gaining popularity is the use of compact storage ottomans. These versatile pieces of furniture combine functionality and style, offering a practical solution for storing household items while serving as comfortable seating or a footrest. Compact storage ottomans not only help in maintaining a clutter-free environment but also enhance the overall aesthetic of any room. In this article, we will explore the various advantages of compact storage ottomans and why they are a must-have addition to small spaces.

1. The Versatility of Compact Storage Ottomans

a) Multi-Functional Design

Compact storage ottomans are incredibly versatile, making them a great option for small spaces where every square foot counts. These ottomans are not just about storage; they can serve multiple purposes depending on your needs. From providing additional seating to acting as a stylish coffee table, they can adapt to different functions in various rooms of the house. In a living room, they can double as extra seating for guests or as a comfortable footrest after a long day. In a bedroom, they can serve as a chic bench at the end of the bed while offering valuable storage space for blankets, linens, or clothing.

b) Innovative Storage Solutions

The primary appeal of compact storage ottomans lies in their ability to hide away everyday clutter. Small apartments or homes with limited storage space often struggle with finding room for extra belongings. A storage ottoman provides an innovative solution, offering hidden compartments that allow you to store everything from books and remote controls to seasonal clothing and toys. Some models even come with removable tops or lift-up seats, providing easy access to your stored items while maintaining the piece’s aesthetic appeal.

2. Space-Saving Benefits

a) Ideal for Small Rooms

One of the key benefits of compact storage ottomans is their ability to fit into even the tightest spaces. Unlike bulky furniture pieces that dominate a room, these ottomans are designed to be sleek and unobtrusive. Whether you live in a studio apartment, a dorm room, or a small house, a compact storage ottoman can provide the additional seating and storage you need without overwhelming the space.

b) Easy to Move and Rearrange

Compact storage ottomans are often lightweight and portable, making them easy to move around. Whether you want to shift them from the living room to the bedroom or create an intimate seating area for guests, their mobility makes them an ideal choice for flexible room layouts. In addition, some ottomans are equipped with wheels or casters, allowing you to effortlessly move them when needed.

c) Aesthetic Appeal

In addition to their functional benefits, compact storage ottomans are available in a wide variety of designs, colors, and materials, making it easy to match one with your home’s décor. From upholstered fabric to leather or faux-leather finishes, you can choose an ottoman that complements your existing furniture. Their stylish appearance enhances the ambiance of any room, providing both utility and an attractive focal point.

3. How to Choose the Right Compact Storage Ottoman

a) Consider Your Storage Needs

When shopping for a compact storage ottoman, it’s essential to consider what you plan to store inside. Some ottomans are designed with deep storage compartments, perfect for larger items like blankets, pillows, or even shoes. Others have smaller, more organized sections, ideal for books, magazines, or personal accessories. Before purchasing, take an inventory of the items you need to store and ensure the ottoman you select offers the right amount of space and configuration for your needs.

b) Choose the Right Material

The material of your ottoman will play a role in its durability and overall look. Fabric ottomans, such as linen or velvet, offer a soft, comfortable surface and are available in a wide range of colors and textures. Leather and faux-leather ottomans, on the other hand, provide a sleek, modern appearance and are typically more durable and easier to clean. Additionally, if you have pets or children, choosing a material that resists stains and wear may be beneficial for long-term use.

c) Pay Attention to Size and Proportions

While compact storage ottomans are designed to be small and space-efficient, it’s essential to consider the dimensions carefully to ensure they fit your space. Too large of an ottoman can overwhelm a room, while one that is too small may not provide enough storage or seating capacity. Measure the available area in your home before purchasing to ensure the ottoman will fit comfortably without crowding the room.

In conclusion, compact storage ottomans are an essential addition to any small living space. They combine style, comfort, and practicality, offering innovative solutions for seating, storage, and organization. Whether you need a place to store extra linens, hide away clutter, or create a cozy seating area, these versatile pieces of furniture are an excellent choice for maximizing limited space. With their sleek designs, mobility, and multi-functional capabilities, compact storage ottomans are an investment that will not only save space but also improve the overall aesthetic and functionality of your home.

Decorative Wall Molding: Adding Style and Character to Any Room

Source:https://www.southernliving.comDecorative wall molding is an elegant and timeless way to enhance the aesthetic appeal of any room. Whether you’re renovating an old space or designing a new one, wall molding can instantly transform a plain, mundane wall into a stunning focal point. With various styles, materials, and finishes available, decorative wall molding offers endless possibilities for customization, making it a versatile addition to any home. In this article, we will explore the different types of decorative wall molding, their benefits, and how to effectively incorporate them into your interior design to bring character and sophistication to your living spaces.
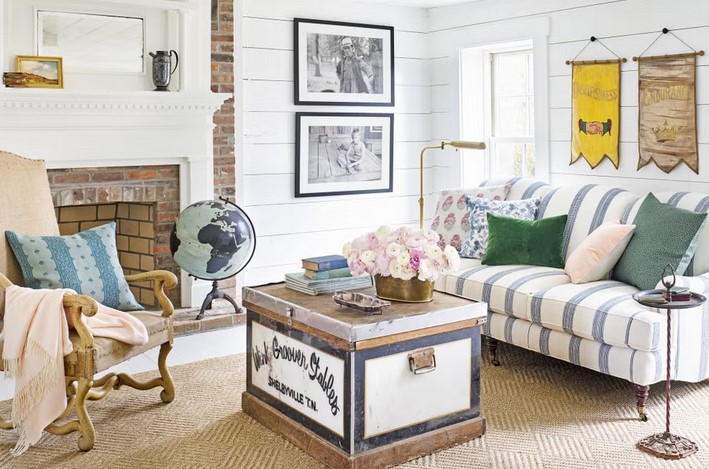
Benefits of Decorative Wall Molding

Incorporating decorative wall molding into your home design provides more than just a decorative touch. It serves a variety of practical and aesthetic purposes, from adding visual interest to creating a sense of elegance and luxury. Let’s explore some of the key benefits that make decorative wall molding a popular design choice.

Enhances Visual Appeal

The primary purpose of decorative wall molding is to elevate the visual appeal of your walls. Plain, flat walls can often feel uninviting or monotonous, but adding molding can break up the space and create a sense of balance and proportion. Molding can draw attention to architectural features, highlight specific areas in the room, and give the space a more finished, polished look.

By varying the style and thickness of the molding, you can tailor it to complement your room’s overall design. For example, in a modern living room, sleek, minimalistic moldings can lend a clean and sophisticated appearance, while intricate, more ornate designs can bring a vintage or classical touch to a traditional interior.

Adds Architectural Character

Decorative wall molding isn’t just a pretty detail; it’s a functional architectural feature that adds structure and depth to a room. It helps frame windows, doors, and ceilings, creating a sense of dimension and enhancing the proportions of the room. For older homes, especially those with high ceilings or traditional architecture, moldings are an excellent way to preserve and emphasize the building’s original character.

In modern homes, decorative wall molding can be used to introduce classic design elements, blending the old with the new. For example, a contemporary living space can benefit from the inclusion of traditional crown molding or wainscoting to infuse historical charm without sacrificing modern functionality.

Conceals Imperfections

Another practical benefit of decorative wall molding is its ability to hide imperfections in walls and ceilings. Over time, walls may develop cracks, stains, or visible seams, especially in older buildings. Molding can conceal these imperfections while adding elegance. For instance, crown molding at the intersection of the walls and ceiling can distract the eye from minor flaws, making your space look fresh and flawless.

Increases Home Value

One of the more long-term benefits of incorporating decorative wall molding is the potential increase in home value. Buyers often appreciate homes that showcase attention to detail and craftsmanship. Well-designed moldings can give a room a sophisticated, upscale feel, which can be particularly appealing to prospective buyers if you’re looking to sell your home. This relatively affordable upgrade can make a significant difference in the perceived value of your space.

Types of Decorative Wall Molding

When selecting decorative wall molding for your home, it’s important to consider the different styles and materials available. The type of molding you choose will play a critical role in shaping the overall look of your room. Here are some popular types of decorative wall molding to consider:

Crown Molding

Crown molding is one of the most common types of decorative wall molding, often installed where the walls meet the ceiling. It comes in a wide range of styles, from simple and contemporary to intricate and traditional. Crown molding can enhance the height of a room and add a polished, finished look. In addition to its aesthetic appeal, crown molding can also help improve acoustics in a room by reducing echoes.

Wainscoting

Wainscoting is another popular style of decorative wall molding, typically installed on the lower portion of a wall, extending a few feet up from the floor. It is often used in dining rooms, hallways, and bathrooms for both functional and aesthetic purposes. Wainscoting can be made from a variety of materials, such as wood, MDF, or PVC, and can range from simple beadboard panels to more elaborate raised or recessed designs. Wainscoting helps protect the walls from damage, particularly in high-traffic areas, while also adding texture and visual interest.

Baseboards

Baseboards are a form of molding installed along the bottom edge of walls, where they meet the floor. While baseboards primarily serve a protective function—shielding walls from scuff marks, dirt, and moisture—they can also be decorative. With their clean lines, baseboards can create a cohesive, finished look and complement other types of molding in the room. Baseboards come in various sizes and materials, allowing you to customize them to match the room’s style.

Chair Rail Molding

Chair rail molding is installed horizontally along the upper part of the wall, usually about 30 to 36 inches from the floor. It was originally designed to protect walls from damage caused by the backs of chairs, but today, it’s often used for decorative purposes. Chair rail molding can be used in conjunction with wainscoting, helping to divide the wall into two sections and adding visual interest to the space.

Picture Frame Molding

Picture frame molding involves arranging rectangular or square frames on the wall, typically in a grid pattern. These frames can be painted in contrasting colors or adorned with artwork, mirrors, or photographs to create a gallery effect. This style of decorative molding works particularly well in dining rooms, living rooms, or hallways and can add a touch of elegance to any room.

How to Incorporate Decorative Wall Molding into Your Home

Once you’ve selected the type of molding that best suits your room, it’s time to consider how to incorporate it into your space. Here are some tips to help you make the most of your decorative wall molding:

Coordinate with Room Design

Before installing molding, make sure it complements the room’s design. For example, if you have a modern, minimalist interior, choose sleek, simple molding styles like flat panels or narrow baseboards. If your home features traditional architecture, more intricate moldings, such as detailed crown molding or ornate wainscoting, can help tie the room’s elements together.

Use Molding as a Focal Point

Molding can be used creatively as a focal point in your room. For instance, a dramatic crown molding design with bold colors or finishes can be the centerpiece of your space. Additionally, picture frame molding or chair rails can be used to highlight specific areas, such as a fireplace, dining table, or artwork.

Pay Attention to Proportions

It’s important to choose molding that is proportional to the size of the room. In smaller rooms, opt for narrower and more subtle moldings to avoid overwhelming the space. In larger rooms, you can experiment with bolder, more intricate designs that draw attention and add visual drama.

Incorporating decorative wall molding into your home is a simple yet powerful way to add style, character, and elegance to any room. Whether you choose crown molding, wainscoting, or baseboards, each type of molding can elevate the overall aesthetic of your living space, making it feel more refined and inviting. Decorative wall molding not only enhances the visual appeal of your walls but also adds architectural depth, conceals imperfections, and can even increase the value of your home. So, if you’re looking for an easy and impactful way to update your space, consider integrating decorative wall molding as a key element in your interior design.

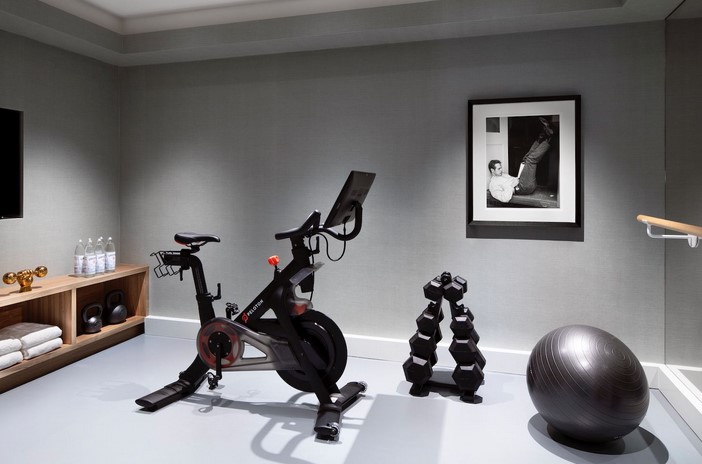
Home Gym Design Tips for Every Fitness Level

Source:https://www.thespruce.com

Creating a home gym is a fantastic way to invest in your health and well-being without the need for a gym membership or the hassle of traveling to a fitness facility. Whether you’re a seasoned athlete, a beginner looking to stay fit, or someone who enjoys the occasional workout, a well-planned home gym design can accommodate your needs and make exercising at home both convenient and enjoyable. This article will explore home gym design tips for every fitness level, providing guidance on how to maximize your space, select the right equipment, and create an environment that motivates you to stay active.

1. Assessing Your Space and Fitness Goals

The first step in designing your ideal home gym is assessing your available space and determining your fitness goals. The size, layout, and purpose of your gym will be influenced by how much space you have and what type of workouts you enjoy. Whether you’re setting up a dedicated room, converting a garage, or using a corner of a bedroom, tailoring the design to your fitness needs will ensure maximum functionality and enjoyment.

Determine Your Fitness Level and Goals

Start by considering your fitness level and what kind of activities you plan to engage in. If you’re just beginning, you may prefer lighter equipment like resistance bands, dumbbells, and a yoga mat. On the other hand, if you’re an experienced athlete, you may need more specialized equipment such as free weights, a bench press, cardio machines, and space for high-intensity workouts. Your fitness goals—whether it’s building strength, increasing endurance, losing weight, or improving flexibility—will play a significant role in determining which equipment and features should be included in your design.

Maximize Space Utilization

Regardless of the size of the space, effective home gym design should focus on maximizing the use of available space. If you have a smaller room or are working within limited square footage, opt for compact, versatile equipment that can be easily stored away when not in use. Foldable or stackable pieces, like resistance bands, adjustable dumbbells, or a fold-up treadmill, can save you space and keep your workout area clutter-free.

If you have a larger space to work with, you have more flexibility in terms of equipment choice. You could dedicate different areas of the room to specific activities, like cardio, weight training, and stretching or yoga. If possible, ensure that there’s enough space between equipment for safety, particularly for exercises that require movement or involve weights.

2. Selecting the Right Equipment for Your Fitness Level

Once you’ve assessed your space and fitness goals, it’s time to select the equipment that best suits your workout routine. The right gear can enhance your home gym design by making workouts more enjoyable and effective. For every fitness level, there are key pieces of equipment that cater to different workout styles.

For Beginners: Start Simple

If you’re just getting started with your fitness journey, it’s important to avoid overwhelming yourself with too much equipment. Instead, start with the essentials that can provide a full-body workout and gradually build up your fitness level.

  • Yoga Mat: Ideal for stretching, core workouts, and yoga, a good-quality mat is a must-have for beginners.
  • Resistance Bands: Lightweight, portable, and versatile, resistance bands are perfect for strengthening exercises and can easily be adjusted to suit your fitness level.
  • Dumbbells: A pair of adjustable dumbbells can serve a variety of purposes, from strength training to circuit workouts.
  • Kettlebell: Kettlebells are excellent for functional training, building strength, and increasing cardiovascular fitness. They are simple yet effective for beginners.

As you progress, you can add more specialized equipment like a treadmill or stationary bike for cardio, a bench for weight training, or even a jump rope for cardiovascular conditioning.

For Intermediate Fitness Levels: Add Variety

As your fitness level improves and your workouts become more advanced, it’s time to incorporate additional pieces of equipment that offer more variety and challenge.

  • Cardio Machines: If you prefer indoor cardio, consider adding a treadmill, elliptical machine, or stationary bike to your gym. These machines offer different levels of intensity and can help build cardiovascular endurance.
  • Weight Training Equipment: Intermediate fitness levels often call for a more extensive range of free weights. Consider investing in a set of barbells or a power rack for squats, deadlifts, and bench presses.
  • Pull-up Bar: For upper body strength, a pull-up bar is an excellent addition to your home gym. Many models are wall-mounted or fit over a doorframe, requiring little space.
  • Medicine Balls or Slam Balls: These are versatile tools that can be used for strength, endurance, and core exercises. Medicine balls are especially useful for high-intensity interval training (HIIT) workouts.

For Advanced Fitness Levels: Focus on Performance and Recovery

At the advanced fitness level, you’ll likely need equipment that supports your specific performance goals, whether it’s building muscle, improving athletic performance, or training for a specific event.

  • Multi-Gym Station: A multi-gym machine can provide a range of exercises in one compact setup, allowing you to target every muscle group without switching between different pieces of equipment.
  • Cable Machines: These machines provide adjustable resistance for exercises that target both large and small muscle groups, allowing for a wider range of movements.
  • Speed and Agility Equipment: If your fitness focus is on speed, coordination, and agility, incorporate cones, resistance bands, and agility ladders into your design to enhance your performance.
  • Recovery Tools: For advanced fitness enthusiasts, recovery tools like foam rollers, massage guns, or even a cryotherapy machine can promote muscle recovery and prevent injuries.

3. Creating a Motivating Environment

Beyond the equipment, creating a motivating and functional environment is key to making your home gym a space that encourages consistency and enjoyment. The atmosphere you create in your gym can significantly impact your motivation levels and overall workout experience.

Lighting and Ventilation

Good lighting and ventilation are essential for an enjoyable workout experience. Natural light is ideal for boosting energy levels, so consider setting up your gym near windows if possible. If natural light is limited, opt for bright, energy-efficient LED lights that can mimic daylight. Adjustable lighting can also help set the mood for different types of workouts, from high-energy cardio sessions to relaxing yoga or meditation.

Adequate ventilation is equally important. If your gym is located in a basement or attic, consider installing a fan or air purifier to ensure fresh air circulates, keeping the space cool and comfortable.

Personalization and Motivational Decor

Personalizing your space can make it feel more inviting and enjoyable. Add motivational quotes, framed workout goals, or photos of athletes or role models who inspire you. Customizing the space with colors or artwork that reflect your personality will make it feel more like a sanctuary rather than just a place to work out.

For added motivation, consider installing a sound system or using a Bluetooth speaker to play your favorite workout playlists. Music has been shown to improve performance and make workouts feel more enjoyable.

Flooring and Safety Considerations

Lastly, pay attention to the flooring in your home gym. Soft, durable flooring like rubber tiles, cork, or foam mats provides cushioning and reduces the risk of injury during exercises. It also protects your floor from heavy equipment or dropped weights. Ensure that the flooring is easy to clean and maintain, as gym floors can accumulate dirt and sweat over time.

Creating the perfect home gym design involves a combination of practical considerations and personal preferences, tailored to your fitness level and goals. Whether you’re a beginner looking for a simple, functional space or an advanced athlete seeking a fully-equipped training environment, a thoughtfully designed home gym can enhance your workout experience and keep you motivated to stay active. By considering your space, selecting the right equipment, and creating a motivating atmosphere, you’ll have a home gym that not only supports your fitness journey but also transforms your health and well-being.

Rustic Decor Ideas to Add Warmth and Charm to Your Home

Source:https://hips.hearstapps.com

Rustic decor has become increasingly popular over the past few years, offering a warm, inviting atmosphere that blends natural elements with vintage charm. Whether you’re looking to create a cozy cabin retreat or infuse a touch of countryside elegance into your urban home, rustic decor ideas can help you achieve that perfect balance of warmth, simplicity, and timeless beauty. With its emphasis on natural materials, earthy tones, and handcrafted details, rustic design creates a lived-in feel that is both comfortable and visually appealing. In this article, we’ll explore some of the best rustic decor ideas that can transform your home into a welcoming and charming space.

1. Embrace Natural Materials

One of the key elements of rustic decor is the use of natural materials that bring the beauty of the outdoors inside. Wood, stone, leather, and metal are staples of rustic design, each contributing to a sense of authenticity and warmth. By incorporating these materials throughout your home, you can create a harmonious and grounded environment that connects your space to nature.

1.1 Wooden Elements: The Heart of Rustic Style

Wood is the backbone of rustic decor, and its presence can be felt in everything from floors to furniture. Exposed beams, reclaimed wood walls, and antique wooden furniture add a sense of history and character to any room. For a more subtle approach, consider using wood accents, such as a wooden coffee table, a rustic bookshelf, or even wooden picture frames.

Reclaimed wood, in particular, is an excellent choice for achieving an authentic rustic look. Its weathered texture and unique imperfections tell a story and create a sense of nostalgia. You can use reclaimed wood to create statement pieces like dining tables, headboards, or floating shelves, or even opt for wood paneling on walls or ceilings.

1.2 Stone and Brick for a Cozy, Earthy Vibe

Stone and brick are two other materials that are central to rustic design. Incorporating these materials into your home can create a grounded, earthy atmosphere. Stone accent walls, a brick fireplace, or even stone floors help to evoke the natural charm of the countryside, while adding texture and visual interest.

For a more subtle approach, consider stone details like a stone backsplash in the kitchen or stone countertops in the bathroom. These elements can add just the right amount of rustic charm without overwhelming the space.

2. Warm, Earthy Color Palette

The color palette of rustic decor is key to creating an inviting and cozy atmosphere. Rich, earthy tones such as warm browns, muted greens, and deep reds help to create a sense of comfort and connection to the natural world. These colors can be incorporated through wall paint, furniture, textiles, and accessories.

2.1 Neutral Tones for a Relaxing Ambiance

A neutral color scheme works beautifully in rustic design, providing a calm and serene environment. Shades of beige, taupe, and soft whites serve as the perfect backdrop for rustic elements, allowing wooden furniture and stone features to stand out. Neutral walls can also be complemented with cozy throws, rustic rugs, and textured cushions in warm tones to add depth and interest to the space.

If you’re looking to add a touch of color, consider earthy greens, terracotta, or burnt orange. These colors evoke the warmth of nature and can be added through accent walls, curtains, or decorative pillows. The key is to keep the overall color palette grounded and natural, avoiding bright or overly bold colors that can detract from the rustic vibe.

2.2 Layering Textures for Visual Interest

In rustic decor, texture is just as important as color. Layering different textures helps create a rich, inviting space that feels both lived-in and luxurious. Incorporate textiles like wool, linen, burlap, and cotton to add warmth and softness to the room. A woolen throw on a leather couch, a jute rug on wooden floors, and linen curtains on windows all contribute to the tactile appeal of the space.

You can also experiment with metal and glass textures, particularly in furniture and lighting fixtures. Wrought iron candle holders, copper light fixtures, and glass vases can all enhance the rustic aesthetic without overpowering the natural elements.

3. Incorporating Vintage and Handcrafted Items

Rustic decor often features vintage or handcrafted items that bring a sense of individuality and history to the space. These pieces not only add charm but also tell a story, creating a space that feels unique and personal.

3.1 Repurposed and Antique Furniture

Vintage furniture is a hallmark of rustic design. Whether it’s an antique dresser, a weathered farmhouse table, or a distressed wooden rocking chair, these pieces bring character and warmth to any room. If you’re on a budget, consider hunting for secondhand furniture at thrift stores or flea markets. You can even repurpose old furniture by sanding, painting, or distressing it to give it a more rustic appearance.

For a truly rustic feel, look for pieces that have a weathered or worn look. A well-loved armchair with chipped paint, a barn door used as a table, or a vintage trunk repurposed as a coffee table can all add personality and charm to your space.

3.2 Handcrafted Accents

Handcrafted accents, such as woven baskets, ceramic pottery, and hand-carved wooden sculptures, can add authenticity and character to your rustic decor. These items help to create a more personal and intimate atmosphere, as they reflect craftsmanship and attention to detail.

Consider adding artisanal items to your home, such as hand-knitted throws, hand-carved picture frames, or handmade pottery vases. These pieces not only contribute to the rustic aesthetic but also give your home a sense of history and personality.

In conclusion, rustic decor ideas can help you create a home that exudes warmth, comfort, and charm. By embracing natural materials like wood and stone, incorporating a warm color palette, and adding vintage or handcrafted elements, you can transform your space into a welcoming retreat. Whether you’re aiming for a traditional country style or a more modern rustic feel, the key is to prioritize comfort and authenticity in your design choices.

Rustic decor invites you to slow down, relax, and enjoy the simple pleasures of home. It’s all about creating a space that feels inviting and lived-in, where every piece has a story to tell. By following these rustic decor ideas, you can add timeless beauty and a sense of warmth to your home, making it a place where you and your guests will feel right at home.

Setting Up the Perfect Home Library Space

Source : https://www.thespruce.com

A home library setup is more than just a place to store books; it’s a personal sanctuary where you can escape into the worlds of literature, study, or simply unwind. Whether you’re a passionate reader, a student, or someone who simply enjoys a quiet space to reflect, having a dedicated home library can elevate your living experience. Setting up the perfect home library requires careful planning and attention to detail, but the result is a space that’s both functional and visually inspiring. In this article, we will walk you through key steps and tips for creating the ideal home library setup that fits your style, needs, and budget.

Choosing the Right Space for Your Home Library

The first and most important step in creating your home library setup is selecting the perfect location. Not every corner of your home will be suitable for a library, so you’ll need to consider various factors such as space size, natural lighting, and privacy.

Space Size and Layout

Ideally, your library should be located in a quiet area of your home, where distractions are minimized. Rooms with sufficient space for bookshelves, seating, and room to move around are optimal. If you’re working with a small space, consider making the most of vertical space by installing tall bookshelves that stretch from floor to ceiling. A compact yet cozy reading nook can also serve as the heart of a smaller library setup.

Alternatively, if you have a larger room or an underutilized area such as a basement, attic, or spare bedroom, this provides you with more room to create a truly immersive reading environment. You can add additional elements such as a comfortable chair, desk, or a small coffee table to create a more complete library experience.

Lighting

Lighting is another critical consideration when setting up a home library. Ideally, you’ll want a combination of natural and artificial light to keep your space both bright and inviting. Natural light is ideal for reading during the day, so try to position your bookshelves and seating near windows. If natural light is limited, you’ll need to invest in high-quality task lighting for reading. Consider adjustable reading lamps, pendant lights, or wall sconces to direct light onto your reading area and bookshelves without causing glare.

Organizing Your Books and Shelving

Once you’ve found the perfect spot for your home library setup, the next step is organizing your books. A well-organized space will not only look aesthetically pleasing but will also make it easier for you to find and access your favorite titles.

Choosing Bookshelves and Storage

Bookshelves are a key component of any home library setup. When selecting shelves, choose ones that fit the dimensions of your room and can accommodate the number of books you have. There are various types of bookshelves to choose from, such as open shelving, built-in units, or floating shelves. Open shelving provides easy access to your books and creates a more airy feel, while built-in units can offer a more permanent, streamlined solution for larger collections.

For those with limited space, opt for adjustable shelves that can accommodate different book sizes and allow you to change the layout as needed. Additionally, storage solutions such as baskets, cabinets, or drawers can be added to keep non-book items, such as magazines, documents, or electronic devices, neatly stored away.

Book Organization Systems

When it comes to organizing your books, there’s no one-size-fits-all solution. Some people prefer alphabetical order, while others like to arrange books by genre, color, or size. The most important thing is to choose an organization system that works for you and makes it easy to locate books when needed. For example, if you read a lot of fiction, separating your books by genre (mystery, fantasy, historical) can make browsing more enjoyable. Alternatively, if you have a significant collection of art books or coffee table books, placing them in a separate area can help create a visual focal point.

Consider also having a designated space for current or favorite reads. A small side table or a stack of books next to your reading chair can make it easy to grab your next title without having to search for it.

Creating a Comfortable and Inspiring Atmosphere

A home library is not just a space to store books—it’s a place where you should feel inspired and comfortable. To achieve this, consider how you want to use your library and how you can create a space that encourages relaxation and focus.

Furniture and Seating

Comfortable seating is crucial for your library setup. A cozy armchair, a plush couch, or even a chaise lounge can provide the perfect spot for you to settle in with a good book. If space allows, create multiple seating areas so that family members or guests can enjoy the space as well. Consider adding throw pillows, blankets, or cushions for added comfort.

In addition to seating, think about adding a desk or worktable if you need a space for studying or writing. Having a dedicated surface for note-taking, writing, or using a laptop can help keep your library functional and versatile. A stylish writing desk paired with a comfortable chair can also add a touch of elegance to your library setup.

Decorative Touches

While functionality is key, aesthetic details can significantly enhance the ambiance of your home library. Consider using rugs to define your reading area and add warmth to the space. Artwork, framed book covers, or vintage maps can provide visual interest and make your library feel more personal. Plants can also bring life and fresh air into the room, providing a natural touch that helps promote focus and relaxation.

If you have enough wall space, think about adding a statement piece like a large mirror or a feature wall of books. This can create a dramatic effect and make your library feel more expansive. Lighting fixtures such as chandeliers or elegant floor lamps can also double as decorative elements that bring a sense of style to the space.

In conclusion, creating the ideal home library setup involves more than just choosing a few shelves and filling them with books. It requires thoughtful planning, from selecting the right space and lighting to organizing your books in a way that suits your needs. With the right furnishings and decor, your home library can become a retreat for reading, studying, or simply unwinding after a long day. By taking the time to craft a space that is both functional and aesthetically pleasing, you will create a home library that is the perfect blend of style, comfort, and inspiration.

Whole House Color Palette: Creating a Cohesive Look

Source : https://thumbor.forbes.com

The Whole House Color Palette: Creating a Cohesive Look is a comprehensive guide that provides insights on how to create a harmonious and balanced color scheme throughout your home. It emphasizes the importance of continuity and flow in interior design, and how the strategic use of color can enhance the overall aesthetic and mood of your living space. This guide offers practical tips and advice on choosing the right colors, combining different hues, and applying them to various elements of your home to create a cohesive and visually pleasing look.

Mastering the Art of Creating a Cohesive Whole House Color Palette

Creating a cohesive whole house color palette is an art that requires a keen eye for detail, a sense of balance, and an understanding of color theory. It’s about more than just choosing your favorite colors; it’s about creating a harmonious flow from room to room that enhances the overall aesthetic of your home.

To begin with, it’s essential to understand the concept of a color palette. A color palette is a selection of colors that are used consistently throughout a design project. In the context of interior design, this means choosing a set of colors that will be used throughout your home. This doesn’t mean every room has to be the same color, but rather that there is a consistent theme or tone throughout.

One of the first steps in creating a whole house color palette is to consider the overall mood you want to create. Do you want a calm and serene environment? Opt for cool colors like blues and greens. If you’re after a more energetic and vibrant feel, warm colors like reds, oranges, and yellows might be more suitable.

Next, consider the architectural style and period of your home. A mid-century modern home might lend itself well to a palette of bold, primary colors, while a Victorian-era home might be better suited to a palette of muted, earthy tones.

Once you’ve decided on the overall mood and taken into account the architectural style of your home, it’s time to start selecting specific colors. A good rule of thumb is to choose three to five colors that will form the basis of your palette. These should include a mix of light, medium, and dark tones to provide contrast and depth.

When selecting these colors, it’s important to consider how they will look in different lighting conditions. Colors can appear very different under natural light compared to artificial light, so it’s a good idea to test your chosen colors at different times of the day and in different lighting conditions before making a final decision.

Once you have your base colors, you can start to think about accent colors. These are the colors that will be used sparingly to add pops of color and interest throughout your home. They should complement your base colors but provide enough contrast to stand out.

Creating a cohesive whole house color palette also involves considering the flow from room to room. This doesn’t mean every room has to be the same color, but there should be a sense of continuity. This can be achieved by using different shades of the same color, or by using the same accent color in different rooms.

Finally, remember that creating a cohesive whole house color palette is a process. It’s not something that has to be decided in one day. Take your time, experiment with different colors, and don’t be afraid to make changes as you go.

In conclusion, mastering the art of creating a cohesive whole house color palette involves understanding color theory, considering the mood you want to create, taking into account the architectural style of your home, selecting a mix of base and accent colors, and considering the flow from room to room. With careful planning and consideration, you can create a color palette that enhances the aesthetic of your home and creates a harmonious and pleasing environment.In conclusion, a whole house color palette is essential in creating a cohesive look throughout the home. It ensures that all rooms flow together seamlessly, creating a sense of harmony and balance. This doesn’t mean every room should be the same color, but rather that the colors should complement each other. A well-planned color palette can enhance the overall aesthetic of the home, making it more appealing and inviting.

Sofa Table Decorating Ideas: Style Your Living Room Like a Pro

Source : https://hgtvhome.sndimg.com

Sofa Table Decorating Ideas: Style Your Living Room Like a Pro is a comprehensive guide that provides innovative and creative ideas to transform your living room with the use of a sofa table. It offers a variety of design concepts, from minimalist to extravagant, to suit different personal styles and preferences. This guide also includes practical tips on how to effectively utilize space, choose the right accessories, and create a harmonious color scheme. Whether you’re a professional interior designer or a homeowner looking to revamp your space, this guide will equip you with the knowledge and inspiration to style your living room like a pro.

10 Sofa Table Decorating Ideas: Transform Your Living Room Like a Pro

Sofa tables, often overlooked in the realm of interior design, can be the key to transforming your living room into a stylish, functional space. With the right decor, these versatile pieces can become a focal point, adding depth and character to your home. Here are ten sofa table decorating ideas to help you style your living room like a pro.

Firstly, consider the use of symmetry. Placing identical lamps, vases, or other decorative items on either end of the table creates a balanced, harmonious look. This is particularly effective in traditional or formal living rooms, where symmetry can enhance the sense of order and elegance.

Secondly, don’t be afraid to mix and match. Contrasting textures, colors, and shapes can create visual interest and prevent your sofa table from looking too uniform or bland. For instance, a sleek, modern table might be paired with a rustic wooden bowl or a colorful ceramic vase.

Thirdly, remember that less is often more. A cluttered table can make your living room feel cramped and chaotic. Instead, opt for a few carefully chosen pieces that reflect your personal style and the overall theme of the room. This minimalist approach can make your decor stand out and give your space a clean, sophisticated look.

Fourthly, consider the use of height. Varying the height of your decor can create a dynamic, layered effect. Try pairing a tall lamp or vase with shorter items like books or small sculptures. This can draw the eye upwards and make your living room feel larger and more spacious.

Fifthly, don’t forget about functionality. Your sofa table can be more than just a decorative piece; it can also provide valuable storage space. Baskets or boxes can be used to store items like remote controls, magazines, or blankets, keeping your living room tidy and organized.

Sixthly, consider incorporating greenery. Plants can add a touch of nature and freshness to your living room. Whether it’s a large potted plant, a small succulent, or a vase of fresh flowers, greenery can breathe life into your decor and create a calming, welcoming atmosphere.

Seventhly, think about lighting. A well-placed lamp can highlight your decor and create a warm, inviting glow. This can be particularly effective in the evenings, when the soft light can create a cozy, relaxing ambiance.

Eighthly, consider using books as decor. Stacked or lined up, books can add color, texture, and personality to your sofa table. They can also serve as conversation starters, reflecting your interests and tastes.

Ninthly, don’t overlook the power of art. A small sculpture, a framed print, or a decorative plate can serve as a focal point, adding a touch of sophistication and creativity to your living room.

Lastly, remember to personalize your decor. Whether it’s a family photo, a cherished souvenir, or a piece of handmade pottery, personal items can make your living room feel uniquely yours.

In conclusion, decorating a sofa table is an opportunity to showcase your style and enhance the overall look and feel of your living room. With these ten ideas, you can transform your sofa table from a simple piece of furniture into a stylish, functional part of your home.In conclusion, sofa table decorating ideas can significantly enhance the aesthetic appeal of your living room. By incorporating elements such as lamps, books, plants, and personal artifacts, you can create a stylish and personalized space. The key is to balance functionality and design, ensuring the table is not overcrowded but still visually appealing. With the right approach, you can style your living room like a pro, making your sofa table a focal point that complements the overall decor.

Beach Decoration Ideas: Bring Coastal Vibes to Your Home

Source : https://www.marthastewart.com

Beach decoration ideas offer a unique way to infuse your home with a refreshing coastal vibe. This style, often referred to as coastal or nautical decor, is characterized by the use of light colors, natural materials, and ocean-inspired elements. From seashell accents to driftwood furniture, beach decoration can transform your living space into a serene seaside retreat. Whether you live by the sea or just dream about ocean breezes, these ideas can help you design a home that feels like a vacation getaway.

10 Beach Decoration Ideas: Bring Coastal Vibes to Your Home

Beach decoration ideas can transform your home into a coastal paradise, regardless of your geographical location. By incorporating elements of the sea, sand, and sky into your interior design, you can create a tranquil, beach-inspired atmosphere that evokes the serenity of a seaside retreat. Here are ten beach decoration ideas to help you bring coastal vibes to your home.

Firstly, consider the color palette. The beach is a symphony of blues, whites, and sandy hues, so these should be your primary colors. Light blue walls can mimic the sky or sea, while white furniture and accents can represent the clouds or sea foam. Add in touches of beige or tan to represent the sand.

Secondly, incorporate natural materials. Beaches are all about the raw beauty of nature, so your decorations should reflect this. Consider furniture made from driftwood or wicker, and use jute or sisal rugs to add texture.

Thirdly, don’t forget about the sea life. Decorative items like seashells, starfish, and coral can be tastefully displayed on shelves or tables. You can also use these items as motifs in your textiles, such as throw pillows or curtains.

Moving on, lighting is another crucial aspect of beach decoration. The beach is synonymous with bright, natural light, so try to let as much of it into your home as possible. Use sheer curtains to diffuse the light and create a soft, warm glow. For artificial lighting, opt for fixtures with a nautical theme, such as lantern-style pendant lights.

Next, consider adding some beach-inspired artwork. This could be anything from a large seascape painting to a collection of framed beach photos. The key is to choose pieces that evoke the tranquility and beauty of the beach.

Furthermore, consider using beach-themed accessories. This could include anything from a nautical-themed clock to a beach-inspired candle holder. These small touches can really help to tie your beach theme together.

Additionally, consider the use of plants in your beach decoration. Indoor plants can help to create a tropical beach vibe, especially when paired with beach-themed planters. Opt for plants that are reminiscent of the beach, such as palm trees or ferns.

Moreover, don’t forget about the outdoor spaces. If you have a patio or balcony, consider adding some beach-inspired outdoor furniture. This could include a hammock, a beach umbrella, or even a sand pit for the kids.

Lastly, consider the use of beach-inspired textiles. This could include anything from a beach-themed throw blanket to a nautical-striped rug. These textiles can add a touch of comfort and coziness to your beach-inspired home.

In conclusion, there are countless ways to bring coastal vibes to your home. Whether you choose to incorporate a few beach-inspired elements or go all out with a complete beach-themed makeover, the key is to create a space that feels relaxed, serene, and reminiscent of the beach. With these ten beach decoration ideas, you can transform your home into a coastal paradise, no matter where you live.In conclusion, beach decoration ideas can effectively bring coastal vibes to your home. By incorporating elements such as seashells, beach-themed artwork, coastal colors, and nautical accessories, you can create a relaxing and refreshing atmosphere reminiscent of a beach vacation. These ideas are not only aesthetically pleasing but also evoke a sense of tranquility and peace, making your home a more enjoyable living space.

replica watches