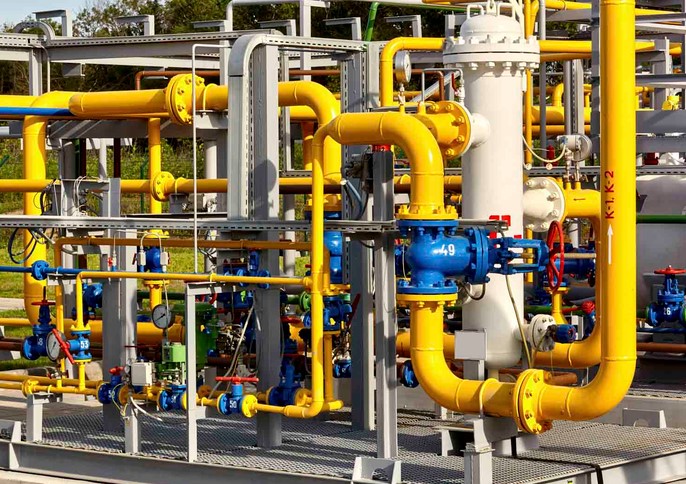
The acrid, pungent smell of rotten eggs is something you never forget. Early in my career as a contractor, I was called to a residential renovation where a homeowner had decided to reroute a line for a new commercial-grade stove themselves. They used standard water-plumbing tape and a couple of mismatched iron joints they found in a clearance bin. When we pressurized the system, my gas detector didn’t just beep—it wailed. A micro-fissure at a poorly threaded joint was leaking enough fuel to turn the entire kitchen into a ticking time bomb.
In home improvement, a leaky water pipe ruins your drywall; a faulty gas pipe fitting can level an entire city block. Statistics from national safety boards consistently show that while gas incidents are relatively rare, over 75% of residential gas distribution failures stem from improper installation, incorrect material selection, or flawed joint connections.
Dealing with fuel logistics requires a massive shift in mindset. You are no longer just dealing with static liquids; you are containing a highly volatile, pressurized fluid that is actively looking for any microscopic path of least resistance to escape. Let’s break down how to approach this critical trade with the precision of an engineer and the practicality of a seasoned pro.
The Anatomy of Pressure: Materials Used in Gas Pipe Fitting
When dealing with gas plumbing, your material choice is your first and most vital line of defense. Unlike water systems that can tolerate minor chemical fluctuations, gas lines must withstand specific pressure thresholds, chemical additives (like mercaptan, the chemical that gives gas its odor), and physical vibrations without degrading.
Black Iron Pipe: The Industry Standard
For decades, black iron has been the undisputed king of residential and commercial gas logistics. It is incredibly strong, highly resistant to accidental puncture (such as a stray nail driven into a wall during drywall installation), and possesses excellent structural integrity over long spans. Its dark color comes from a protective iron oxide coating formed during manufacturing.
CSST (Corrugated Stainless Steel Tubing)
The modern alternative to rigid black iron is CSST. Think of CSST as a heavy-duty, flexible straw made of high-grade stainless steel encased in a protective plastic jacket. It allows installers to snake lines through complex framing without cutting and threading dozens of individual joints. However, it requires highly specific, proprietary fittings and must be meticulously bonded to your home’s electrical grounding system to prevent lightning strikes from arcing through the thin metal walls.
Materials to Avoid (The Golden Rules)
-
Galvanized Pipe: While technically permitted by some older local codes under strict conditions, modern consensus avoids it. The zinc coating on the interior of galvanized pipes can flake off over time when exposed to natural gas, clogging regulator orifices and creating major appliance hazards.
-
Standard Copper (Without Verification): Copper can be used for liquid petroleum (LP) gas, but certain types of natural gas contain hydrogen sulfide, which causes internal flaking in standard copper lines.
Mastering the Mechanics of the Gas Joint
To understand why a gas pipe fitting fails, you have to look at the threads. In standard plumbing, threads simply mechanical pull pieces together while rubber washers create the seal. In gas logistics, we use NPT (National Pipe Tapered) threads.
NPT threads are engineered at a slight angle. As you screw a male fitting into a female fitting, the threads actually deform and crush against each other, creating a metal-to-metal wedge seal.
Standard Parallel Threads (Water/Mechanical)
|   |   |   |
|   |   |   |  <- Continuous even gap (requires washer/gasket)

Tapered NPT Threads (Gas Logistics)
\   \   \   \
 \   \   \   \ <- Threads compress tightly together as they deepen
Because of this intense friction, you must use a specialized thread sealant—colloquially known as “pipe dope”—or yellow PTFE tape specifically rated for hydrocarbons. Regular white Teflon tape used for water is too thin and will shred under the sharp edges of iron threads, guaranteeing a slow, dangerous leak.
Step-by-Step Guide to Executing a Leak-Free Iron Pipe Connection
Working with rigid black iron requires a systematic process. If you skip a single step, you compromise the entire system’s structural integrity.
Step 1: Cutting and True De-burring
Cut your pipe to length using a dedicated wheeled pipe cutter. This process creates a clean cut but pushes a sharp metal lip (a burr) into the interior diameter of the pipe. You must use a pipe reamer to scrape this burr away. Leaving it intact creates turbulent flow and can trap particulate matter over time.
Step 2: Threading with Precision
Secure the pipe in a vice and apply plenty of dark cutting oil. Using a manual or power threading die, cut the threads until the end of the pipe is flush with the edge of the die teeth. This typically yields about 10 to 11 threads, which is the ideal depth for a secure NPT engagement. Wipe away all metal shavings and excess oil using a clean rag.
Step 3: Applying Chemical Sealant
Apply your yellow gas-rated PTFE tape starting one thread back from the end of the pipe, wrapping clockwise (in the direction the fitting will turn). Smooth it down, then apply a thin, even coat of premium pipe dope over the tape. This dual-layer method is a trick used by pros to ensure a flawless seal even if there are microscopic imperfections in the iron casting.
Step 4: Mechanical Torque and Engagement
Hand-tighten the fitting until it catches snugly (usually about 3 full turns). Then, grab two heavy-duty pipe wrenches. Use one wrench to hold the existing pipe completely stationary (to prevent transferring torque down the line) and the second wrench to turn the fitting clockwise. You want to achieve 2 to 3 full turns past hand-tight.
Verifying System Integrity: The Pressure Drop Test
Never, under any circumstances, assume a line is safe just because you tightened it with a massive wrench. Before a new gas line is ever hooked up to an appliance or the main meter, it must undergo rigorous validation.
| Verification Method | Application | Pros & Cons |
| Pneumatic Pressure Test | Mandatory for new lines before utility connection |
Pros: Quantifiable, absolute proof of integrity. Cons: Requires specialized gauges and pumps. |
| Non-Corrosive Bubble Solution | Localized joint inspection |
Pros: Instantly pinpoints microscopic leaks visually. Cons: Only works on exposed, visible fittings. |
| Electronic Gas Sniffing | Post-pressurization final sweep |
Pros: High sensitivity to parts-per-million leaks. Cons: Can give false positives from residual pipe dope vapors. |
Never use dish soap mixed with tap water to test your gas fittings. Many household dish soaps contain high concentrations of chlorides and phosphates, which can chemically attack brass valves and copper lines, causing stress corrosion cracking months down the road. Always use a dedicated, non-corrosive, certified gas leak detection solution.
Scalable Logistics: When to Step Back
Understanding your limits is the hallmark of a true craftsman. While a confident intermediate DIYer can easily run a simple extension line for an outdoor barbecue or replace a flexible appliance connector, changing out a main manifold, upgrading a pressure regulator, or tapping into the primary utility meter demands a licensed professional gas fitter.
Many local municipalities legally require a licensed trade professional to sign off on gas permits, and skipping this step can completely void your homeowner’s insurance policy in the event of an incident. Treat gas fitting with the immense respect it deserves, invest in the correct tools, and never compromise on material quality.
Have you tackled a gas appliance installation in your own home, or are you preparing to map out your first utility run? What specific challenges or code requirements are you navigating in your area? Drop a comment below to share your projects, ask questions, or discuss your experiences with the community!
