Optimizing Structural Storage: Utilizing Attic Truss Storage for Asset Management

Source:https://homebuildingplus.net

You are standing in your garage, surrounded by a sea of plastic bins, mountain bikes, and seasonal gear. You’ve already maximized your wall hooks, and the cars are now relegated to the driveway because there’s simply no floor left. You look up at the ceiling and realize that just inches above your head lies a vast, empty “cathedral” of space—the attic. But before you start tossing boxes onto those wooden triangles, stop. If you don’t understand the engineering of your roof, you aren’t creating storage; you’re creating a structural catastrophe.

In my ten years of structural consulting and home renovations, I’ve seen more “bowed” ceilings and cracked drywall than I care to count. Most homeowners assume that if there is a floor-like surface in the attic, it’s meant for boxes. In reality, most modern homes use “W-style” Fink trusses designed to hold the weight of the roof—not your high-school yearbooks and heavy luggage. However, with the right approach to Attic Truss Storage, you can reclaim that “hidden warehouse” without compromising your home’s integrity.


The Anatomy of the Triangle: Why Trusses Are Tricky

To master Attic Truss Storage, you have to understand the difference between a rafter and a truss. Think of a rafter like a heavy-duty bookshelf; it’s thick, solid, and built to carry weight directly. A truss, however, is more like a bicycle wheel. It is a sophisticated system of tension and compression where every thin piece of wood depends on the others.

The bottom horizontal piece of your truss (the bottom chord) is often designed only for “dead loads”—basically just the weight of the drywall ceiling and some insulation. When you add a “live load” (your boxes and your body weight), you are asking that thin piece of lumber to do a job it wasn’t hired for. If you overload it, the wood flexes, the nails pull at the gusset plates, and you’ll start seeing cracks in the bedroom ceiling below.


Strategic Engineering: Assessing Load Capacity

Before you buy a single sheet of plywood, you need to check the design specs of your trusses. For an intermediate DIYer, this means looking for the stamp on the lumber or checking your home’s original blueprints.

  • Dead Load vs. Live Load: Most standard trusses are rated for a 10–20 lbs per square foot (psf) dead load. For true Attic Truss Storage, you want to see a “Live Load” rating of at least 30–40 psf.

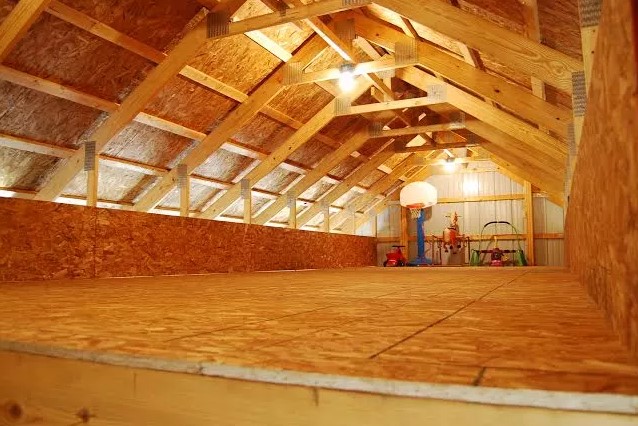
  • The Web Configuration: If your attic has a forest of diagonal “webs” (the W-shape), your storage space is limited to the center. If you have “Attic Trusses” (often called Room-in-Attic trusses), they are pre-engineered with a wide, open center rectangular area specifically for storage or living space.

  • Gusset Plates: Inspect the metal “teeth” plates holding the wood together. If they are rusted or pulling away, do not add weight.


Implementing the “Floating Floor” System

In my decade of experience, the best way to implement Attic Truss Storage without crushing your insulation or overstressing the wood is the Floating Floor or Attic Decking method.

Most people make the mistake of squashing their fiberglass batts or blown-in cellulose to lay plywood flat. Never compress your insulation. Compressing insulation is like squeezing a down jacket; it loses its “loft” and stops keeping you warm. To solve this, we use Attic Stilts or Joist Elevators.

Steps for a Professional Install:

  1. Install Stored-Load Supports: Screw plastic or wooden “stilts” into the top of the bottom chords. This raises the new floor above the level of the insulation.

  2. Cross-Bridging: If the span is long, run 2x4s perpendicular to the trusses to distribute the weight across multiple structural members.

  3. OSB/Plywood Decking: Use 5/8-inch or 3/4-inch tongue-and-groove plywood. Fasten them with structural screws, not nails, to avoid the vibration of a hammer which can pop the drywall screws in the ceiling below.


Asset Management: Categorizing Your Vertical Warehouse

Once your Attic Truss Storage floor is secure, you need a system. An attic is a harsh environment—it’s an oven in the summer and a freezer in the winter.

Think of your attic like long-term cold storage. You wouldn’t put fine wine or delicate electronics in a garage, and you shouldn’t put them in the attic either.

  • The Plastic Bin Mandate: Only use airtight plastic bins. Cardboard boxes attract silverfish and mice, and they absorb moisture from the air, which eventually leads to mold.

  • Weight Distribution: Place your heaviest items (like tools or crates of tiles) as close to the bearing walls (the walls that go all the way to the foundation) as possible. Never place heavy weight in the exact center of a long truss span.

  • Inventory Labeling: Use large, bold labels on the side of the bins facing the “walkway.” Better yet, use a QR code system that links to a spreadsheet on your phone.


Expert Advice: The Temperature Factor

Tips Pro: The Ventilation Warning

One of the most common “hidden” failures I see is homeowners blocking their soffit vents with storage bins. Your attic needs to “breathe” to prevent moisture buildup and ice dams in the winter. If you block the airflow at the edges of the roof with your Attic Truss Storage setup, you are inviting roof rot. Always leave a 2-inch gap between your storage and the roof deck.


Improving Accessibility and Safety

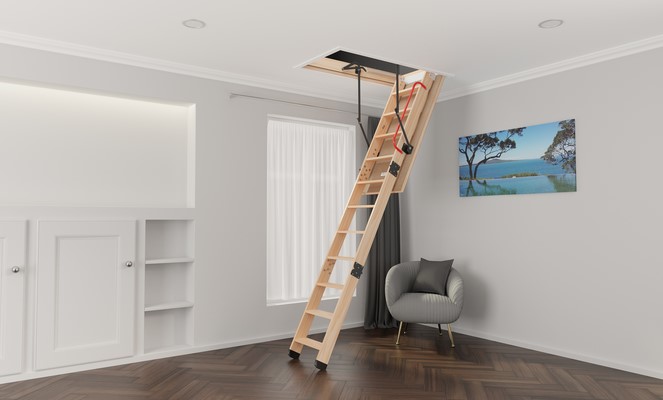
You cannot manage assets if you can’t reach them safely. If you are serious about Attic Truss Storage, you need more than a “hole in the ceiling.”

  • Integrated Lighting: Install LED shop lights on a motion sensor. Fumbling for a flashlight while balancing on a truss is a recipe for a broken leg.

  • Walkway Clearances: Always maintain a clear “spine” through the center of the attic. This isn’t just for you; it’s for the HVAC tech or electrician who might need to service your home in the future.

  • Heat Shielding: If your attic gets above 120°F, consider installing a radiant barrier on the underside of the roof rafters. This can drop the temperature of your storage zone by 20 degrees, protecting your plastic bins from warping.


Technical Data: The “Deflection” Limit

For the intermediate reader, let’s talk about L/360. This is the industry standard for how much a beam is allowed to “bend” or deflect. If your truss span is 20 feet (240 inches), it shouldn’t bend more than 2/3 of an inch.

When I’m testing an Attic Truss Storage area, I look for “bounce.” If you walk on your new decking and feel the floor spring like a trampoline, you have exceeded the deflection limit. This is your sign to lighten the load or consult a structural engineer to sister the joists.


Your home’s attic is a goldmine of square footage, but it requires a disciplined, engineering-first mindset to exploit it. By respecting the physics of the Attic Truss Storage system, using elevated decking to save your insulation, and organizing your assets with durable containers, you turn a cluttered house into a streamlined facility.

Stop letting your garage overflow. Look up, measure your trusses, and start building your vertical warehouse.

What’s the first thing you’re moving into your new attic space? Are you clearing out the holiday gear or making room for a new hobby in the garage? Drop a comment below—I’d love to help you determine if your truss type is ready for the weight!

Maximizing Vertical Access: The Strategic Value of the Attic Ladder Install

Source:https://www.sellwood.co.nz

You’re standing on the top rung of a rickety step ladder, balanced precariously while trying to hoist a 40-pound box of holiday decorations through a tiny, dark hole in your ceiling. Your fingers are slipping, the ladder is wobbling, and you realize that one wrong move means a trip to the emergency room and a hole in your drywall. This “attic acrobatics” is a scene I’ve witnessed in hundreds of homes, and frankly, it’s the most dangerous way to manage your storage.

In my ten years of structural renovations, I’ve found that an Attic Ladder Install is one of the highest-return “quality of life” upgrades you can make. It’s the difference between your attic being a terrifying, forgotten wasteland and it becoming a functional extension of your home’s square footage. I remember a client who lived in a beautiful 1950s ranch; they were paying for a monthly storage unit until we installed a heavy-duty aluminum pull-down. Within a week, they had canceled their subscription and moved everything into the “bonus room” above their heads.

The Portal Concept: Why Vertical Access is Strategic

Think of an attic ladder as a permanent bridge between your living space and your hidden warehouse. Without it, your attic is like a bank vault without a door—you know the treasure is in there, but getting to it is so much work that you eventually stop trying.

A professional Attic Ladder Install changes the “psychology of the space.” When access is as easy as pulling a cord, you start to use that vertical real estate for more than just dusty suitcases. You can monitor your insulation levels, check for roof leaks early, and keep your garage floor clear of clutter. It transforms a dark void into a strategic asset.

Choosing the Right Hardware: Wood vs. Aluminum vs. Steel

When I consult on an Attic Ladder Install, the first question is always about material. Most big-box stores push the basic wood models, but as an expert, I look at the duty rating and longevity data.

  • Wood Ladders: These are the traditional choice. They are sturdy but heavy. In humid climates, wood can warp over time, leading to gaps in the ceiling seal. If you go with wood, ensure it is premium-grade pressure-treated pine.

  • Aluminum Ladders: This is my personal recommendation for 90% of homeowners. They are incredibly lightweight, rust-proof, and have a much higher “strength-to-weight” ratio. Because they are lighter, there is less strain on the tension springs and the person pulling them down.

  • Steel Ladders: These are the “industrial” option. If you are a big guy carrying heavy toolboxes into a workshop attic, the 375-lb duty rating of a steel ladder provides unmatched stability.

Technical Deep-Dive: The Rough Opening and Structural Integrity

For the intermediate DIYer, the most intimidating part of an Attic Ladder Install is cutting into the ceiling. You aren’t just making a hole; you are altering the ceiling joists.

Most residential joists are spaced 16 or 24 inches on center. A standard attic ladder requires a “Rough Opening” of 22.5″ x 54″. This means you will almost certainly have to cut a joist. When you do this, you must “frame out” the opening with headers to redistribute the weight to the adjacent joists.

Think of it like removing a leg from a chair. If you don’t reinforce the frame, the chair will eventually collapse. I always use double-headers and joist hangers to ensure the ceiling doesn’t sag under the weight of the ladder and the person using it.

Energy Efficiency: The “Hidden” Heat Leak

Here is a technical insight many general contractors miss: an attic ladder is a giant hole in your thermal envelope. Without proper insulation, that thin plywood door acts like an open window, letting your expensive AC leak into the attic during the summer.

During an Attic Ladder Install, I always prioritize the R-Value. Look for models that include integrated weather stripping. If the model you love doesn’t have it, you must build or buy an Attic Tent—an insulated cover that sits over the ladder in the attic. This single addition can save you 10% on your monthly energy bills by preventing convective heat transfer.

Step-by-Step Precision: The Installation Arc

If you’re tackling this yourself, precision is your best friend. A ladder that is 1/4 inch too long will “bow” in the middle, and a ladder that is too short will put dangerous stress on the hinge plates.

  1. Check for Obstructions: Before cutting, go into the attic and clear away electrical wires, HVAC ducts, or plumbing lines.

  2. Square the Frame: Use a framing square to ensure your headers are at perfect 90-degree angles. If the frame is “diamond-shaped,” the ladder door will never close flush.

  3. Temporary Support: Use “cleats” (small scraps of wood) screwed into the ceiling to hold the ladder unit in place while you bolt it to the joists. This is a two-person job—don’t try to be a hero.

  4. The Final Cut: Aluminum and wood ladders usually come “over-long.” You must measure the distance from the hinge to the floor and trim the feet at an angle so they sit perfectly flat on the ground.

Tips Pro: The Safety Shim

Never rely solely on nails. During an Attic Ladder Install, use 1/4-inch x 3-inch lag screws or structural timber screws to secure the frame. Nails can pull out under the dynamic load of a person climbing. Also, always shim the gaps between the ladder frame and the joists to prevent the frame from “twisting” when you tighten the bolts.

Maintenance and Operational Safety

Once your ladder is in, it requires an annual “physical.” I’ve seen 20-year-old ladders snap because the pivot points were bone-dry and rusted.

  • Lubrication: Use a dry silicone spray on the springs and hinges every year. Avoid WD-40, as it attracts dust and becomes “gunk” over time.

  • Bolt Check: The vibration of walking up and down can loosen the nuts. Give them a quick turn with a wrench once a year.

  • Clearance Zone: Ensure the “swing path” of the ladder is always clear. Don’t place a permanent piece of furniture where the ladder needs to unfold.

An Attic Ladder Install is about more than just storage; it’s about taking control of your home’s infrastructure. It provides safety, energy efficiency, and a massive amount of “hidden” space that was previously doing nothing for you. By choosing the right materials and respecting the structural engineering required, you turn a dangerous chore into a seamless transition.

Stop balancing on that old step ladder. It’s time to build a bridge to your home’s full potential.

What’s the most interesting thing currently “lost” in your attic? Are you planning to use the new access for a workshop, or just to finally get the holiday boxes organized? Drop a comment below—I’d love to help you figure out the best ladder dimensions for your specific ceiling height!

Would you like me to walk you through how to build an insulated attic cover or explain how to relocate electrical wiring that might be in the way of your new opening?

The Potential Of Your Unfinished Basement

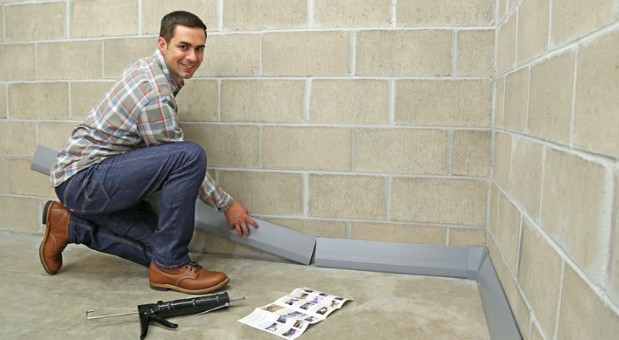
You may not have gotten the memo, but creepy basements are now a thing of the past. Gone are the days of the dark, cold space beneath your house where unwanted objects go to be forgotten about. For many, this comes as a relief because even if we do love our families, sometimes being crammed into a house with them makes them a little hard to bear. Especially if you’re a little short on space.

Some people don’t buy into it, though. They think that a basement is just a basement and there’s no point in remodelling it. They’re stuck in the past when dwelling in the basement wasn’t desired. But whether or not you believe it, your basement is brimming with potential and if you happen to be in the unfinished basement department, you’re missing out on it.

The first thing that you should know is that finishing your basement can drastically increase the value of your home, especially if done nicely, and even more so if you add legal bedrooms downstairs. If you’ve never heard the term ‘legal bedroom’ before it means that the room must meet certain requirements for you to be able to advertise that room as an extra bedroom while selling your home. The requirements vary from location to location but in most places, it involves a minimum window size and the existence of a closet.

But home value isn’t the only reason to consider basement development. When it comes to extra space in your home, there’s something for everyone. If you have more children than bedrooms, the ability to give everyone their own room can be life-changing. Not to mention another bathroom downstairs could reduce the line for the bathroom in the morning and quell any subsequent arguments.

Do you work from home, or have you ever had a desire to do so? The basement can be an excellent place to put an office. If it’s away from the natural foot traffic in your house the extra quiet can really help you get some work done? If that’s not your thing but could kill for some peace and quiet, a playroom or a family room could be a great option for you. A place to send your kids or teens and their friends, giving you back the space they’ve probably overtaken.

Alternatively, the basement could be for the grown-ups. Add the fitness room you’ve always dreamed of so you no longer have to trek to the gym to get in a decent work-out (and say goodbye to those monthly gym fees!). Or you could have a bar to entertain your friends, poker or pool table to boot. Or maybe you just need a (wo)man cave where you can go to kick your feet up, to get away from everyone and wind down at the end of the day.

You could always go for a mix of options. Create a family space. A home theatre. A game room. Somewhere to come together as a family. And if you do opt for a basement renovation, it doesn’t mean you’ve got to bid your storage farewell. It can be trimmed down and neatly organized in a smaller space with shelves bins.

When it comes to an unfinished basement, the potential is endless. And while no two people are the same, I can say for certain that a finished basement can be right for anyone one. You just have to put your own spin on it.

Ways to Protect Your Basement Before You Consider a Damp Proofer in Cumbria

If you have dampness issues inside your basement and you notice that it is uninviting, moldy and damp, you have to do something about it because it can expand and cause structural issues to your household.

The main reason why damp happens in the basement is that cellar walls are close to the ground, and they do not have a waterproof layer that will help them protect against water damage. As a consequence, walls will be surrounded by conditions that will increase dampness.

The best way to protect your home is to find the appropriate service such as Cumbria damp proofing that will address the problem with ease since humidity is an invitation to fungus, molds, and mildew. Have in mind that dampness is closely associated with health issues as well.

Apart from salts, that water contains, when it moves through the walls it will cause the damage to the foundation of your home, and it can create various structural problems along the way. That is the main reason why you should waterproof your basement as soon as you detect dampness.

Best Ways to Protect Your Basement

If you want to protect your basement, you will have to waterproof it so that you can eliminate associated problems that we have mentioned above. It is essential and necessary to prevent moisture in floors and walls from entering the internal wall.

Since each basement is unique, we cannot give you appropriate calculations on how to waterproof it because it depends on its form and space. However, two most common ways of waterproofing are structural waterproofing and cavity drain tanking membrane.

To learn more on waterproofing process, you should click here.

Tanking Membranes

This particular method features lining the basement floors and walls with dimpled, robust and waterproof membranes that you have to apply to all underground structures. Since polyethylene membranes feature high density, you will get an air gap between them and wall, which will permit water and air circulation but without significant damage.

At the same time, water can easily pass into constructed channels that you can make so that you can pump it away. Please have in mind that basement floor has to be angled toward the pump so that you can reduce the water damage and so that water can run into the pump from the cavity.

Check this link: https://www.designingbuildings.co.uk/wiki/Tanking to learn more on tanking membranes and its use.

It is essential to understand that membranes are fixed to original wall surfaces by using plastic plugs, and you can fix it with plasterboard as the alternative protection. You can choose different types of membranes, but the final choice should be based on the anticipated flow rate and finish.

Advantages of Cavity Drain Membranes

  • Simple to install
  • Lightweight solution
  • It won’t interfere with the structural integrity
  • Sound absorbing and insulation features
  • It will create a dry environment

Structural Waterproofing

This particular type of waterproofing features another name such as tanking slurry, and it is one of the most appealing options which is affordable and proven because people are using it since the ’50s.

As soon as you apply it to your basement, it can withstand external water pressure and maintain a dry environment because it will create a physical barrier so that water cannot enter the walls.

It is simple to apply it, and you have to mix the formula. You will purchase it as powder, and combine it with water to make the similar thing as cement so that you can waterproof the wall surface.

Other Common Methods

  • Check Guttering – You should understand that the main reason why basement water issues happen is due to water pooling next to your foundation. Therefore, it is essential to waterproof your basement from the outside. You can start by inspecting downspouts and gutters, so that you can ensure that they are not rusted, plugged, and leaking. If you notice something faulty, it is vital to fixing it as soon as possible. The best time to check whether water is flowing through your gutter is when it is raining. Since most drains come from metal design, some areas can rust and start to crack, which will cause leaking inside. Therefore, you have to make sure that all connections are tightly sealed because you do not want to create havoc on your home.