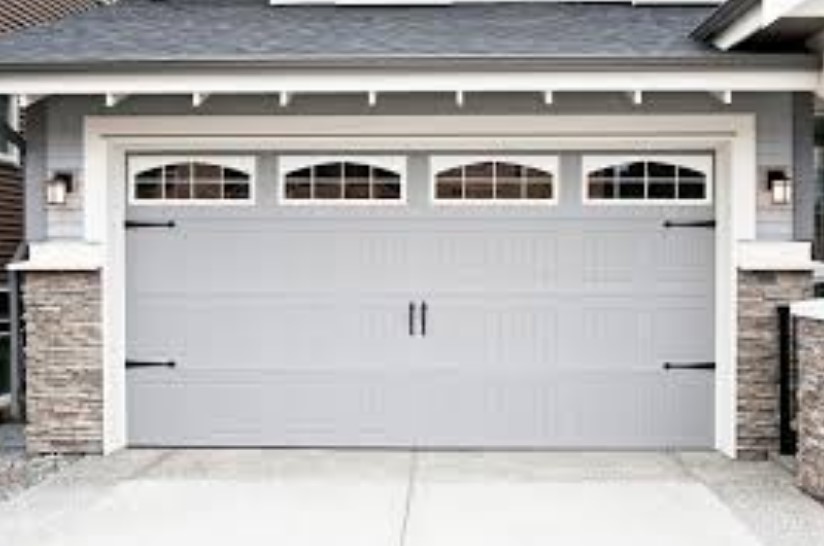
Twig Chandelier: Crafting Nature-Inspired Elegance for Your Ceiling

Twig chandeliers are a unique and beautiful way to bring nature-inspired elegance to your ceiling. These chandeliers are crafted from natural twigs and branches, creating a rustic yet sophisticated look that is perfect for any home. Twig chandeliers come in a variety of styles, from traditional to modern, and can be customized to fit any space. Whether you’re looking for a statement piece or a subtle accent, a twig chandelier is sure to add a touch of natural beauty to your home.

How to Incorporate Twig Chandeliers into Your Home Decor: Tips for Enhancing Your Space with Nature-Inspired Elegance

Twig chandeliers are a unique and beautiful way to add a touch of nature-inspired elegance to your home decor. Whether you’re looking to create a rustic, woodland-inspired atmosphere or a more modern, contemporary look, twig chandeliers can be a great addition to any space. Here are some tips for incorporating twig chandeliers into your home decor:

1. Choose the Right Size: When selecting a twig chandelier, it’s important to choose the right size for your space. Consider the size of the room and the height of the ceiling when selecting a chandelier. If the chandelier is too large, it can overpower the room and make it feel cramped. If it’s too small, it can get lost in the space.

2. Consider the Color: Twig chandeliers come in a variety of colors, from natural wood tones to painted finishes. Consider the color of the walls and furniture in the room when selecting a chandelier. If you’re looking for a more subtle look, choose a natural wood tone. If you want to make a bold statement, opt for a painted finish.

3. Add Accent Lighting: Twig chandeliers can be used as the main source of light in a room, but they can also be used to add accent lighting. Consider adding wall sconces or table lamps to the room to create a warm, inviting atmosphere.

4. Incorporate Nature: Twig chandeliers are a great way to bring the outdoors inside. Consider adding other natural elements to the room, such as plants, wood furniture, and natural fabrics. This will help to create a cohesive look and feel.

By following these tips, you can easily incorporate twig chandeliers into your home decor. With the right size, color, and accent lighting, you can create a beautiful, nature-inspired atmosphere in any room.

The Benefits of Installing a Twig Chandelier: Why You Should Consider Adding a Natural Touch to Your Ceiling

Adding a twig chandelier to your ceiling is a great way to bring a natural touch to your home. Not only is it aesthetically pleasing, but it also offers a number of benefits that make it a great choice for any home. Here are some of the reasons why you should consider installing a twig chandelier in your home.

First, twig chandeliers are incredibly versatile. They can be used in a variety of settings, from traditional to modern, and can be customized to fit any style. Whether you’re looking for a rustic, country-style chandelier or a sleek, contemporary one, you’ll be able to find a twig chandelier that fits your needs.

Second, twig chandeliers are incredibly durable. They are made from natural materials, such as wood and metal, which are both strong and long-lasting. This means that your twig chandelier will last for years to come, providing you with a beautiful and timeless piece of decor.

Third, twig chandeliers are incredibly energy efficient. They don’t require a lot of electricity to operate, so you’ll be able to save money on your energy bills. Additionally, twig chandeliers are also eco-friendly, as they don’t produce any harmful emissions.

Finally, twig chandeliers are incredibly affordable. They are much less expensive than traditional chandeliers, so you won’t have to break the bank to add a natural touch to your ceiling.

Installing a twig chandelier is a great way to bring a natural touch to your home. Not only is it aesthetically pleasing, but it also offers a number of benefits that make it a great choice for any home. From its versatility and durability to its energy efficiency and affordability, a twig chandelier is an excellent addition to any home.

Conclusion

The Twig Chandelier is a beautiful and unique way to bring nature-inspired elegance to any ceiling. Its intricate design and natural materials make it a timeless piece that will bring a touch of beauty and sophistication to any room. With its versatility and durability, the Twig Chandelier is sure to be a conversation starter and a timeless addition to any home.

How important is the on demand water heater?

When it comes to a water heater, the level of convenience one offers must match its maintenance costs. While most homes use the conventional but costly tanked heater, tank-less heaters, also known as the on-demand heaters seeks to revolutionize this sensitive home sector. So what is the importance of an on-demand heater and why should you install one at your home.

<2017/06/How-important-is-the-on-demand-water-heater.jpg">

1. It is cost effective

While the initial installation costs of an on-demand heater are higher than that of a heater tank, their long term maintenance costs are incomparable. Primarily, the tanked heater runs on electricity while the on-demand heater uses gas. Additionally, significant energy is wasted when using the tanked heater as it keeps on heating the same water again and again just to ensure it maintains the preset temperature levels.

On the other hand, the on-demand heater only uses enough power to heat a certain amount of water required at a particular time. You, therefore, stand a chance to shed off more than 20% of your annual water bills with an on-demand heater.

2. It is durable and environmentally friendly

Unlike its tanked counterpart with an average usable life of about ten years, the tank-less heaters can have a usable life span of about two decades. This explains why the on-demand heaters are more costly to install. You will also be contented to note that the tank-less heaters are environmentally friendly. They have a comprehensive combustion chamber and are operated using natural gas, thereby eliminating the possibility of emission of greenhouse gases.

3. They save on space

You don’t have to create additional room for installation of the on-demand water heater. Most of them are custom designed to match their use, a factor that is not possible with the tanked heaters. For instance, some on-demand heating units are small enough to fit under cabinets or in the closet. Their designers seek to bring the unit as close to the point of use as possible. Once equipped with an anti-freeze kit, the unit can also be installed in outdoor spaces.

4. It doesn’t expose your house to unnecessary risks

These small designs eliminate the possibility of water damage, often associated with the tanked heaters in case of leaks. This is emphasized by the fact that the on-demand heaters don’t hold in water for heating but heats it as it passes on its heat exchanger unit on route to direct usage.

5. It does not run out of hot water

The tank heater can only provide as much hot water as its tank base can hold. Once depleted, the homeowner has to either wait for the refilled tank to heat or source other means of heating water. This inconvenience is one of the fundamental reasoning behind the development of an on-demand heater as it will never run out of hot water.

The importance of an on-demand water heater is emphasized on by the various benefits a homeowner stands to gain by installing one at home. With such a heating unit around the house, you won’t have to worry about increasing water bills, running out hot water when you need it most, or constantly have to worry about floods that may be caused by heated water tank leaks.


How to Age Paper: Adding Vintage Appeal to Your DIY Creations

Aging paper is a great way to add a vintage look to your DIY creations. Whether you’re making a scrapbook, a greeting card, or a piece of art, aging paper can give it a unique, antique feel. In this guide, we’ll discuss the different methods of aging paper, from using tea and coffee to using bleach and other chemicals. We’ll also discuss the best materials to use and the safety precautions you should take when aging paper. With the right techniques and materials, you can create beautiful, aged paper for your projects.

How to Create an Aged Look on Paper with Tea Bags: A Step-by-Step Guide

Creating an aged look on paper with tea bags is a simple and effective way to give your paper a vintage feel. This step-by-step guide will show you how to achieve this effect.

Step 1: Gather Your Materials. You will need a few tea bags, a pot of boiling water, a bowl, and the paper you wish to age.

Step 2: Place the Tea Bags in the Boiling Water. Place the tea bags in the boiling water and let them steep for several minutes.

Step 3: Remove the Tea Bags. Once the tea bags have steeped for several minutes, remove them from the boiling water and discard them.

Step 4: Pour the Tea into the Bowl. Carefully pour the tea from the pot into the bowl.

Step 5: Place the Paper in the Tea. Submerge the paper in the tea and let it soak for several minutes.

Step 6: Remove the Paper from the Tea. Once the paper has soaked for several minutes, remove it from the tea and let it dry.

Step 7: Enjoy Your Aged Paper. Once the paper has dried, you will have achieved the aged look you were aiming for. Enjoy your vintage paper!

How to Use Coffee Grounds to Create an Aged Look on Paper: Tips and Tricks for DIYers

Creating an aged look on paper can be a great way to add a unique touch to your DIY projects. Coffee grounds are an easy and inexpensive way to achieve this effect. Here are some tips and tricks for using coffee grounds to create an aged look on paper.

1. Start by gathering your supplies. You will need coffee grounds, a shallow bowl, a paintbrush, and the paper you want to age.

2. Place the coffee grounds in the shallow bowl.

3. Dip the paintbrush into the coffee grounds and then brush the grounds onto the paper.

4. Allow the paper to dry completely before handling it.

5. If you want to add more of an aged look, you can repeat the process with more coffee grounds.

6. Once you are satisfied with the look, you can seal the paper with a sealant to protect it from moisture and fading.

Using coffee grounds to create an aged look on paper is a simple and cost-effective way to add a unique touch to your DIY projects. With these tips and tricks, you can easily create an aged look on paper that will last for years to come.

Conclusion

Aging paper is a great way to add a vintage look to any DIY project. With a few simple steps, you can easily create a unique and aged look for your paper. Whether you use tea, coffee, or other natural ingredients, you can create a beautiful aged look that will add a unique touch to your project. With a little bit of creativity and patience, you can create a beautiful aged look that will make your project stand out.

Crafting Friendship: Cute DIY Gifts for Friends That Show You Care

Crafting friendship is a great way to show your friends how much you care. DIY gifts are a thoughtful way to show your friends that you appreciate them and that you are thinking of them. Whether it’s a handmade card, a personalized mug, or a unique gift basket, DIY gifts are a great way to show your friends that you care. Crafting friendship is a fun and creative way to show your friends how much you appreciate them. With a few simple supplies and a little bit of creativity, you can create a unique and meaningful gift that your friends will cherish for years to come.

Crafting Friendship: 5 Creative Ideas for Making Meaningful Gifts for Your Best Friend

1. Create a Memory Book: Gather photos, ticket stubs, and other mementos from your time together and compile them into a scrapbook or memory book. Include captions and stories to make it even more meaningful.

2. Make a Customized Playlist: Put together a playlist of songs that remind you of your friendship and the special moments you’ve shared.

3. Design a Personalized Mug: Get a plain white mug and use permanent markers to draw a design or write a message that’s special to your friendship.

4. Put Together a Gift Basket: Fill a basket with items that your friend loves, such as their favorite snacks, books, or movies.

5. Create a Photo Collage: Print out photos of you and your friend and arrange them in a creative way. Frame the collage and give it to your friend as a special gift.

Crafting Friendship: How to Make a Special Memory Box for Your Best Friend to Cherish Forever

Creating a special memory box for your best friend is a wonderful way to show them how much you care. Not only will it be a physical reminder of your friendship, but it will also be a place to store all the special memories you have shared together. Here are some tips on how to make a special memory box for your best friend to cherish forever.

First, choose a box that is meaningful to your friend. It could be a box that is decorated with their favorite colors, or one that has a special design or pattern. You can also personalize the box with your friend’s name or initials.

Next, fill the box with items that remind you of your friendship. This could include photos, ticket stubs from events you have attended together, or even small trinkets that you have collected over the years. You can also include a handwritten note expressing your appreciation for your friend.

Finally, make sure to include a few items that your friend can use in the future. This could be a journal for them to write down their thoughts, a special pen, or even a small gift card. These items will remind your friend of your friendship every time they use them.

Creating a special memory box for your best friend is a thoughtful way to show them how much you care. With a little bit of effort and creativity, you can make a box that your friend will cherish forever.

Conclusion

Crafting friendship is a great way to show your friends how much you care. DIY gifts are a thoughtful and creative way to show your friends that you appreciate them. Not only are they a great way to show your friends how much you care, but they are also a fun and rewarding activity that can bring you and your friends closer together. Whether you choose to make something simple like a friendship bracelet or something more complex like a scrapbook, your friends will be sure to appreciate the effort and thought you put into it.

How Much Does it Cost to Replace Main Drain Pipe?

Drain issues can be rather annoying, and if you let the problem persist, a mere annoyance can turn into a much bigger problem. In fact, a small leak or clog could lead to you having to replace the main drain pipe, which can be a costly job.

It’s not always easy to know when your pipes are at the point of needing replacement, though. After all, not everyone is a New England Pipe expert and specializes in these types of piping issues.

To help you with this decision, we’re going to point out some of the signs of needed replacement, how much it costs to replace the main drain pipe, and a possible cheaper solution.

Looking for signs

How do you know when it’s time to trade in your store-bought clogging remover for professionals and a main drain pipe replacement? Here are just some of the reasons for replacing your pipes:

  • Long-term or persistent issues: If you’re constantly dealing with clogs or have been dealing with the same issue over a long period, then it might be time to bring in the experts. Not to mention, the longer you wait, the more damage that can be caused.
  • Old pipes: Things tend to break down over time, and your pipes are no exception. If you don’t know how old your pipes are, then consider how old your home is to get a better idea. The older the house is, the more likely it is that the sewer line needs replaced (unless it has already been replaced, of course).
  • Malfunctioning: If you notice any malfunctions, such as water backing up in sinks or toilets, then there might be a clog that requires immediate attention.

Odor and molding could also be signs that your pipes have a problem.

How much does it cost?

This is one of those questions that gets the typical answer of … it depends.

It depends on the size of the house, how hard it is to get to your pipes, how much labor and time it will take to replace the pipes, and many other factors.

With that in mind, here are some of the figures that HomeAdvisor came up with “to replace or repair a main sewer line.”

  • National Average Change Location: $2,567
  • Typical Range: $1,069 – $4,075
  • Low End: $191
  • High End: $7,600

“The average cost to repair a sewer main is $2,556. You could spend anywhere between $1,073 and $4,054, depending on the kind of damage. Full sewer line replacement ranges from $3,000 to $25,000” (via HomeAdvisor).

As you can see, those prices vary quite drastically, and that’s because many factors are involved when it comes to replacing a main drain pipe, from the severity of the pipe damage all the way to tree root infiltration. Location is also another factor.

A cheaper solution

Trenchless sewer line repair tends to be a cheaper option than actually having to replace a main drain pipe. That’s because it usually requires less labor. Not to mention, the pipes aren’t being replaced, walls might not have to be cut through, etc.

With that said, a trenchless sewer line repair isn’t always the best option because your pipes might need to be replaced—and there’s no way around that—especially if your pipes have caused a considerable amount of damage already. Even so, it is definitely an option you should explore.

The price points on replacing a main drain pipe vary quite drastically, but we hope the information above gives you a better idea on how much this process can be and what to expect.

Exterior Dutch Doors: Welcoming Charm and Fresh Air

Exterior Dutch doors are a charming and unique way to bring a touch of style and fresh air to your home. These doors are split in half, with the top half able to open independently from the bottom half. This allows you to open the top half to let in fresh air while keeping the bottom half closed for security. Dutch doors also add a welcoming charm to your home, as they are often seen on farmhouses and cottages. With a variety of styles and materials to choose from, you can find the perfect exterior Dutch door to fit your home’s aesthetic.

How Exterior Dutch Doors Can Add a Touch of Welcoming Charm to Your Home

Exterior Dutch doors can be a great way to add a touch of welcoming charm to your home. These doors are a unique and attractive feature that can be used to create a warm and inviting atmosphere.

Dutch doors are split horizontally in the middle, with the top and bottom halves able to open and close independently. This allows you to open the top half to let in light and fresh air while keeping the bottom half closed for security. The split design also allows you to keep an eye on visitors or children while still allowing them to come and go as they please.

Exterior Dutch doors are available in a variety of styles and materials, so you can find one that fits your home’s aesthetic. You can choose from traditional wood doors, modern fiberglass doors, or even metal doors. The doors can be painted or stained to match the color of your home, or you can choose a contrasting color to create a unique look.

Exterior Dutch doors are also a great way to add a touch of character to your home. The split design creates a unique look that can be used to create a welcoming atmosphere. The doors can also be used to create a sense of privacy, as the top half can be opened while the bottom half remains closed.

Exterior Dutch doors are a great way to add a touch of charm and character to your home. They are available in a variety of styles and materials, so you can find one that fits your home’s aesthetic. The split design also allows you to keep an eye on visitors or children while still allowing them to come and go as they please. With exterior Dutch doors, you can create a warm and inviting atmosphere that will welcome visitors and make your home feel like a home.

Enjoy Fresh Air and Natural Light with Exterior Dutch Doors

Exterior Dutch doors are a great way to bring the outdoors in and enjoy the fresh air and natural light of the outdoors. These doors are a unique and stylish way to add a touch of charm to any home.

Dutch doors are split in half horizontally, allowing the top half to be opened independently of the bottom half. This allows for ventilation and natural light to enter the home while still providing security and privacy. The top half of the door can be opened to allow a breeze to enter the home, while the bottom half remains closed and locked. This is a great way to enjoy the outdoors without having to worry about leaving the door open.

Exterior Dutch doors are available in a variety of styles and materials. Wood is a popular choice for these doors, as it is durable and can be stained or painted to match the home’s exterior. Fiberglass and steel are also popular materials for Dutch doors, as they are more resistant to weathering and provide additional security.

Exterior Dutch doors are a great way to add a touch of charm and style to any home. They provide a unique way to enjoy the outdoors while still providing security and privacy. With a variety of styles and materials available, these doors are sure to add a unique and stylish look to any home.

Conclusion

Exterior Dutch Doors are a great way to add a touch of charm and fresh air to any home. They are a great way to bring the outdoors in and create a welcoming atmosphere. They are also a great way to add a unique look to any home. With their unique design and functionality, Exterior Dutch Doors are a great way to add a touch of style and fresh air to any home.

4 Tips For Dealing With A Plumbing Emergency

Plumbing is crucial for an effective home or business – along with electricity, it’s one of those absolutely fundamentalfunctions of a building, and needs to be it tip-top shape. Unfortunately, plumbing issues can happen at anytime, and can arise seemingly unexpectedly. It is highly important therefore, if a plumbing emergency happens, that you and your family or business have a thought-out game plan. Below are four crucial tips for dealing with a plumbing emergency.

Do Not Panic

You see it all the time: people have a plumbing emergency and they go into complete fight or flight mode. Oftentimes you will see families or business workers lose control and scurry around the home or workplace, but doing this will only cause more damage and chaos. Panicking and losing control could create more problems, as every second is important. It is important to take a deep breath and identify the problem in a controlled manner, before seeking out professional help.

Turn Off The Main Water Line

Generally an emergency is bad because of the water damage, so make sure you know where and how to turn off your main water line. Statistics show that many homeowners, renters, or business owners and workers do not know the proper way in turning off the water line. Some do not even know where the main line is. When you turn off your water line you will stop an added damage to the property, which can save a lot of money and time. Make sure employees or everyone living in the home know where and how to turn off the main line.

Contact Your Plumber Immediately

Have a 24/7 plumber on your speed dial. Your city, most likely, has many experienced plumbers in the area, but it is crucial that you have a plumber on hand that you trust. It’s also important to go over emergency steps with the plumber and explain to them that you would like to notify them immediately if an emergency occurs. Make sure the plumber or plumbing company understands what you will be doing if a plumbing emergency happens, and make sure you hire a plumber in Toronto that will strive to answer your call 24/7 – if a plumber can’t promise this, you should look for another one. Also, make sure the plumber gives you his or her personal contact info so that you have a 24/7 plumber on your speed dial when an emergency happens. They are your frontline of defense in the case of a plumbing emergency, so it’s of key importance that they’re available, ready and highly experienced.

Contact And Underst and Your Homeowners Insurance

All companies and areas are different, but it’s important to understand your homeowners insurance policy, as various companies cover different things and you need to know what steps to take in case of a plumbing emergency. You should also contact your insurance company and go over a game plan on what to do when an emergency occurs. Speaking with the insurance company before an emergency can help prepare you.

Hopefully, with these four tips, you’re ready for the worst. Of course, the best-case scenario is never having to use any of these tips, but it’s best to be prepared and proactive. Lastly, there are several sites that you can visit to get more information about your water system. You can visit this website to learn all about your plumbing upgrade options to help you in case of a plumbing emergency.

Choosing a Contractor for a Bathroom Makeover

A bathroom makeover or a remodel is a DIY job. A DIY job is a (do it yourself) job. However, it is advisable if you don’t know anything about bathroom remodeling that you hire a professional contractor who will do the remodeling work for you. Among the people who need a contractor to help remodel their bathroom are the elderly or disabled people. There are some difficult operations when remodeling a bathroom which needs to be done by individuals who know what they are doing. Some of these operations include plumbing, tiling and electrical among others. It’s not easy to find a good bathroom-contractor that will assist you on the bathroom remodeling job. This blog will aid you in choosing a good bathroom makeover contractor to those interested in hiring a contractor.

If you are looking for a website that has all the information about bathroom makeover check out the walkinshowersandbaths.co.ukwebsite. The website also has a new range of baths you could want to have in your home which includes; Embrace Bathtub, Refind, Bathtub, Superior Bathtub and Tranquility bathtub among others. These new ranges of baths are discussed in detail in this website   http://www.walkinshowersandbaths.co.uk/independent-bathtub-range/

Ask for Referrals

One of the best ways of finding a qualified professional in bathroom makeovers is by asking for referrals. Make sure you ask your neighbors, your relatives, and your friends about the contractor they have had good experiences.  You also need to ask them what made them choose the specific contractor to remodel their bathroom. Listen to what they will say and get the positive experience of how the bathroom makeover contractor handled their problems.

Interview Candidates

If you have a list of potential contractors, then all you need to do is to narrow down the list and set up meetings. Make sure if you are having interviews with contractors, you interview at most three potential contractors. This is because if you decide to interview many people, you will have a hard time when it comes to decision making.

Look at credentials

If you have some recommendations in hand, then make sure you do some research. The research may be in the form of a phone call or even a visit to the website of the contractor. You can also research their social media handles. This is because nowadays people post more about what they do on social media and it is possible to know more about a person or a company online on the social media platforms.

In your research, find if the contractor you want to hire has all the required licenses and credentials to perform the remodeling work.  Also, it is advisable to look for people who have invested in some coursework and passed some specific, rigorous tests. Check also the certifications of the tests that they have passed on the contractor work.

Check References

Once you begin communicating and creating rapport with the potential contractors, ask them to give you the documents of some of the works they have done. Also, make sure you call or talk to the contractor’s former customer to check on them and ask them about the potential contractor. Ask how the contractor performed the execution of the work correctly? Can they recommend the contractor to another person? These are the type of questions you need to ask the previous clients to be in a better position to decide on the contractor you want to hire.


Advantages And Disadvantages Of Steel Frame Homes

<2017/01/Advantages-And-Disadvantages-Of-Steel-Frame-Homes.jpg">

Steel is now really popular as a construction material because of the strength and durability offered. The steel frame buildings that builders like http://kysteel.com/ offer are very popular in storage and industrial situations at the moment. However, we also have an increase in the people that are taking advantage of steel structures in the residential building projects. We are thus faced with the option of building residential homes with the use of steel frames.

Just as with every single possible opportunity available in construction, steel frame homes will present some advantages and some disadvantages. It is very important that you think about both aspects when you make your final choice. You will have to always work with an experienced architect in order to properly deal with the facts that are connected with the project. Focus on those that do have experience in dealing with steel construction in homes.

Steel Frame Building Advantages

The most important of the advantages of a steel building that appear is definitely the fact that you gain access to really high durability and longevity.  Wood frames are so often exposed to warping and rotting. You would eventually have to replace under-structure of a home. The process would be really costly. When steel is utilized warping and rotting are not problems you would have to worry about. You basically end up saving a lot of money that would need to be spent on future repairs.

When looking at pests, steel can still be affected by different bugs. However, the extent of serious structural damage that would appear is so much lower than with the alternatives. You will surely want to consider steel in areas where pests are common.

The last advantage to be mentioned is that the steel framed homes will be very sturdy. It is really easy for them to withstand very severe weather. You can build them in order to withstand earthquake and hurricane if this is what you want.

Disadvantages Of Steel Frame Homes

The main disadvantage is that steel production will cost a lot as opposed to other opportunities. Many steel frame materials are now competitive in term of prices but we are still not at a really good place. We should know that actual steel frame construction will take a lot of time and screws will normally cost a lot.

We should add that insulation can quickly become a large project with the steel buildings. Extra insulation will always be necessary because steel as a material is a bad insulator. You should always think about home insulation since this is something that you will love during winter.

Conclusions

As you can see, for most homeowners out there we do have advantages that are going to easily outweigh the disadvantages. It is definitely one opportunity that should be considered in the event the budget allows it. The only real situation in which there is no way to use the steel frame is when there is simply not enough money to make the investment. You can always take this option into account when this problem does not appear.

Five Great Ways to Improve A Boy’s Bedroom

   There’s a saying that goes boys will be boys” and it couldn’t get any truer than that. Before they become men, these boys will have the whole world to discover. Whether it’s in the form of books, movies, comics, or video games, there are so many things that can make a boy’s world so much interesting.

As parents of a boy, it’s your job to cultivate their fantasies and point it towards something more positive. Redesigning a boy’s room can greatly help in that aspect. If you are in this exact situation, here are several interior design elements you can place inside your boy’s room.

World Map Wall Mural

Photo from Mural Wallpaper UK

Boys always love to discover new things. One good way to capitalize on that is to have a world map mural painted in a boy’s bedroom. He can easily discover other nations and see where they are located in the world. This wall mural opens up a whole world of possibility to these kids and pushes them to expand their understanding of other people. Plus, it would make their rooms a lot more stylish too.

Shelves for Toy Display

Every boy has their own set of toys. It can be action figures, building blocks, or model cars, among others. Whatever they choose to play with, it’s imperative to let them have their fun every now and then. The only problem that can occur is these boys can make a mess whenever they’re playing with their toys. To remedy this situation, placing a shelf in a boy’s bedroom can be a big help. With the help of this furniture piece, your boys can organize their toys instead of leaving them scattered on the floor. At the same time, a shelf can help display their toys and improve a room’s interior design.

Posters of his favorite characters

Speaking of toys, every boy has a fantasy world they always lose themselves in. For instance, a lot of boys dream of being Iron Man or Captain America. A good way to inspire your boys is get posters of these characters to hang in their rooms. These posters will look good when they are framed properly. When you have these posters framed, they are also protected from dirt and dust. Due to these frames, they can last longer in their respective rooms.

Well-lit study table

Of course, it isn’t always play time for your boys. They also need to fulfill their responsibilities as students as well. In this case, you need to equip their rooms with interior design elements that are conducive for their studies. Foremost among these furniture pieces is a study table with ample lighting. This interior design ideas for booklovers will help your boys focus on their books without any form of distraction nearby.

A basketball hoop on the walls

Last, but not the least, is small basketball hoop in a boy’s room. Every kid will benefit greatly from a participation in sports. To help them be more enticed, you can get a small ball and a hoop that they can shoot it with. Whenever they’re bored, they can start shooting some hoops. Ultimately, this will inspire your boys to take this outside and be more engrossed with sports.

Paving Possibilities: Calculating the Cost to Repave Your Driveway for a Polished Look

Paving Possibilities: Calculating the Cost to Repave Your Driveway for a Polished Look is a comprehensive guide to help you determine the cost of repaving your driveway. This guide will provide you with the information you need to make an informed decision about the cost of repaving your driveway. It will cover the different types of paving materials, the cost of labor, and the cost of materials. Additionally, it will provide tips and tricks to help you save money on the project. With this guide, you will be able to make an informed decision about the cost of repaving your driveway and get the polished look you desire.

How to Choose the Right Paving Material for Your Driveway: Exploring the Pros and Cons of Different Options

When it comes to choosing the right paving material for your driveway, there are a number of factors to consider. Different materials offer different advantages and disadvantages, so it is important to weigh up the pros and cons of each option before making a decision. This article will explore the various paving materials available and the benefits and drawbacks of each.

One of the most popular paving materials is asphalt. Asphalt is a durable and cost-effective option that is easy to install and maintain. It is also resistant to weathering and can last for many years with proper care. However, asphalt can be prone to cracking and can be difficult to repair.

Concrete is another popular choice for driveways. It is strong and durable, and can be designed to fit any shape or size. It is also relatively easy to install and maintain. However, concrete can be expensive and can be prone to cracking and staining.

Brick is a classic choice for driveways. It is attractive and can be laid in a variety of patterns. It is also relatively easy to install and maintain. However, brick can be expensive and can be prone to cracking and staining.

Gravel is a popular choice for driveways. It is relatively inexpensive and easy to install and maintain. However, gravel can be prone to shifting and can be difficult to repair.

Finally, pavers are a great option for driveways. They are attractive and can be laid in a variety of patterns. They are also relatively easy to install and maintain. However, pavers can be expensive and can be prone to cracking and staining.

When choosing the right paving material for your driveway, it is important to consider the pros and cons of each option. Different materials offer different advantages and disadvantages, so it is important to weigh up the pros and cons of each option before making a decision.

DIY Paving Projects: Tips and Tricks for Repaving Your Driveway on a Budget

Repaving your driveway can be a daunting task, especially if you’re on a budget. However, with the right tips and tricks, you can get the job done without breaking the bank. Here are some tips and tricks for DIY paving projects that will help you repave your driveway on a budget.

1. Choose the Right Materials: When it comes to repaving your driveway, the materials you choose will have a big impact on the cost. Asphalt is the most common material used for driveways, and it’s also the most affordable. However, if you’re looking for a more durable option, you can opt for concrete or pavers.

2. Prepare the Surface: Before you start laying down the new material, you’ll need to prepare the surface. This includes removing any existing asphalt, weeds, and debris. You’ll also need to level the surface and make sure it’s free of any bumps or dips.

3. Use a Professional: If you’re not confident in your DIY skills, it’s best to hire a professional to help you with the project. This will ensure that the job is done correctly and that you don’t end up with any costly mistakes.

4. Rent the Right Equipment: If you’re going to be doing the job yourself, you’ll need to rent the right equipment. This includes a compactor, asphalt roller, and other tools. Make sure to rent the right size for the job and that you know how to use the equipment properly.

5. Seal the Driveway: Once the new material is laid down, you’ll need to seal it. This will help protect it from the elements and make it last longer. Make sure to use a sealant that is specifically designed for the material you’ve chosen.

By following these tips and tricks, you can repave your driveway on a budget. With the right materials, preparation, and equipment, you can get the job done without breaking the bank.

Conclusion

Paving Possibilities: Calculating the Cost to Repave Your Driveway for a Polished Look is a great resource for anyone looking to repave their driveway. It provides a comprehensive overview of the different types of paving materials, the cost of each, and the steps involved in the repaving process. With this information, homeowners can make an informed decision about the best option for their driveway and budget. Ultimately, repaving your driveway can be a great way to improve the look and value of your home.

Why take the help of a relocation service?

<2016/06/Why-take-the-help-of-a-relocation-service.jpg">Why take the help of a relocation service

Relocating to a new city can be a cumbersome task if things are not organised well in advance. At your old location it involves disconnecting all utility connections, terminating the house rent agreement or selling off the place, packing and moving. In the new location, you are required to find out a new place to rent or buy, all utilities connection for the home and other allied stuffs to make your new property liveable and as comfortable as your old one.

To save yourself from this huddle in relocation, you can have the services of a professional relocation agency that can make the transition easy for you. For example, you know nothing about the utility companies offering their services in the city of Melbourne and you have no idea about their tariffs either. Also you are almost blind about the quality of the service they offer in your area. For troublesome situation like this, you just need to make a phone call to the relocation service beforehand. Once they know your address they run through their database and using their experience short list the best offer for you. They will find you the best plan which suits your budget and requirement.

For water connection, they will organise with the local water supplier on your behalf. The services rendered by them is not only limited to the utility connections. They also offer you other services like locksmiths to replace the old locks of your new home for safety and security of life and property there. Other miscellaneous services such as storage, shifting, cleaning service, gardening etc can be arranged by them. This indeed becomes a great help for you because being new to the town you have no clue whatsoever where to find these services.

The relocation service comes useful for the fact that they serve you to get out of the early hustles easily and at the same time introduce you to several other agencies which may come handy for you in future.

Tropical Backyard: Creating a Lush Oasis in Your Space

Tropical Backyard is a great way to create a lush oasis in your own backyard. With the right plants, you can create a tropical paradise that will be the envy of your neighbors. Whether you want to create a tropical oasis for entertaining, relaxing, or just enjoying the beauty of nature, Tropical Backyard can help you create the perfect outdoor space. With tips on selecting the right plants, creating a design, and maintaining your tropical oasis, you can create a beautiful and inviting outdoor space that will be the envy of your neighborhood.

How to Design a Tropical Backyard Oasis on a Budget

Creating a tropical backyard oasis on a budget is possible with a little creativity and planning. Here are some tips to help you design a beautiful and affordable outdoor space.

1. Start with a plan. Before you begin, take some time to think about what you want your backyard oasis to look like. Consider the size of your space, the type of plants and furniture you want to include, and the overall atmosphere you want to create.

2. Choose low-maintenance plants. Tropical plants can be expensive, so look for varieties that are easy to care for and don’t require a lot of water or fertilizer. Some good options include bromeliads, orchids, and ferns.

3. Use natural materials. Natural materials like wood, stone, and bamboo are great for creating a tropical feel without breaking the bank. Look for pieces that can be repurposed or upcycled, such as old pallets or driftwood.

4. Add lighting. Lighting can make a big difference in the atmosphere of your backyard oasis. Look for solar-powered lights or string lights that can be hung from trees or posts.

5. Incorporate water features. Water features like fountains or ponds can add a calming and peaceful element to your backyard. Look for pre-made kits or build your own with a few simple materials.

With a little creativity and planning, you can create a beautiful and affordable tropical backyard oasis. With the right plants, materials, and lighting, you can create a space that is both inviting and relaxing.

Tips for Incorporating Tropical Plants into Your Backyard Landscape

1. Choose plants that are suited to your climate. Before selecting tropical plants for your backyard landscape, it is important to consider the climate in your area. Some tropical plants may not be able to survive in colder climates, so it is important to research the plants you are considering and make sure they are suitable for your climate.

2. Consider the size of the plants. When selecting tropical plants for your backyard landscape, it is important to consider the size of the plants when they are fully grown. Some tropical plants can grow quite large, so it is important to make sure you have enough space for them to grow and thrive.

3. Plant in groups. To create a lush, tropical look in your backyard landscape, it is best to plant tropical plants in groups. This will create a more visually appealing look and will also help the plants to thrive.

4. Add a water feature. To create a truly tropical feel in your backyard landscape, consider adding a water feature such as a pond or fountain. This will add a calming and tranquil atmosphere to your backyard and will also provide a habitat for aquatic plants and animals.

5. Incorporate other elements. To create a complete tropical look in your backyard landscape, consider incorporating other elements such as outdoor furniture, lighting, and decorations. This will help to create a cohesive look and will also make your backyard more inviting and enjoyable.

Conclusion

Creating a tropical backyard oasis is a great way to bring a little bit of paradise into your own backyard. With the right plants, furniture, and accessories, you can create a lush and inviting outdoor space that will be the envy of your neighbors. Whether you want to create a relaxing retreat or a vibrant party space, a tropical backyard can be the perfect way to make your outdoor space unique and inviting. With a little bit of planning and creativity, you can create a tropical oasis that will be the perfect place to relax and entertain.

Built to Impress: DIY Built-In Bookcase Plans for a Grand Library Feel

Welcome to Built to Impress: DIY Built-In Bookcase Plans for a Grand Library Feel! If you’ve ever dreamed of having a grand library in your home, this is the perfect place to start. Here, you’ll find detailed plans and instructions for building your own custom built-in bookcase. With these plans, you can create a beautiful and functional library that will be the envy of your friends and family. Whether you’re a beginner or an experienced woodworker, you’ll find something here to help you create the perfect library. So, let’s get started and build something amazing!

How to Create a Custom Built-In Bookcase for Your Home Library

Creating a custom built-in bookcase for your home library is a great way to add a unique and stylish touch to your space. With a few simple steps, you can create a beautiful and functional bookcase that will be the perfect addition to your library.

The first step in creating a custom built-in bookcase is to measure the space you have available. Measure the height, width, and depth of the area you plan to use for the bookcase. This will help you determine the size of the bookcase you need to build.

Next, you will need to decide on the type of material you want to use for the bookcase. You can choose from a variety of materials, such as wood, metal, or even glass. Consider the look and feel of the material you choose and make sure it will fit in with the overall design of your library.

Once you have chosen the material, you will need to decide on the design of the bookcase. You can choose from a variety of styles, such as traditional, modern, or even a combination of both. Consider the size of the books you plan to store and the overall look of the bookcase.

Once you have chosen the design, you will need to purchase the necessary materials. You will need wood, screws, nails, and other hardware to build the bookcase. Make sure you have all the necessary tools and supplies before you begin.

Now that you have all the materials, you can begin building the bookcase. Start by cutting the wood to the desired size and shape. Then, assemble the pieces together using screws and nails. Make sure to use a level to ensure the bookcase is even and level.

Once the bookcase is assembled, you can add shelves and other features to customize it. You can add drawers, doors, or even a ladder to make it easier to access the books.

Finally, you can finish the bookcase with a coat of paint or stain. This will help protect the wood and give it a beautiful finish.

Creating a custom built-in bookcase for your home library is a great way to add a unique and stylish touch to your space. With a few simple steps, you can create a beautiful and functional bookcase that will be the perfect addition to your library.

Tips for Designing a Built-In Bookcase to Impress Your Guests

1. Choose the Right Location: When designing a built-in bookcase, it is important to choose the right location. Consider the size of the room and the amount of natural light available. Place the bookcase in an area that will be easily accessible and visible to your guests.

2. Select the Right Materials: Select materials that will complement the existing décor of the room. Consider the color, texture, and style of the materials to ensure that the bookcase will fit in with the overall design of the space.

3. Utilize Vertical Space: Make the most of the available space by utilizing vertical space. Consider adding shelves that reach up to the ceiling to maximize storage capacity.

4. Incorporate Lighting: Incorporate lighting into the design of the bookcase to create a warm and inviting atmosphere. Consider adding a few accent lights to highlight certain books or items.

5. Add Personal Touches: Add personal touches to the design of the bookcase to make it unique. Consider adding a few decorative items such as a vase or a framed photo to give the bookcase a more personalized look.

6. Consider the Functionality: When designing a built-in bookcase, it is important to consider the functionality of the space. Think about how you will use the bookcase and what type of items you will be storing in it. This will help you determine the size and shape of the bookcase.

Conclusion

Built to Impress: DIY Built-In Bookcase Plans for a Grand Library Feel is an excellent resource for anyone looking to create a beautiful and functional library in their home. With detailed instructions and helpful tips, this guide provides everything you need to create a stunning library that will impress your friends and family. Whether you are a beginner or an experienced woodworker, this guide will help you create a library that will be the envy of your neighborhood. With the help of this guide, you can create a library that will be the perfect addition to your home.

Top 7 Steps to Build a Bench from Scratch

Source : familyhandyman.com

Building a bench from scratch can be a rewarding and practical project for any DIY enthusiast. Whether you want to create a cozy seating area in your garden, a comfortable spot on your porch, or a functional addition to your home, constructing a bench allows you to customize it to your specific needs and style. In this article, we will outline the top 7 steps to help you build a bench from scratch.

1. Plan and Design

The first step in building a bench from scratch is to plan and design it. Consider the purpose of the bench, the available space, and your desired style. Sketch out your ideas on paper or use design software to visualize the final product. This step is crucial in ensuring that the bench meets your requirements and fits well in its intended location.

2. Gather Materials and Tools

Once you have a design in mind, it’s time to gather the necessary materials and tools. The exact materials will depend on your chosen design, but common materials for bench construction include wood, screws, nails, and paint or stain for finishing. Ensure that you have all the required tools, such as a saw, drill, measuring tape, and sandpaper, to complete the project efficiently.

3. Measure and Cut the Wood

Measurements are crucial in building a bench that is sturdy and proportionate. Accurately measure and mark the wood according to your design specifications. Use a saw to cut the wood into the required pieces, such as the seat, backrest, legs, and support beams. Take your time during this step to ensure precise cuts.

4. Assemble the Frame

Once you have cut all the necessary pieces, it’s time to assemble the frame of the bench. Start by attaching the legs to the seat using screws or nails. Then, attach the support beams to reinforce the structure. Make sure everything is level and secure. If necessary, use clamps to hold the pieces in place while you fasten them together.

5. Add the Backrest and Armrests

If your bench design includes a backrest and armrests, this is the stage to add them. Attach the backrest to the frame using screws or nails, ensuring it is at a comfortable angle. For armrests, measure and cut the wood to the desired length, then attach them securely to the sides of the bench.

6. Sand and Finish

To achieve a smooth and polished look, sand all the surfaces of the bench using sandpaper. This step removes any rough edges or imperfections. Once the sanding is complete, apply a finish of your choice, such as paint or stain, to protect the wood and enhance its appearance. Follow the manufacturer’s instructions for the best results.

7. Final Touches and Inspection

The final step is to add any final touches and inspect the bench for any necessary adjustments. Check for any loose screws or nails and tighten them if needed. Consider adding cushions or pillows for added comfort. Once you are satisfied with the bench’s overall appearance and stability, it is ready to be enjoyed.

Building a bench from scratch allows you to create a unique piece of furniture that perfectly suits your needs and style. By following these 7 steps, you can confidently embark on this DIY project and create a bench that will provide comfort and functionality for years to come.

Remember to prioritize safety during the construction process by wearing appropriate protective gear, using tools correctly, and following all safety guidelines. Happy bench building!