Mosaic tile projects bring a burst of creativity and color into the realm of interior design and artistic expression. By arranging small, vibrant pieces into intricate patterns, these projects offer a unique way to transform spaces and objects, breathing life into everything from walls to tabletops. Whether you’re a seasoned crafter or a newcomer to the world of DIY, mosaic tile projects provide an accessible and visually captivating avenue for self-expression.
Mosaic tiles have been used for centuries to adorn spaces with their intricate and captivating designs. From ancient Roman baths to modern kitchens, these tiny tiles have a timeless appeal that can elevate any DIY project. Whether you’re considering a mosaic backsplash, a tabletop, or an accent wall, choosing the right mosaic tiles is essential to ensure a stunning and cohesive result. In this article, we’ll guide you through the process of selecting the perfect mosaic tile for your DIY projects.
1. Understand Your Project Goals
Before you dive into the world of mosaic tiles, it’s crucial to have a clear understanding of your project goals. Are you looking to add a pop of color to your kitchen backsplash, create a focal point in your bathroom, or design a unique piece of art? Defining your project’s purpose will help you narrow down your options and make more informed choices.
2. Consider Your Style and Aesthetic
Mosaic tiles come in a wide variety of colors, materials, and designs, so it’s important to choose tiles that align with your personal style and the overall aesthetic of your space. If you prefer a classic look, opt for neutral tones and traditional patterns. For a more contemporary vibe, explore bold colors and geometric designs. Consider the existing décor of the room and choose tiles that complement it seamlessly.
3. Explore Different Materials
Mosaic tiles are available in various materials, each with its own unique characteristics. Some common materials include glass, ceramic, porcelain, natural stone, and metal. Each material has its own level of durability, maintenance requirements, and visual appeal. Glass tiles, for example, can add a sleek and reflective quality to your project, while natural stone tiles can bring a rustic and textured look.
4. Size and Shape Matter
The size and shape of the mosaic tiles play a significant role in the overall appearance of your project. Smaller tiles, such as 1×1-inch or 2×2-inch squares, create intricate and detailed patterns, while larger tiles can make a bold statement with fewer grout lines. Consider the scale of the area you’re working with and choose tile sizes and shapes that harmonize well with the dimensions of the space.
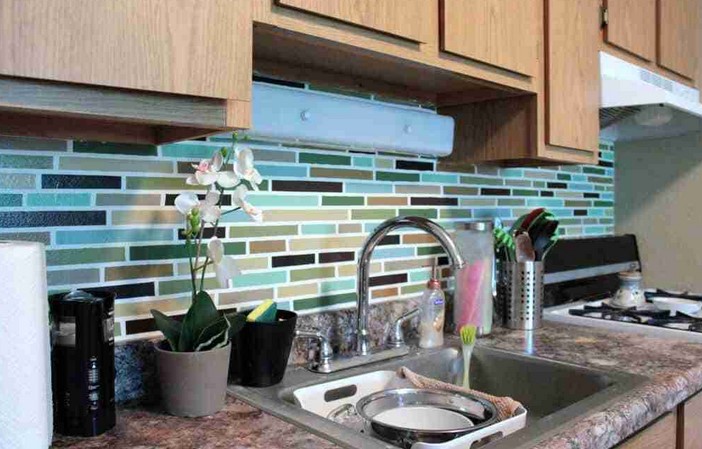
5. Evaluate Color Options
Color is a fundamental aspect of mosaic tiles, and choosing the right colors can greatly impact the mood and atmosphere of your project. If you’re unsure about the color scheme, start by selecting a dominant color and then choose complementary or contrasting hues. Use color swatches and samples to visualize how different colors will interact in your space and whether they align with your vision.
6. Test Different Patterns
Mosaic tiles allow for endless pattern possibilities. You can create herringbone, chevron, basketweave, or even custom designs. Before committing to a pattern, consider creating mock-ups using paper templates or online design tools. This will give you a better idea of how the pattern will look on a larger scale and help you make adjustments as needed.
7. Mind Grout Selection
The grout you choose can significantly impact the final look of your mosaic project. Grout color can either blend in with the tiles or create contrast, emphasizing the design. Lighter grout can make the tiles stand out, while darker grout can create a more unified appearance. Additionally, be mindful of the grout’s durability and ease of maintenance, as grout can become discolored or damaged over time.
8. Think About Long-Term Maintenance
Different materials require different levels of maintenance. Glass and ceramic tiles are generally easy to clean, while natural stone tiles might need sealing to prevent staining. Consider how much time and effort you’re willing to invest in maintaining your mosaic project’s appearance. Choosing tiles that align with your maintenance preferences will ensure the longevity of your DIY masterpiece.
9. Budget Considerations
Mosaic tiles vary widely in price based on material, size, brand, and design complexity. It’s essential to establish a budget for your project early on and stick to it. Keep in mind that quality tiles are an investment that can enhance the value of your space, so striking a balance between cost and quality is key.
10. Seek Inspiration and Advice
If you’re feeling overwhelmed by the multitude of options available, seek inspiration from interior design magazines, online platforms like Pinterest, or even visiting local home improvement stores. Additionally, don’t hesitate to seek advice from professionals or experienced DIYers. They can provide valuable insights and recommendations based on their expertise.
In conclusion, choosing the perfect mosaic tile for your DIY project requires a thoughtful consideration of your project goals, style preferences, materials, colors, patterns, and long-term maintenance needs. By taking the time to explore various options and seeking inspiration, you can create a mosaic masterpiece that not only adds visual appeal but also reflects your unique taste and creativity. Remember, the journey of selecting mosaic tiles is an exciting part of the DIY process, and with careful planning, you can achieve stunning results that will be admired for years to come.

 I have been managing a community in Bloomington here in Minnesota for the last 10 years. Part of my major duty is to ensure that tree removals are being done on areas that need to be developed for a residential or commercial establishment if the tree could damage the surrounds or the structure to be built. By doing so, I have tried and tested different tree removal services, most of them can be found online if you try to search: