<2016/12/Where-to-Find-the-Best-Replacement-Windows-In-Los-Angeles.jpg">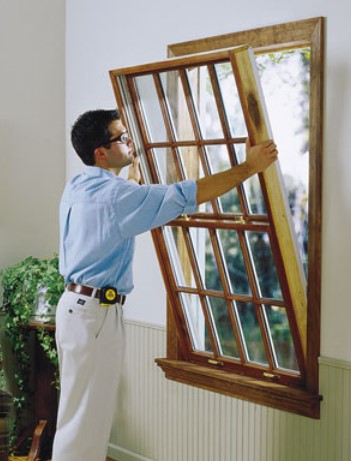
So, you are thinking about improvement project for your home and that’s a good thing because it has been years since the last time this home got an improvement. The improvement project is intended to create even better residential space for your family with optimum comfort and safety. However, you need to realize that the budget for the project is limited and it won’t be enough to cover total improvement. You need to set a priority on which part of your house needs to be improved. This time, it is highly recommended to focus the improvement project on the windows.
Yes, the windows are the ones to get the improvement or more precisely, you need to replace the existing windows with the new ones. You need to realize that the windows at your home are already too old and all of these years it has been withstand extreme weather from hot summer to freezing winter storm. When you take a look close to those windows, you will notice that the glass on the windows look blurred and dull, and on the window frames you can find broken parts here and there. Replacing those old windows with new ones will significantly improve your home, not only it will have better look and don’t forget that windows are also about your home security. New windows have better security and it will provide better protection to your family. The most important thing is looking for Replacement Windows In Los Angeles too meet your actual needs.
Looking for the right replacement windows can be quite tricky. It is crucial that the replacement windows are perfectly similar in dimension with the old windows. That’s important to make sure it will fit the space on the windows frame otherwise you will only spend lots of extra money to make it works. This is the reason why you are recommended to order the windows from Intex Windows & Doors. This is the leading distributor and supplier of doors, windows, fixtures, and accessories. This company is also the leading contractor for windows and doors installation. This company has large selections of high quality windows made from varieties of top grade materials. It won’t be difficult to easily find the right windows to meet your actual needs. You will be assisted by its expert staffs to find the right windows to perfectly fit at your home. Even when your home is a historical architecture and you need replica windows of the broken original ones, the team of this company will make sure the replica windows have every detail to exactly similar with the old ones.
Intex Windows & Doors is also committed to provide you the best solutions possible. All windows can be optimized to improve your house’s energy efficiency based on ENERGY STAR’s rating. Choosing this company means you will get complete and highly reliable solutions at the most competitive price. There’s no reason to hesitate. Give them a call and let they help you order the replacement windows today.
 Every housewife needs to know effective ways to clean blood most effectively without spending a lot of time. Of course, when it comes to cleaning huge amount of blood, for instance after accidents and crimes, it’s better to use
  Training your employees has a host of benefits for your cleaning business. First, it helps to ensure that your staff who perform