Bookshelf Brilliance: Building a Do-It-Yourself Bookshelf for Your Space is a comprehensive guide to creating a custom bookshelf that fits your space and style. Whether you’re a beginner or an experienced woodworker, this book provides step-by-step instructions and helpful tips to help you build a beautiful and functional bookshelf. With detailed illustrations and photographs, you’ll be able to create a bookshelf that is both aesthetically pleasing and practical. From selecting the right materials to finishing the project, this book will help you create a bookshelf that is perfect for your home.
How to Choose the Right Materials for Your DIY Bookshelf: Tips for Maximizing Bookshelf Brilliance
When it comes to creating a bookshelf, the materials you choose can make all the difference. Whether you’re looking for a modern, minimalist look or a more traditional, rustic feel, the right materials can help you maximize the brilliance of your bookshelf. Here are some tips to help you choose the right materials for your DIY bookshelf.
1. Consider the weight of the materials. Depending on the size of your bookshelf, you’ll need to choose materials that can support the weight of your books. If you’re looking for a lightweight option, consider using particleboard or MDF. If you’re looking for something more durable, opt for plywood or hardwood.
2. Think about the look you’re going for. Different materials can give your bookshelf a unique look and feel. For a modern, minimalist look, consider using metal or glass. For a more traditional, rustic feel, opt for wood or stone.
3. Consider the cost. Different materials can vary in cost, so it’s important to consider your budget when choosing materials for your bookshelf. If you’re looking for an affordable option, consider using particleboard or MDF. If you’re willing to spend a bit more, opt for plywood or hardwood.
4. Consider the ease of installation. Some materials are easier to install than others. If you’re looking for an easy installation, consider using metal or glass. If you’re looking for something more challenging, opt for wood or stone.
By following these tips, you can choose the right materials for your DIY bookshelf and maximize its brilliance. With the right materials, you can create a bookshelf that is both beautiful and functional.
Creative Ways to Style Your DIY Bookshelf: Making the Most of Your Bookshelf Brilliance
Are you looking for creative ways to style your DIY bookshelf? If so, you’ve come to the right place! With a few simple tips and tricks, you can make the most of your bookshelf brilliance and create a unique and stylish display.
First, consider the color of your bookshelf. If you’re looking for a more modern look, opt for a bright, bold color. If you’re going for a more traditional look, choose a neutral color like white or gray.
Next, think about the items you’d like to display on your bookshelf. Books are a great way to add color and texture to your shelf, but don’t forget to add other items like plants, vases, and sculptures. These items can add a unique touch to your shelf and make it stand out.
Finally, consider the arrangement of your bookshelf. You can arrange your books in a variety of ways, such as by size, color, or genre. You can also create a unique pattern by alternating the books’ positions.
By following these tips, you can make the most of your bookshelf brilliance and create a unique and stylish display. With a little creativity and effort, you can transform your DIY bookshelf into a beautiful and functional piece of furniture.
Conclusion
Bookshelf Brilliance: Building a Do-It-Yourself Bookshelf for Your Space is an invaluable resource for anyone looking to create a custom bookshelf for their home. With detailed instructions and helpful illustrations, this book provides readers with the knowledge and tools they need to build a beautiful and functional bookshelf. Whether you are a novice or an experienced woodworker, this book will help you create a bookshelf that is perfect for your space.


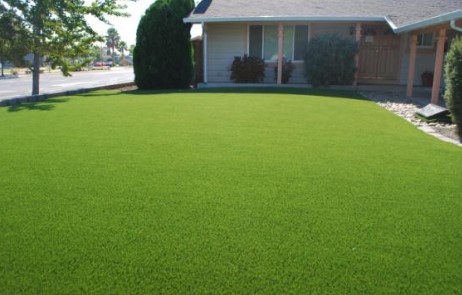 First, it will save your time. When you install artificial grass in your yard, you don’t have to spend time mowing the lawn, which means you will have more time to do something else. This will work best for those who are busy working and barely have time to look after their lawns. It is also will work best for older people.