What to Look for When Hiring a Pest Control Company

There is no shortage of pest control companies across Canada. With so many available options, it can be difficult to know which one is the right one for you. Choosing a name out of a phone book might seem like the easiest option, but it likely isn’t the right choice. If you are ready to put a stop to pest infestations, there are some things to consider while choosing a service team.

Referrals: A good reputation is the biggest endorsement that any business can have. Asking friends and family in your area about their pest control experiences can be an excellent way to choose a local service. If your nearest and dearest have been lucky enough to avoid roaches and rodents, the internet can work just as well. Reviews offer insight into the customer experience before you commit to any one service provider.

Knowledge: Any pest control professional should be knowledgeable about more than just basic removal techniques. For example, Toodaloo pest control in Saskatoon knows how to both ask and answer the right questions. Whether you want to know about the habits of pests, the right treatment methods to deal with the problem, or prevention methods, your team should be able to provide an answer.

Experience: The only way to become an industry leader is through experience. It is completely appropriate to ask how long a company has been in business. With each year that passes by, new lessons are learned and that is a major benefit for clients.

Methods: The most common way to treat insect or rodent populations is with poisons or chemicals – but it is not the only way. If you are opposed to the use of chemicals in your home or workspace, many companies offer non-chemical or eco-friendly options, designed to suit client needs.

Quotes & Costs: Before any work begins, reputable companies should be able to provide estimates for both costs and time frames. Choosing the cheapest option is not always the most cost-effective overall. Pest control relies on the quality over quantity rule – so save yourself additional costs by picking right the first time.

Should You Opt For A Timber Or Concrete Floor?

<2017/05/Should-You-Opt-For-A-Timber-Or-Concrete-Floor.jpg">
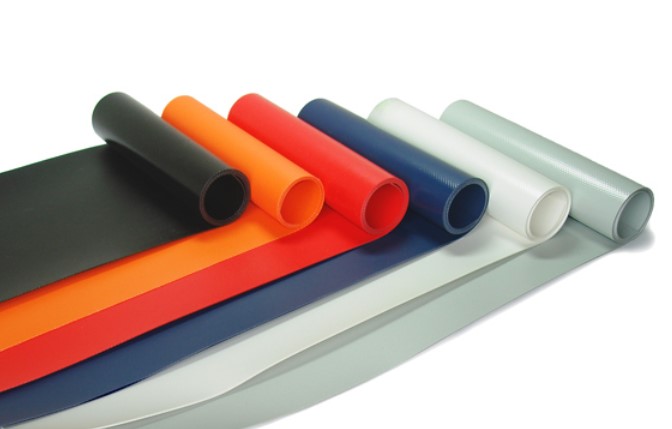
There are lots of choices to make when you are self-building a house or if you are working with an architect to draw up designs for a property you are having built. One of the biggest questions is around the flooring and the choices involved with that. Currently, two of the most popular styles of flooring are timber or concrete but which material would be best for your home?

Solid Vs. Suspended

The question here isn’t so much the material used for the flooring but the style of floor that you require – either a solid or a suspended one. Solid floors are more substantial and use a layering system of a sub-base, sand, compacted hard core then a damp proof membrane before the insulation and concrete is finally added. On the other hand, suspended floors are made usually from timber joists and can come in a wide range of styles to adapt to the needs of the space.

Why Go For Suspended Floors?

Firstly, let’s look at the suspended floor and why floor construction using joists has become popular. In this kind of system, timber joists are suspended from the bearing walls and are then covered with floor boards or even high quality tongue and groove sheets. This means that the floor is well insulated and also very sound proof so is ideal for upper floors where footfall can make a lot of noise on the ground floor.

Suspended floors do require air flow so this means that an airtight breather membrane will often be used to ensure there is no moisture in the flooring system but that it gets the airflow that it needs. Also, if you need to access pipes under the floor, this type of system makes this relatively easy.

Why Go For Solid Floors?

On the other hand, solid floors can often be favoured in the lower parts of a house because they are so substantial. The systems use a variety of materials in layers to create the floor and incorporate a damp proofing membrane to prevent moisture seeping in as well as insulation to increase energy efficiency of the property.

As their name suggests, solid floors are very heavy duty and have a long lifespan. There is little noise made when walking on them and they won’t creak as they shrink with time. However, they are incompatible with underfloor heating systems and accessing pipes under them means a full scale excavation.

Conclusion

As with much in construction, there is no right and wrong answer with regards to the type of floor you choose – it is more about what you need and what you can afford. Look at things like underfloor heating as many new homes want to include this but some solid floor systems don’t work with this.

You can also get combination systems where you use a concrete floor that is supported by joists to be more like a suspended floor. Finally, the use of I-joists is a popular way get the best of both worlds as these don’t shrink or warp and create ‘quiet floors’.

Author Bio: Declan Small is the Digital Marketing Manager at Haldane Fisher, builder’s merchants with branches across the UK.

Cost of Small Inground Pool: Budgeting for Backyard Luxury

The idea of having a small inground pool in your backyard is a luxurious one, but it can also be a costly one. Before you start planning your backyard oasis, it’s important to understand the cost of a small inground pool and how to budget for it. This guide will provide an overview of the costs associated with a small inground pool, as well as tips for budgeting for this backyard luxury.

How to Estimate the Cost of a Small Inground Pool: Tips for Staying Within Your Budget

Installing a small inground pool can be a great way to add value to your home and provide a fun and relaxing outdoor space for your family. However, it is important to understand the cost of a small inground pool before you begin the project. Here are some tips to help you estimate the cost of a small inground pool and stay within your budget.

1. Research Pool Types: The first step in estimating the cost of a small inground pool is to research the different types of pools available. Inground pools come in a variety of shapes, sizes, and materials, and each type has its own associated costs. Consider the size and shape of the pool you want, as well as the type of material you want to use.

2. Calculate the Cost of Materials: Once you have chosen the type of pool you want, you can begin to calculate the cost of materials. This includes the cost of the pool liner, the pool pump, the filter, and any other necessary materials. Make sure to factor in the cost of any additional features you may want, such as a diving board or slide.

3. Consider Labor Costs: In addition to the cost of materials, you will also need to factor in the cost of labor. This includes the cost of hiring a professional to install the pool, as well as any additional labor costs associated with the project.

4. Get Multiple Quotes: Once you have an idea of the cost of materials and labor, it is important to get multiple quotes from different contractors. This will help you compare prices and ensure that you are getting the best deal.

5. Set a Budget: Once you have an idea of the cost of the project, it is important to set a budget. This will help you stay within your means and ensure that you are not overspending.

By following these tips, you can estimate the cost of a small inground pool and stay within your budget. With careful planning and research, you can create a beautiful and functional outdoor space that your family can enjoy for years to come.

The Benefits of Investing in a Small Inground Pool: Enjoying the Luxury of a Backyard Oasis Without Breaking the Bank

Having a pool in your backyard can be a luxurious experience, but it can also be expensive. Investing in a small inground pool is a great way to enjoy the luxury of a backyard oasis without breaking the bank. Here are some of the benefits of investing in a small inground pool.

First, a small inground pool is more affordable than a large pool. The cost of a small inground pool is typically much lower than the cost of a large pool, making it a great option for those who want to enjoy the luxury of a backyard oasis without spending a fortune.

Second, a small inground pool is easier to maintain than a large pool. Smaller pools require less maintenance and are easier to keep clean. This means that you can enjoy your pool without having to spend a lot of time and money on maintenance.

Third, a small inground pool is more energy efficient than a large pool. Smaller pools require less energy to heat and maintain, which can save you money on your energy bills.

Fourth, a small inground pool is more aesthetically pleasing than a large pool. Smaller pools are easier to design and decorate, allowing you to create a beautiful backyard oasis that is tailored to your tastes.

Finally, a small inground pool is safer than a large pool. Smaller pools are less likely to be a drowning hazard, making them a great option for families with young children.

Investing in a small inground pool is a great way to enjoy the luxury of a backyard oasis without breaking the bank. With its affordability, ease of maintenance, energy efficiency, aesthetic appeal, and safety, a small inground pool is an excellent choice for those who want to enjoy the luxury of a backyard oasis without spending a fortune.

Conclusion

The cost of a small inground pool can be a significant investment, but it can also be a great way to add luxury and value to your backyard. With careful planning and budgeting, you can find a pool that fits your needs and budget. With the right pool, you can enjoy the luxury of a backyard oasis without breaking the bank.

Precise Crafting: Tips and Techniques for Cutting Melamine with Precision

Precise Crafting: Tips and Techniques for Cutting Melamine with Precision is a comprehensive guide to help woodworkers and DIYers achieve accurate and precise cuts when working with melamine. This guide covers the basics of melamine cutting, from selecting the right saw blade and setting up the saw to making the cut and finishing the edges. It also provides tips and techniques for achieving the best results, such as using a jig or a template, and how to avoid common mistakes. With this guide, you can learn how to make precise cuts with melamine and create beautiful projects with confidence.

How to Achieve Perfect Cuts with a Table Saw: Tips and Techniques for Cutting Melamine with Precision

Table saws are an essential tool for any woodworker, and they can be used to make precise cuts in a variety of materials, including melamine. Melamine is a type of plastic laminate that is often used to make furniture, cabinets, and countertops. It is a durable material, but it can be difficult to cut accurately. To ensure perfect cuts with a table saw, it is important to use the right techniques and tools.

The first step is to choose the right blade for the job. A standard blade will not work for cutting melamine, as it will cause chipping and splintering. Instead, use a blade specifically designed for cutting laminate. These blades have a higher tooth count and a special coating that helps reduce chipping.

Next, make sure the saw is properly set up. The blade should be set at the correct height and the fence should be parallel to the blade. If the blade is too high, it can cause chipping, and if the fence is not parallel, the cut will be inaccurate.

Once the saw is set up, it is time to make the cut. Start by making a shallow cut, then gradually increase the depth until the desired thickness is reached. This will help reduce chipping and splintering. It is also important to use a steady, even pressure when pushing the material through the saw.

Finally, use a sharp utility knife to trim off any excess material. This will help ensure a clean, precise cut.

By following these tips and techniques, you can achieve perfect cuts with a table saw when cutting melamine. With the right tools and a steady hand, you can make precise cuts that will look great and last for years.

The Benefits of Using a Router for Precise Crafting: Tips and Techniques for Cutting Melamine with Precision

Using a router for precise crafting is a great way to create beautiful and intricate designs with melamine. Routers are versatile tools that can be used to cut a variety of materials, including melamine, with precision. With the right tips and techniques, you can achieve professional-looking results with your router. Here are some tips and techniques for cutting melamine with precision using a router.

First, it is important to select the right router bit for the job. When cutting melamine, a straight bit with a sharp cutting edge is the best choice. This type of bit will provide a clean, precise cut. Additionally, it is important to select a router bit with a diameter that is slightly smaller than the thickness of the melamine. This will help to ensure that the cut is even and accurate.

Second, it is important to secure the melamine firmly in place before beginning to cut. This will help to prevent the material from shifting or moving while the router is in use. To do this, use clamps to hold the melamine in place. Additionally, it is important to use a straight edge or template to guide the router bit. This will help to ensure that the cut is straight and even.

Third, it is important to use the correct speed when cutting melamine with a router. The speed should be set to a medium-high setting. This will help to ensure that the cut is clean and precise. Additionally, it is important to use a steady, even pressure when cutting. This will help to prevent the router bit from becoming clogged or damaged.

Finally, it is important to use the correct safety equipment when using a router. This includes safety glasses, a dust mask, and hearing protection. Additionally, it is important to keep the router bit sharp and clean. This will help to ensure that the cut is precise and accurate.

By following these tips and techniques, you can achieve professional-looking results when cutting melamine with a router. With the right tools and techniques, you can create beautiful and intricate designs with precision.

Conclusion

Precise crafting with melamine is a skill that requires patience and practice. With the right tools and techniques, it is possible to achieve a high level of precision when cutting melamine. By following the tips outlined in this article, you can ensure that your cuts are accurate and precise. With a little practice, you can become an expert in precise crafting with melamine.

Cinder Block Desk: Crafting a Unique and Functional Workspace

The cinder block desk is a unique and functional workspace that can be crafted with minimal effort and cost. It is a great way to add a modern, industrial look to any room. The cinder block desk is a great way to create a workspace that is both stylish and functional. It is easy to customize and can be used in a variety of ways. With a few simple tools and materials, you can create a desk that is both stylish and functional. Whether you are looking for a workspace for your home office or a place to do your homework, the cinder block desk is a great option.

How to Create a Stylish and Functional Cinder Block Desk

Creating a stylish and functional cinder block desk is a great way to add a modern and industrial touch to any room. With a few simple materials and tools, you can easily build a desk that is both stylish and practical.

First, you will need to gather the necessary materials. You will need cinder blocks, a piece of wood for the top, screws, and a drill. You can find cinder blocks at most home improvement stores. The size of the wood top will depend on the size of the desk you want to create.

Once you have all the materials, you can begin building your desk. Start by laying out the cinder blocks in the desired shape. Make sure to leave enough space between the blocks for the wood top. Once the blocks are in place, use the screws and drill to secure them together.

Next, place the wood top on the cinder blocks. Make sure to use screws to secure the wood top to the blocks. You may also want to use a sealant to protect the wood from moisture.

Finally, you can add any additional features you would like to your desk. You can add shelves, drawers, or even a lamp. You can also paint the cinder blocks to match the color scheme of your room.

With a few simple materials and tools, you can easily create a stylish and functional cinder block desk. This type of desk is perfect for any room and can be customized to fit your individual style.

DIY Cinder Block Desk: Tips and Tricks for a Professional Look

Creating a cinder block desk is a great way to add a unique and stylish piece of furniture to your home. With a few simple tips and tricks, you can create a professional-looking desk that will last for years to come.

First, you’ll need to decide on the size and shape of your desk. Measure the space you have available and decide how many cinder blocks you’ll need. You can also use cinder blocks to create a corner desk or an L-shaped desk.

Next, you’ll need to prepare the cinder blocks. Make sure to clean them thoroughly and remove any dirt or debris. You can also paint the blocks to match the color scheme of your room.

Once the blocks are ready, you’ll need to assemble them. Start by laying out the blocks in the shape of your desk. Make sure to use a level to ensure that the blocks are even. Once the blocks are in place, you can use a drill to secure them together.

Finally, you’ll need to add a top to your desk. You can use a piece of wood, a sheet of glass, or even a piece of marble. Make sure to use a sealant to protect the top from moisture and wear and tear.

With these tips and tricks, you can create a professional-looking cinder block desk that will last for years to come. With a little bit of effort, you can create a unique and stylish piece of furniture that will be the envy of your friends and family.

Conclusion

The Cinder Block Desk is a great way to create a unique and functional workspace. It is an inexpensive and easy to assemble project that can be customized to fit any space. With its modern and industrial look, it is sure to be a conversation starter in any home or office. Whether you are looking for a workspace for yourself or a gift for someone else, the Cinder Block Desk is a great choice.

Small Yard, Big Style: Transforming Your Space with Small Yard Landscaping

Small Yard, Big Style: Transforming Your Space with Small Yard Landscaping is a comprehensive guide to creating a beautiful outdoor space, even if you have a small yard. This book provides readers with the tools and knowledge they need to create a stunning landscape design that fits their needs and budget. It covers topics such as choosing the right plants, creating a plan, and working with a professional landscaper. With this book, readers can learn how to make the most of their small yard and create a space that is both functional and aesthetically pleasing.

Maximizing Your Small Yard: Tips for Creating Big Style with Limited Space

Creating a beautiful outdoor space in a small yard can be a challenge, but it is possible to maximize the area and create a stylish and inviting outdoor area. With a few simple tips and tricks, you can transform your small yard into a beautiful and functional outdoor space.

1. Make the Most of Vertical Space: Vertical space is often overlooked in small yards, but it can be a great way to maximize the area. Consider adding a trellis or pergola to create a shaded area, or use wall-mounted planters to add greenery and color.

2. Choose the Right Furniture: When selecting furniture for a small yard, look for pieces that are lightweight and easy to move. Choose pieces that can be folded or stacked when not in use to save space.

3. Utilize Multi-Functional Pieces: Look for furniture and accessories that can serve multiple purposes. For example, an ottoman can be used as a footrest, extra seating, or a side table.

4. Create Separate Areas: Divide the space into separate areas to create the illusion of a larger space. Use furniture, planters, or even a rug to create distinct areas for lounging, dining, or entertaining.

5. Add Lighting: Lighting can be used to create a cozy atmosphere and make the space feel larger. Consider adding string lights, lanterns, or solar-powered lights to illuminate the area.

By following these tips, you can create a stylish and inviting outdoor space in your small yard. With a little creativity and the right furniture and accessories, you can maximize the area and create a beautiful outdoor oasis.

Get Creative with Small Yard Landscaping: Ideas for Making the Most of Your Outdoor Space

Making the most of your outdoor space can be a challenge, especially if you have a small yard. However, with a little creativity and some careful planning, you can transform your small yard into a beautiful and functional outdoor space. Here are some ideas for small yard landscaping that can help you make the most of your outdoor space.

First, consider the layout of your yard. If you have a small yard, it’s important to make sure that you use the space efficiently. Think about how you want to use the space and plan accordingly. For example, if you want to create a seating area, make sure that you leave enough room for chairs and a table. If you want to create a garden, plan out where you want to place the plants and how much space they will need.

Next, think about the types of plants and materials you want to use in your small yard landscaping. Choose plants that are low-maintenance and don’t require a lot of space. Consider using native plants that are well-suited to your climate and soil type. You can also use hardscaping materials such as pavers, stones, and gravel to create pathways and seating areas.

Finally, think about how you can add color and texture to your small yard landscaping. Use colorful flowers and plants to add a pop of color to your outdoor space. You can also use outdoor lighting to create a cozy atmosphere in the evening.

By following these tips, you can create a beautiful and functional outdoor space in your small yard. With a little creativity and careful planning, you can make the most of your outdoor space and create a space that you can enjoy for years to come.

Conclusion

Small Yard, Big Style: Transforming Your Space with Small Yard Landscaping is an invaluable resource for anyone looking to make the most of their small outdoor space. With its comprehensive advice on landscaping, design, and maintenance, this book provides readers with the tools they need to create a beautiful and functional outdoor area. Whether you’re looking to create a cozy patio, a lush garden, or a vibrant outdoor living space, Small Yard, Big Style has the tips and tricks you need to make your small yard dreams come true.

Tile Transformation: How to Paint Bathroom Tile for a Fresh Look

Tile transformation is a great way to give your bathroom a fresh, new look without having to replace the existing tile. Painting bathroom tile can be a relatively easy and inexpensive way to update the look of your bathroom. With the right preparation and the right paint, you can transform your bathroom tile into something new and exciting. In this guide, we will discuss the steps you need to take to successfully paint your bathroom tile and give it a fresh, new look.

Tips for Preparing Your Bathroom Tile for a New Paint Job

1. Thoroughly clean the tile: Before you begin painting, it is important to make sure that the tile is clean and free of dirt, dust, and debris. Use a mild detergent and a soft cloth to wipe down the tile.

2. Remove any existing paint: If the tile has been previously painted, you will need to remove the old paint before you can begin painting. Use a paint scraper or a wire brush to remove any existing paint.

3. Sand the tile: Once you have removed any existing paint, you will need to sand the tile to create a smooth surface for the new paint. Use a medium-grit sandpaper and sand the tile in a circular motion.

4. Clean the tile again: After sanding, it is important to clean the tile again to remove any dust or debris that may have been created during the sanding process. Use a damp cloth to wipe down the tile.

5. Prime the tile: Once the tile is clean and dry, you will need to prime it before you can begin painting. Use a high-quality primer that is designed for use on tile.

6. Apply the paint: Once the primer has dried, you can begin painting the tile. Use a brush or roller to apply the paint in even strokes. Allow the paint to dry completely before applying a second coat.

Creative Ideas for Transforming Your Bathroom Tile with Paint Colors

Are you looking for a way to transform your bathroom tile with paint colors? Painting your bathroom tile can be a great way to give your bathroom a fresh, new look without having to replace the tile. With the right paint and a few creative ideas, you can easily transform your bathroom tile with paint colors.

First, you will need to choose the right paint for your tile. You will want to use a paint that is specifically designed for tile and is water-resistant. This will ensure that your paint job will last for years to come. Once you have chosen the right paint, you can begin to think about the colors you would like to use.

One creative idea is to use a single color to paint all of your tile. This will give your bathroom a unified look and will make it easier to coordinate with other elements in the room. You can also use multiple colors to create a unique pattern or design. For example, you could use two different shades of blue to create a wave pattern on your tile.

Another creative idea is to use a stencil to paint your tile. This will allow you to create a unique design that is completely customized to your bathroom. You can also use a combination of colors to create a more intricate design.

Finally, you can use a combination of paint and tile to create a unique look. For example, you could paint the tile in one color and then use a different color to create a border around the tile. This will give your bathroom a unique look that is sure to stand out.

By using these creative ideas, you can easily transform your bathroom tile with paint colors. With the right paint and a few creative ideas, you can easily give your bathroom a fresh, new look without having to replace the tile.

Conclusion

Tile transformation is a great way to give your bathroom a fresh look without having to replace the tile. With the right tools and supplies, you can easily paint your bathroom tile to create a new look. Painting your tile is a relatively inexpensive and easy way to update your bathroom and give it a new look. With a few simple steps, you can transform your bathroom tile and give it a fresh look.

Why A Plumber Must Use the Right Tools

A good plumber should have all the tools required for any task they need to do at your home. These tools help the plumber make work easy and avoid any damage while doing the repair or installation. There are some tasks that you can`t handle as DIY and need the help of a professional who has the required tool to perform the work.

At some point, you might need to purchase some of these tools to run your DIY project if you need to save money and avoid hiring plumbers. You can get all the tools and services you need at Lexity Pty Ltd that will help you avoid any accidents at home. Before you can start using any device, it is essential to learn the precaution and handle it. Here are the reasons you need to have the right plumbing tools.

Let’s check.


  • Assure Customer Satisfaction

Having the right tools gives the customer confidence that you can handle the task to their expectation.

You will be able to check the background of the plumping system and advise your customers what they need to change or improve. Some clients will need you to work on the task immediately, and you need to have the required tools in place.


  • Safety

Working without any gear exposes you to unexpected injury. A plumber needs to have all tools from gear to other essential tools like an adjustable pipe wrench, tubing cutter, plumbers’ tape, etc. you need to get these tools from a reputable store because you will need them to last long. Always buy a tool that you are sure won’t bring an injury while using it.

If you don’t have the required tool, you don’t have to stress yourself with a DIY project. Get a plumber in Melbourne because they have experience and have insurance for their safety. They come with their tool to help you with any plumbing.


  • Work Efficiency

Plumbing tools are not just simple tools, you know, like hacksaws and long screwdrivers that you use daily. A professional plumber has all the modern tools that you don’t have to use much energy to control and function as instructed. Sometimes, you may find strengthening the nuts or screws difficult, but these tools will offer the support you need.


  • Save Money

You might be spending a lot of money hiring plumbers, yet the problem is easy to handle. It will help if you have the required tool to handle it on your own. But sometimes, the tools might be expensive as compared to hiring a plumber. At this point, you can sort to call Lexity Pty Ltd for help, and they visit home to do the job.


Final thoughts

If you’re not a professional, you don’t need to invent your way to do your plumbing, and you need to use each, too, as directed by the manufacturer. But if you fail to consider guidelines, you might be making the situation worse and costing you too much a profession to repair. Always keep the tool in the right place to avoid misuse by your kids and any possible injuries.

4 Types of Tile Cutters for Bathroom Tile

<2016/07/4-Types-of-Tile-Cutters-for-Bathroom-Tile.jpg">4 Types of Tile Cutters for Bathroom Tile

Tile cutters are some of the essential tools that you need for bathroom renovation projects that involve installing tiles on walls and floors. Thanks to technological advancement, there are hundreds of models that you can purchase online. Some of them are engineered for making custom and designer cuts while others can only make straight line cuts. The traditional ones used to run on batteries, but the modern ones rely on electricity to function.

Here is a brief outlook at the various bathroom tile cutters on the market today.

Handheld Wet Tile Cutters

As you can tell from the name, you will need to hold the cutter’s handle when using it to cut tiles. It has a special water container that is supply water to the saw thereby preventing tile dust from been dispensed into the air.

These types of cutters are an ideal choice for medium sized projects such as tiling small bathrooms. If you intend to cut the tiles without using water, make sure that you wear a protective dust mask to avoiding inhaling the dust particles. You can also use it to make custom cuts on virtually all types of tiles except natural stone tiles.

Snap Cutters

These are an ideal choice for simple projects that involve small cuts. To derive maximum utility from them, you need to place the tile on the machine and move the scoring wheel on the tile’s surface to make the cut.

These types of cutters are an ideal choice for projects such as cutting tiles for use around the window ledges of your bathroom and other simple projects that do not require high accuracy cuts. When shopping, it is recommended to choose one that has the ability to cut an entire tile in one shot to get the best results. They work best on tiles that are made from weak materials such as ceramic as the blade cannot cut hard surfaces. It is also recommended to press the tile against a wall or hold it under a baseboard to get straight cuts.

However, if you want smooth and precise cuts, choose a snap or rail cutter that has steel rails that are reinforced with chrome plates or wheels that are coated with titanium.

Overhead Motor Wet Cutter

They are the largest cutters in the market and are ideal for large-scale projects that require precision and exceptional tile cutting skills. You will be required to assemble the cutter on its stand or work table before using it. To make accurate cuts, it is prudent to purchase one that has laser lights to guide you. In addition, you should choose one that has a fresh water delivery system connected to the cutting wheel to get better cuts and prevent release of tile dust into the atmosphere.

Tabletop Wet Tile Saw

Just like the overhead motor wet cutter, this one is suitable for large-scale projects that require you to input or feed large pieces of tiles into the cutting wheel. The best have a drain plug that is strategically positioned at the bottom to dispose water.

Purchase any of these tile cutters from an accredited store to get value for your money. More importantly, make sure you heed to the instructions provided by the manufacturer to avoid accidents.

Elevating Elegance: Wainscoting Bathroom Ideas for Timeless Appeal

Welcome to Elevating Elegance, where we explore the timeless appeal of wainscoting bathroom ideas. Wainscoting is a classic design element that has been used for centuries to add a touch of elegance and sophistication to any room. Whether you’re looking to add a touch of classic charm to your bathroom or you’re looking for a way to update your existing bathroom, wainscoting is a great option. In this article, we’ll explore some of the most popular wainscoting bathroom ideas, from traditional paneling to modern tile designs. We’ll also discuss the benefits of wainscoting and how to choose the right style for your bathroom. So, let’s get started and explore the timeless appeal of wainscoting bathroom ideas!

How to Create a Classic Look with Wainscoting in Your Bathroom

Creating a classic look in your bathroom can be achieved with the addition of wainscoting. Wainscoting is a type of wall paneling that is typically made of wood and is used to cover the lower portion of a wall. It is a great way to add texture and visual interest to a room, and it can also help to protect the walls from moisture. Here are some tips for creating a classic look with wainscoting in your bathroom.

First, decide on the type of wainscoting you would like to use. There are several different types of wainscoting available, including beadboard, raised panel, and flat panel. Each type has its own unique look and feel, so it is important to choose the one that best suits your style.

Next, measure the walls in your bathroom and determine how much wainscoting you will need. You will also need to decide on the height of the wainscoting. Generally, it is best to have the wainscoting reach up to about three-quarters of the way up the wall.

Once you have determined the amount of wainscoting you need, you can begin the installation process. Start by attaching the wainscoting to the wall using nails or screws. Make sure to use the appropriate fasteners for the type of wainscoting you are using.

Once the wainscoting is in place, you can begin to paint or stain it. If you are using a painted wainscoting, you can choose a color that complements the other colors in the room. If you are using a stained wainscoting, you can choose a color that will bring out the natural beauty of the wood.

Finally, you can add the finishing touches to your classic look with wainscoting in your bathroom. Consider adding trim around the edges of the wainscoting to give it a more finished look. You can also add decorative molding around the top of the wainscoting to give it a more elegant look.

By following these tips, you can easily create a classic look with wainscoting in your bathroom. With the right materials and a bit of creativity, you can transform your bathroom into a beautiful and timeless space.

Elevating Elegance: Tips for Installing Wainscoting in Your Bathroom for a Timeless Look

Wainscoting is a timeless and elegant way to add character to any room in your home, and the bathroom is no exception. Installing wainscoting in your bathroom can elevate the look of the space and create a classic, sophisticated atmosphere. Here are some tips to help you get started.

1. Choose the Right Material: Wainscoting is available in a variety of materials, including wood, vinyl, and even tile. Consider the look you’re trying to achieve and the level of maintenance you’re willing to commit to when selecting the material for your wainscoting.

2. Measure Carefully: Before you begin, take precise measurements of the walls in your bathroom. This will help you determine the amount of material you’ll need to purchase.

3. Prepare the Walls: Make sure the walls are clean and free of any debris before you begin installing the wainscoting. If you’re installing wood wainscoting, you may need to sand the walls to ensure a smooth surface.

4. Install the Baseboard: Start by installing the baseboard along the bottom of the wall. This will provide a solid foundation for the rest of the wainscoting.

5. Install the Panels: Once the baseboard is in place, you can begin installing the panels. Make sure to measure and cut each panel to fit the wall before attaching it.

6. Finish with Trim: Once all the panels are in place, you can finish the look with trim around the edges. This will give the wainscoting a polished, finished look.

Installing wainscoting in your bathroom is a great way to add a timeless, elegant touch to the space. With these tips, you’ll be able to create a classic look that will last for years to come.

Conclusion

Elevating Elegance: Wainscoting Bathroom Ideas for Timeless Appeal is a great resource for anyone looking to add a timeless and elegant touch to their bathroom. With a variety of styles and materials to choose from, there is something for everyone. Whether you are looking for a classic look or something more modern, wainscoting is a great way to add a touch of sophistication and style to any bathroom. With the right materials and design, you can create a timeless and beautiful bathroom that will last for years to come.

Fireside Bliss: Backyard Fire Pit Designs for Cozy Outdoor Gatherings

Welcome to Fireside Bliss! If you’re looking for the perfect way to bring your family and friends together for a cozy outdoor gathering, then you’ve come to the right place. We specialize in backyard fire pit designs that will create a warm and inviting atmosphere for your next gathering. From traditional fire pits to modern designs, we have something for everyone. Whether you’re looking for a place to roast marshmallows or just a place to relax and enjoy the evening, we have the perfect fire pit design for you. So, let’s get started and find the perfect fire pit for your backyard gathering!

How to Create the Perfect Ambiance for Your Backyard Fire Pit: Tips for Choosing the Right Design and Accessories

Creating the perfect ambiance for your backyard fire pit can be a daunting task. With so many design and accessory options available, it can be difficult to know where to start. To help you create the perfect atmosphere for your outdoor fire pit, here are some tips for choosing the right design and accessories.

First, consider the size of your fire pit. If you have a large backyard, you may want to opt for a larger fire pit. On the other hand, if you have a smaller space, a smaller fire pit may be more suitable. Make sure to measure the area where you plan to place the fire pit before making a purchase.

Next, decide on the type of fire pit you want. There are many different types of fire pits available, including wood-burning, gas-burning, and propane-burning. Each type has its own advantages and disadvantages, so it’s important to consider which type is best for your needs.

Once you’ve chosen the type of fire pit, it’s time to select the right accessories. Fire pits come with a variety of accessories, such as grills, covers, and firewood holders. Choose accessories that will enhance the ambiance of your fire pit and make it more enjoyable to use.

Finally, consider the safety of your fire pit. Make sure to follow all safety guidelines when using your fire pit, such as keeping it away from flammable materials and never leaving it unattended. Additionally, consider purchasing a fire extinguisher and smoke detector to ensure your fire pit is as safe as possible.

By following these tips, you can create the perfect ambiance for your backyard fire pit. With the right design and accessories, you can create a cozy and inviting atmosphere that will make your outdoor space even more enjoyable.

Enjoying the Great Outdoors with a Fireside Bliss Fire Pit: Ideas for Outdoor Entertaining and Relaxation

Outdoor entertaining and relaxation can be made even more enjoyable with the addition of a Fireside Bliss Fire Pit. This stylish and functional fire pit is designed to provide warmth and ambiance to any outdoor gathering. Whether you are hosting a backyard barbecue or simply enjoying a night under the stars, a Fireside Bliss Fire Pit can help make your outdoor experience even more enjoyable.

When it comes to outdoor entertaining, a Fireside Bliss Fire Pit is the perfect centerpiece. Not only does it provide a warm and inviting atmosphere, but it also serves as a great conversation starter. Guests can gather around the fire and enjoy the warmth and light while they chat and catch up. The fire pit also provides a great spot for roasting marshmallows or making s’mores.

For those looking to relax outdoors, a Fireside Bliss Fire Pit is the perfect way to unwind. Whether you are reading a book, listening to music, or simply enjoying the night sky, the fire pit provides a cozy and inviting atmosphere. The warmth of the fire can help you relax and enjoy the great outdoors.

When it comes to safety, a Fireside Bliss Fire Pit is designed with safety in mind. The fire pit is made from durable steel and features a spark guard to help contain sparks and embers. The fire pit also comes with a fire poker and a fire screen to help keep the fire contained.

Whether you are looking to entertain or relax, a Fireside Bliss Fire Pit is the perfect addition to any outdoor space. With its stylish design and functional features, it is sure to make any outdoor gathering even more enjoyable. So, gather your friends and family and enjoy the great outdoors with a Fireside Bliss Fire Pit.

Conclusion

Fireside Bliss: Backyard Fire Pit Designs for Cozy Outdoor Gatherings is a great resource for anyone looking to create a cozy outdoor gathering space. With a variety of designs and materials to choose from, you can create a fire pit that fits your style and budget. Whether you’re looking for a traditional fire pit or something more modern, you can find the perfect design to make your outdoor gathering space a place of warmth and relaxation.

Timeless Charm: Incorporating Arch Molding to Add Elegance to Your Interiors

Timeless Charm: Incorporating Arch Molding to Add Elegance to Your Interiors is a comprehensive guide to using arch molding to create a timeless and elegant look in your home. Arch molding is a classic architectural element that has been used for centuries to add a touch of sophistication and beauty to any interior. This guide will provide you with all the information you need to incorporate arch molding into your home, from selecting the right materials and colors to installation tips and tricks. With the help of this guide, you can easily create a timeless and elegant look in your home that will last for years to come.

How to Use Arch Molding to Create Timeless Charm in Your Home

Arch molding is a timeless architectural feature that can add charm and character to any home. It is a type of trim that is used to create an archway or doorway, and it can be used to frame windows, doorways, and other openings. Arch molding can be used to create a classic, timeless look in any home.

When using arch molding, it is important to choose the right type of material. Wood is the most common material used for arch molding, but other materials such as plaster, stone, and metal can also be used. The material should be chosen based on the style of the home and the desired look.

Once the material has been chosen, the next step is to measure the opening for the arch molding. Measure the width and height of the opening and then use a saw to cut the arch molding to the correct size. It is important to make sure that the arch molding is cut to the exact size of the opening, as any gaps or overhangs can detract from the look of the arch.

Once the arch molding has been cut to size, it is time to install it. The arch molding should be attached to the wall using nails or screws. It is important to make sure that the arch molding is securely attached to the wall, as any movement can cause the arch to become misaligned.

Once the arch molding is installed, it is time to finish it. Paint or stain can be used to give the arch molding a finished look. If the arch molding is made of wood, it is important to use a sealer to protect it from moisture and other elements.

Arch molding is a great way to add timeless charm to any home. It is a classic architectural feature that can be used to frame windows, doorways, and other openings. With the right materials and installation techniques, arch molding can create a timeless look that will last for years to come.

The Benefits of Incorporating Arch Molding into Your Home Design for a Classic Look

Arch molding is a timeless and classic design element that can add a touch of elegance to any home. Incorporating arch molding into your home design can provide a variety of benefits, from enhancing the aesthetic appeal of your home to increasing its value.

Arch molding is a type of trim that is used to create an archway or doorway. It is typically made from wood, but can also be made from other materials such as plaster or stone. Arch molding is available in a variety of styles and designs, allowing you to customize the look of your home to suit your personal taste.

One of the primary benefits of incorporating arch molding into your home design is its aesthetic appeal. Arch molding can add a touch of sophistication and elegance to any room, making it look more inviting and luxurious. It can also be used to create a focal point in a room, drawing the eye to a particular area.

In addition to its aesthetic appeal, arch molding can also increase the value of your home. This is because arch molding is considered a classic design element that is timeless and will never go out of style. As such, it can be a great investment for homeowners who are looking to increase the value of their home.

Finally, arch molding is also relatively easy to install and maintain. It is a relatively simple process that can be done by most homeowners with minimal tools and experience. Additionally, arch molding is also relatively low maintenance, requiring only occasional cleaning and polishing to keep it looking its best.

Incorporating arch molding into your home design can provide a variety of benefits, from enhancing the aesthetic appeal of your home to increasing its value. With its timeless and classic design, arch molding is sure to add a touch of elegance and sophistication to any home.

Conclusion

Timeless Charm: Incorporating Arch Molding to Add Elegance to Your Interiors is a great resource for anyone looking to add a touch of elegance to their home. Arch molding is a timeless and classic design element that can be used to create a variety of looks, from traditional to modern. With the right materials and tools, anyone can create a beautiful arch molding feature in their home. Whether you are looking to add a touch of sophistication to your living room or a grand entrance to your home, arch molding is a great way to add timeless charm and elegance to any interior.

When Demolition is a Better Option


When your home structure is already too old and facing risks of serious damage from water, fire, or mold, remodeling or renovation work won’t be a suitable solution. It would no longer enough given the scope of existing problem and rebuilding can be a better option. It is true that this option would be involving demolition of the old structure of the house.

Depends of the actual condition, it can be demolition of partial structure or full demolition of the whole house structure. This option allows you to build new structure that meets the latest safety standard while also able to accommodate the current and future needs of your family. Of course, residential demolition isn’t a simple project. It needs to be done optimally and safely. It must cause minimum impact to surrounding environment and people living there. Western Environmental Solutions is the expert is residential demolition service. It has team of professionals highly trained and full experienced in partial or full demolition of residential building. It is including handling potentially hazardous materials such as asbestos that is commonly found in old house structure. The team form this company will safely demolish the old and unwanted structure and removing all materials and debris that the space is ready for building new structure.

Once the area is cleared from old structure, the new structure can be started to build. It is a good thing that you are thinking about Basement Developments. It can be an extra space to accommodate several needs from storage space to utilities installation. Golden Acre Renovations is Calgary’s top renovation and remodeling contractor. This company has the expertise and resources to help you design and build new basement structure as well as renovating and remodeling old basement. Don’t hesitate to call them and let their team of experts help you with the plan.

Clarifying Common Myths about Bathing and Shower Essentials

<2016/05/Clarifying-Common-Myths-about-Bathing-and-Shower-Essentials-.jpg">Clarifying Common Myths about Bathing and Shower EssentialsWe take a bath each day because we want to stay clean and fresh. Some others also take a bath just to release stress from their body. You will feel that you have a better perspective as soon as you get out of the bathroom. However, there are myths about bathing and items used for bathing that are not helpful in any way. Therefore, you need to know the facts.

Myth 1 – You should not bathe at night

Some people say that bathing at night is not good for your health. Your muscles are tired the entire day and it does not help if you hit the shower at night. The truth is that whatever time of the day it is, you need to be clean. So, if you have been exposed outdoors the entire day, it is best to take a shower before you hit the bed. Imagine letting dust and dirt stick on your body until the next day. That is more likely to cause illnesses than bathing at night.

Myth 2 – Sick people should not take a bath

This is not necessarily a myth, but when you are sick, you don’t want to take a bath. You think that it is too cold. It is just normal considering the change in your body temperature. However, you need to battle it out since you still have to be clean. You will get even worse if you don’t clean your body. If you can’t take a shower, you can at least get a towel and dip it in hot water and clean your body.

Myth 3 – Scented candles can cause cancer

Are you one of those people who love using scented candles when bathing? There was research in the past that revealed they contain substances that may cause cancer. In a way, this has been proven. However, there are a lot of scented candles available today that are made from organic substances. The scent comes from plants. Therefore, they are totally safe.

Myth 4 – Shower enclosures are expensive

Many movies show the stars bathing, and their shower room usually has a shower pod. But these can be enjoyed by anyone seeking a little luxury in their daily routine. The truth is that there are different types of shower pods that can be used at home. There are also different sizes available depending on the size of your bathroom. You can start comparing options so that you can find the best choice.

Now that you have finally realized the truth behind these myths, it is time to hit the shower and enjoy your bathing experience.

Image: freedigitalphotos.net (just2shutter)

Brick Pattern: Adding Texture and Style to Your Interior or Exterior

Brick pattern is a popular design choice for both interior and exterior spaces. It adds texture and style to any space, creating a unique and eye-catching look. Brick pattern can be used to create a classic, timeless look or to add a modern, contemporary feel. It can be used to create a feature wall, to line a fireplace, or to create a unique flooring design. Brick pattern is also a great way to add texture and interest to outdoor spaces, such as patios and walkways. With its versatility and timeless appeal, brick pattern is a great choice for any space.

How to Incorporate Brick Pattern into Your Home Design: Tips for Enhancing Your Interior and Exterior Spaces

Brick pattern is a timeless and classic design element that can be used to enhance the look of any home. Whether you’re looking to add a touch of rustic charm to your interior or exterior spaces, incorporating brick pattern into your home design can be a great way to add visual interest and texture. Here are some tips for incorporating brick pattern into your home design:

1. Use brick pattern to create a feature wall. Feature walls are a great way to add a unique and eye-catching element to any room. Consider using brick pattern to create a feature wall in your living room, bedroom, or kitchen. You can also use brick pattern to create an accent wall in your entryway or hallway.

2. Incorporate brick pattern into your outdoor living spaces. Brick pattern can be used to create a beautiful patio or walkway. Consider using brick pattern to create a stunning outdoor fireplace or fire pit. You can also use brick pattern to create a unique and eye-catching outdoor kitchen or dining area.

3. Use brick pattern to create a unique backsplash. Backsplashes are a great way to add texture and visual interest to any kitchen. Consider using brick pattern to create a unique and eye-catching backsplash. You can also use brick pattern to create a unique and eye-catching accent wall in your bathroom.

4. Incorporate brick pattern into your landscaping. Brick pattern can be used to create a beautiful and unique walkway or patio in your yard. Consider using brick pattern to create a stunning retaining wall or garden bed. You can also use brick pattern to create a unique and eye-catching outdoor fireplace or fire pit.

By incorporating brick pattern into your home design, you can add texture, visual interest, and timeless charm to any space. Whether you’re looking to create a feature wall, outdoor living space, or unique backsplash, brick pattern can be a great way to enhance the look of your home.

Exploring the Benefits of Brick Pattern: Aesthetic Appeal and Durability for Your Home

Brick pattern is a popular choice for many homeowners looking to add a touch of style and sophistication to their home. Not only does it provide an aesthetically pleasing look, but it also offers a level of durability that is hard to match. In this article, we will explore the benefits of brick pattern and how it can enhance the look and feel of your home.

When it comes to aesthetic appeal, brick pattern is a great choice. It adds a classic, timeless look to any home, and can be used in a variety of ways. Whether you are looking to create a traditional look or a more modern feel, brick pattern can be used to achieve the desired effect. Additionally, brick pattern can be used to create a variety of textures and colors, allowing you to customize the look of your home.

In addition to its aesthetic appeal, brick pattern is also incredibly durable. It is resistant to wear and tear, and can withstand extreme temperatures and weather conditions. This makes it an ideal choice for outdoor areas, such as patios and walkways. It is also easy to maintain, requiring only occasional cleaning to keep it looking its best.

Finally, brick pattern is an affordable option for homeowners. It is relatively inexpensive compared to other materials, and can be installed quickly and easily. This makes it a great choice for those looking to add a touch of style to their home without breaking the bank.

In conclusion, brick pattern is an excellent choice for homeowners looking to add a touch of style and sophistication to their home. Not only does it provide an aesthetically pleasing look, but it also offers a level of durability that is hard to match. Additionally, it is an affordable option that can be installed quickly and easily. For these reasons, brick pattern is an ideal choice for any homeowner looking to enhance the look and feel of their home.

Conclusion

Brick pattern is a great way to add texture and style to any interior or exterior space. It is a timeless look that can be used in a variety of ways to create a unique and stylish look. Whether you are looking for a classic look or something more modern, brick pattern can be used to create a beautiful and unique look that will last for years to come. With its versatility and durability, brick pattern is a great choice for any home or business.