Dreamscapes Unveiled: Exploring Creative Dream House Ideas

Dreamscapes Unveiled: Exploring Creative Dream House Ideas is a book that provides readers with a unique look into the world of dream house design. It is a comprehensive guide to creating the perfect dream home, from the initial concept to the finished product. The book is filled with inspiring ideas and practical advice on how to make your dream home a reality. It covers topics such as budgeting, design, construction, and decorating, as well as tips on how to make the most of your space. With Dreamscapes Unveiled, you can explore the possibilities of creating a dream home that is both beautiful and functional.

How to Design a Dream House on a Budget: Tips and Tricks from Dreamscapes Unveiled

Designing a dream house on a budget can seem like an impossible task. However, with the right tips and tricks, it is possible to create a beautiful and functional home without breaking the bank. Dreamscapes Unveiled has compiled the following advice to help you design your dream house on a budget.

1. Start with a plan. Before you begin shopping for furniture and decor, it is important to have a plan in place. Take the time to research different design styles and create a budget that outlines how much you can spend on each room. This will help you stay on track and ensure that you don’t overspend.

2. Shop around. Don’t be afraid to shop around for the best deals. Compare prices online and in stores to find the best deals. You may also want to consider buying used furniture and decor to save money.

3. Get creative. You don’t have to buy everything new. Get creative and find ways to repurpose items you already have or find second-hand items that can be upcycled.

4. Invest in quality. While it is important to stay within your budget, it is also important to invest in quality pieces that will last. Investing in quality furniture and decor will save you money in the long run.

5. Don’t forget the details. Don’t forget to add the finishing touches to your dream house. Small details like throw pillows, rugs, and artwork can make a big difference in the overall look and feel of your home.

By following these tips and tricks, you can design your dream house on a budget. With a little creativity and patience, you can create a beautiful and functional home that you will love for years to come.

Exploring the Creative Possibilities of Dream House Design with Dreamscapes Unveiled

Dream House Design is an exciting and creative way to bring your dream home to life. With Dreamscapes Unveiled, you can explore the possibilities of creating a unique and personalized home that reflects your individual style and taste.

Dreamscapes Unveiled offers a wide range of design options to choose from, allowing you to customize your dream house to your exact specifications. From traditional to modern, you can select from a variety of floor plans, materials, and colors to create a home that is truly unique. With the help of Dreamscapes Unveiled’s experienced design team, you can create a home that is both aesthetically pleasing and functional.

The design process begins with a consultation with the Dreamscapes Unveiled team. During this consultation, you will discuss your vision for your dream house and the design team will help you create a plan that meets your needs. From there, you can select the materials, colors, and features that will make your dream house come to life.

Once the design is complete, Dreamscapes Unveiled will provide you with a detailed 3D rendering of your dream house. This rendering will allow you to visualize your dream house in its entirety, giving you the opportunity to make any necessary changes before construction begins.

Dreamscapes Unveiled also offers a variety of services to help you bring your dream house to life. From interior design to landscaping, the team can help you create a home that is both beautiful and functional.

Dream House Design with Dreamscapes Unveiled is an exciting and creative way to bring your dream home to life. With the help of the experienced design team, you can create a home that is both aesthetically pleasing and functional. From traditional to modern, you can select from a variety of floor plans, materials, and colors to create a home that is truly unique. With the help of Dreamscapes Unveiled’s 3D rendering, you can visualize your dream house in its entirety, giving you the opportunity to make any necessary changes before construction begins. With Dreamscapes Unveiled, you can explore the creative possibilities of Dream House Design and bring your dream home to life.

Conclusion

Dreamscapes Unveiled: Exploring Creative Dream House Ideas is an inspiring and informative book that provides readers with a wealth of ideas for creating their own dream home. From traditional to modern, from rustic to luxurious, the book offers a wide range of design options to suit any taste. With its detailed descriptions and helpful illustrations, Dreamscapes Unveiled is an invaluable resource for anyone looking to create their own dream home.

Backyard Makeovers: Transforming Your Outdoor Space with Aesthetic Flair

Backyard makeovers are a great way to transform your outdoor space into a beautiful and functional area. Whether you’re looking to create a cozy outdoor living space, a relaxing retreat, or a fun and inviting play area for your family, a backyard makeover can help you achieve your goals. With the right design elements, you can create a backyard that is both aesthetically pleasing and practical. From adding a deck or patio to creating a garden oasis, there are many ways to make your backyard a place you’ll love to spend time in. With a little creativity and some hard work, you can transform your outdoor space into a place of beauty and relaxation.

How to Create a Cozy Outdoor Retreat with a Backyard Makeover

Creating a cozy outdoor retreat in your backyard is a great way to enjoy the outdoors and relax in your own private space. With a few simple changes, you can transform your backyard into a tranquil oasis. Here are some tips for creating a backyard makeover that will help you create a cozy outdoor retreat.

First, consider the layout of your backyard. Think about how you want to use the space and what type of seating and furniture you would like to include. If you have a large backyard, you may want to create separate areas for different activities. For example, you could have a seating area for relaxing, a dining area for entertaining, and a play area for children.

Next, choose the right materials for your backyard makeover. Natural materials such as wood, stone, and brick can create a cozy atmosphere. If you want to add a bit of color, consider adding some colorful cushions or outdoor rugs.

Once you have the layout and materials in place, it’s time to add some lighting. String lights, lanterns, and torches can create a warm and inviting atmosphere. You can also add some outdoor speakers to create a relaxing ambiance.

Finally, add some plants and greenery to your backyard makeover. Plants can help to create a sense of privacy and can also add a touch of nature to your outdoor retreat. Consider adding some potted plants, shrubs, and trees to your backyard.

With these tips, you can create a cozy outdoor retreat with a backyard makeover. With the right layout, materials, lighting, and plants, you can create a tranquil oasis in your own backyard.

5 Tips for Incorporating Colorful Plants and Flowers into Your Backyard Makeover

1. Choose Plants That Are Appropriate for Your Climate: When selecting plants and flowers for your backyard makeover, it is important to choose varieties that are suitable for your local climate. This will ensure that your plants and flowers will thrive and remain healthy.

2. Consider Plant Placement: When planning your backyard makeover, consider the placement of your plants and flowers. Make sure to place them in areas that will receive adequate sunlight and water.

3. Utilize Containers: Utilizing containers is a great way to add color and texture to your backyard. Containers can be used to create a focal point or to add a pop of color to an otherwise dull area.

4. Incorporate Colorful Foliage: Incorporating colorful foliage is a great way to add color to your backyard without relying solely on flowers. Consider adding plants with colorful leaves, such as coleus or caladiums.

5. Plant in Groups: Planting in groups is a great way to create a bold and vibrant look. Grouping plants and flowers together will create a more unified and eye-catching look.

Conclusion

Backyard makeovers are a great way to transform your outdoor space into a beautiful and inviting area. With the right design elements, you can create a space that is both aesthetically pleasing and functional. Whether you are looking to add a touch of elegance to your outdoor space or create a cozy and inviting atmosphere, backyard makeovers can help you achieve your desired look. With the right materials, tools, and design ideas, you can create a backyard makeover that will be the envy of your neighbors.

Looking for Cosyness? Consider an Antique Fireplace


After a long and exhausting day at work, most of us crave for a calm rest. A lot of people may drink a cup of wine. Some may hit the gym to sweat the stress. And others may walk around the park while seeing the tranquil darkness with the lights from malls, department stores, and commercial establishments.

But not all people prefer this after-work routine. Many individuals prefer sitting on a couch for an hour before they eat dinner. The comfy sofa and the classic songs are enough to give some a smile and forget the stress for a while. Still, there are ways to get the most out of the time? How are you going to do that? And what’s the best thing to bring your relaxation up to the maximum level?

It’s simple! Why don’t you consider an antique marble fire surround? Although you’re not fond of a fireplace with a classic theme, perhaps, this time would be different. You’ll probably find it amazing. Sitting on comfortable chair while feeling the heat from an antique fireplace is totally good. Your everyday experience during the long season of winter is very nostalgic. It would bring all happy memories back when your grandparents gathered every cold night. You’d remember the times when your mom sang a lullaby until you got to sleep.

Of course, many people would prefer a soft bed or cozy couch while sipping a cold beverage. But sitting in front of an antique fireplace is different. The heat is very soothing and the pieces of wood that turn to ashes is fascinating. It would give you a deep thought and start the other day with a sense of positivity.

Whether this is your first time to consider an antique fireplace or want to replace an old one, there’s a number of options out there you shouldn’t miss. However, the variety of choices would give you some trouble. Good news! Thornhill Galleries has everything for you! From antique to marble, we got you covered! We can help you find the right option in just a snap. All the hassles you think won’t be a huge dilemma anymore.

Despite the number of options to trust, Thornhill Galleries stand out from the competition. They have a special place on the market because of the highest quality and most affordable antique fireplaces solutions! For further details, please feel free to contact them.


Tips to Get Proper Residential Locksmith Services Near Me

<2017/06/Tips-to-Get-Proper-Residential-Locksmith-Services-Near-Me.jpg">

The high locks in most homes show how homeowners value everything inside their homes. Residential locksmith services come in handy when your locks are spoilt, or you just lost the keys to your home. In fact, locksmith services near me can handle all the issues that involve locks and keys. Getting a reliable locksmith is not easy. You need someone who is reliable because your door locks may break or fail when you least expect. You would not want to be stuck inside your house on a working day. Below are some tips to help you choose the ideal residential locksmiths near me.

First, you must always look for the services of a qualified locksmith. These professionals are trained to handle different types of locks. Modern locks can be very complicated, and your handyman may end up spoiling the lock if he does not know what he is doing. Instead of incurring extra costs of buying a new lock, get a qualified locksmith who will sort out the problem in a cost-effective and timely manner. Look for a residential locksmith near me with the experience and expertise to handle a complicated lock.

Additionally, a good residential locksmith near me will always give you the right advice on whether to fix the current lock or install a new one altogether. Locks are exposed to a lot of abuse and may end up failing from time to time. Even the best locks will have to be replaced after certain duration. In case you are moving to a brand new home, you will need to have a locksmith install a new set of locks.

It is also important to make sure the locksmith offers a variety of services. A good locksmith should be your go-to guy whenever you are faced with any security concerns in your home. There are even locksmiths who can install a home safe with the right locks in your home. A residential locksmith near me should also be able to set up peepholes on your doors and repair or upgrade all kinds of locks in your home.

When looking for the best residential locksmiths near me, make sure you confirm on their availability. The best locksmiths will offer their services 24 hours a day seven days a week. You should call them at any time and receive great customer service. Reliable Locksmiths also offer free estimates to allow you to budget ahead for their services.

Most importantly, choose a residential locksmith near me who is capable of giving you quality services whenever you need them. Whether you lock yourself out of your house or you need a new set of keys, a reliable locksmith should only be a call away. When searching for locksmiths online, go through some reviews to be confident that you are hiring a competent professional. With so many people offering residential locksmith services near me, you must do your homework if you want to get the best service provider.

How Much Does a Sprinkler System Cost? Budgeting for Lawn Care

Having a lush, green lawn is a great way to add curb appeal to your home. But keeping your lawn looking its best can be a challenge. One way to make lawn care easier is to install a sprinkler system. A sprinkler system can help you keep your lawn healthy and looking great with minimal effort. But before you install a sprinkler system, you need to know how much it will cost. This article will provide an overview of the cost of a sprinkler system, including installation and maintenance costs. It will also provide tips on how to budget for lawn care and how to save money on a sprinkler system.

How to Budget for a Sprinkler System: Tips for Estimating Costs and Finding the Right System for Your Lawn

Installing a sprinkler system is a great way to keep your lawn looking lush and green. However, it is important to budget for the system correctly to ensure that you get the best system for your needs without overspending. Here are some tips for estimating costs and finding the right system for your lawn.

1. Determine Your Needs: Before you start shopping for a sprinkler system, it is important to determine your needs. Consider the size of your lawn, the type of soil, and the amount of water you need to provide. This will help you narrow down your options and determine the type of system that will work best for your lawn.

2. Research Prices: Once you know what type of system you need, it is time to start researching prices. Look at different brands and models to get an idea of the cost. You can also compare prices online to find the best deal.

3. Estimate Installation Costs: Installation costs can vary depending on the complexity of the system and the size of your lawn. It is important to get an estimate from a professional before you commit to a system. This will help you budget for the installation and ensure that you are not overspending.

4. Consider Maintenance Costs: Maintenance costs can add up over time, so it is important to factor them into your budget. Make sure to research the maintenance requirements for the system you are considering and factor in the cost of any necessary supplies.

5. Shop Around: Once you have an idea of the type of system you need and the cost, it is time to start shopping around. Compare prices and features to find the best system for your needs.

By following these tips, you can ensure that you get the best system for your lawn without overspending. With the right system in place, you can enjoy a beautiful, healthy lawn for years to come.

The Pros and Cons of Installing a Sprinkler System: What to Consider Before Investing in a Sprinkler System

Installing a sprinkler system can be a great way to ensure that your lawn and garden are properly watered and maintained. However, before investing in a sprinkler system, it is important to consider the pros and cons of such an installation.

Pros

The primary benefit of installing a sprinkler system is that it can save you time and effort. With a sprinkler system, you can set a timer to water your lawn and garden at specific times, eliminating the need to manually water your plants. Additionally, sprinkler systems can help you conserve water, as they are designed to deliver water in a more efficient manner than manual watering.

Another benefit of installing a sprinkler system is that it can help you maintain a healthy lawn and garden. Sprinkler systems can help ensure that your plants receive the right amount of water, which can help them grow and thrive.

Cons

The primary downside of installing a sprinkler system is the cost. Sprinkler systems can be expensive to install and maintain, and they may require professional installation. Additionally, if you live in an area with hard water, you may need to invest in a water softener to ensure that your sprinkler system works properly.

Another potential downside of installing a sprinkler system is that it can be difficult to maintain. Sprinkler systems require regular maintenance and repairs, and if they are not properly maintained, they can become inefficient or even malfunction.

Conclusion

Installing a sprinkler system can be a great way to save time and effort while ensuring that your lawn and garden are properly watered and maintained. However, it is important to consider the pros and cons of such an installation before investing in a sprinkler system. By weighing the costs and benefits of installing a sprinkler system, you can make an informed decision about whether or not it is the right choice for you.

Conclusion

A sprinkler system is an important investment for any homeowner looking to maintain a healthy and beautiful lawn. The cost of a sprinkler system can vary greatly depending on the size of the lawn, the type of system, and the complexity of the installation. However, with careful planning and budgeting, it is possible to find a sprinkler system that fits within your budget and meets your needs. With the right system, you can enjoy a lush, green lawn for years to come.

Homemade Gifts for Your Boyfriend: Thoughtful DIY Gestures

Homemade gifts for your boyfriend are a great way to show your love and appreciation. DIY gifts are thoughtful and meaningful, and they can be tailored to your boyfriend’s interests and hobbies. Whether you’re looking for a romantic gesture or a practical gift, there are plenty of DIY ideas that will make your boyfriend feel special. From personalized photo albums to homemade snacks, these homemade gifts are sure to make your boyfriend feel loved and appreciated.

How to Make a Homemade Gift Basket for Your Boyfriend: Ideas and Tips for Crafting the Perfect Present

Crafting the perfect gift basket for your boyfriend can be a daunting task. However, with a few simple tips and ideas, you can create a thoughtful and unique present that your boyfriend will love.

First, consider your boyfriend’s interests and hobbies. What does he enjoy doing? What are his favorite activities? Knowing this information will help you choose the items for the gift basket. For example, if your boyfriend loves to cook, you could include a cookbook, a set of kitchen utensils, or a selection of his favorite spices. If he’s a sports fan, you could include a jersey or a signed photo of his favorite athlete.

Next, think about the presentation. Gift baskets are all about presentation, so make sure to choose a basket that is both attractive and functional. You can find a variety of baskets at craft stores, or you can get creative and make your own. Once you have the basket, you can fill it with tissue paper, shredded paper, or other decorative items.

Finally, choose the items for the basket. You can include items that are practical, such as a gift card or a new wallet, or you can choose items that are more sentimental, such as a framed photo of the two of you or a handwritten note. You can also include items that are related to his hobbies or interests, such as a new video game or a book about his favorite sport.

Creating a homemade gift basket for your boyfriend is a great way to show him how much you care. With a little bit of thought and creativity, you can craft the perfect present that he will cherish for years to come.

Creative DIY Projects to Show Your Boyfriend You Care: Ideas for Making Unique Homemade Gifts

Showing your boyfriend that you care doesn’t have to be expensive or complicated. With a little creativity and effort, you can make unique homemade gifts that will show him just how much you care. Here are some creative DIY projects to get you started.

1. Create a personalized photo album. Gather photos of the two of you together and arrange them in a scrapbook or photo album. Include captions and special memories to make it even more meaningful.

2. Make a custom t-shirt. Use fabric paint or iron-on transfers to create a one-of-a-kind t-shirt with a special message or design.

3. Bake a special treat. Whether it’s his favorite cookies or a cake decorated with a special message, baking something special is sure to show him how much you care.

4. Put together a care package. Fill a box with his favorite snacks, a movie, and a handwritten note expressing your love.

5. Create a custom mug. Use a permanent marker to write a special message on a plain white mug.

6. Make a coupon book. Create a book of coupons for special activities or treats that you can do together.

7. Put together a memory jar. Fill a jar with notes, photos, and other mementos that remind you of your relationship.

8. Create a custom playlist. Put together a playlist of songs that remind you of your relationship and share it with him.

These are just a few ideas for creative DIY projects that you can use to show your boyfriend how much you care. With a little effort and creativity, you can make unique homemade gifts that will show him just how much you mean to him.

Conclusion

Homemade gifts for your boyfriend are a great way to show your love and appreciation. They are thoughtful, meaningful, and can be tailored to your boyfriend’s interests and hobbies. Whether you make something from scratch or put together a gift basket, your boyfriend will be sure to appreciate the effort you put into it. With a little creativity and effort, you can make a homemade gift that your boyfriend will cherish for years to come.

Built-In Spice Rack: Organizing and Accessorizing Your Kitchen Space

The kitchen is the heart of the home, and having a well-organized and efficient space is essential for any home chef. A built-in spice rack is a great way to keep your spices organized and easily accessible. Not only does it provide a convenient way to store and access your spices, but it also adds a stylish touch to your kitchen. With a built-in spice rack, you can easily find the spices you need and keep them organized in one place. Plus, you can customize the design to fit your kitchen’s style and décor. Whether you’re looking for a modern, minimalist look or a more traditional style, there are plenty of options to choose from. With a built-in spice rack, you can make the most of your kitchen space and create a beautiful and functional space.

How to Maximize Your Kitchen Space with a Built-In Spice Rack

Having a built-in spice rack in your kitchen is a great way to maximize your kitchen space and keep your spices organized. A built-in spice rack can be installed in a variety of places, such as inside a cabinet, on the wall, or even on the side of the refrigerator. Here are some tips for making the most of your built-in spice rack.

First, consider the size of your spice rack. If you have a large kitchen, you may want to opt for a larger spice rack that can hold more spices. If you have a smaller kitchen, you may want to choose a smaller spice rack that can still hold all of your spices but won’t take up too much space.

Second, think about the type of spices you use most often. If you use a lot of herbs and spices, you may want to opt for a larger spice rack that can hold more of them. If you only use a few spices, you may want to choose a smaller spice rack that can still hold all of your spices but won’t take up too much space.

Third, consider the location of your spice rack. If you have a lot of counter space, you may want to install your spice rack on the countertop. If you don’t have a lot of counter space, you may want to install your spice rack inside a cabinet or on the wall.

Fourth, think about the type of materials you want to use for your spice rack. You can choose from a variety of materials, such as wood, metal, or plastic. Each material has its own advantages and disadvantages, so it’s important to consider which material will work best for your kitchen.

Finally, make sure to measure the area where you plan to install your spice rack. This will ensure that your spice rack fits properly and won’t take up too much space.

By following these tips, you can maximize your kitchen space with a built-in spice rack and keep your spices organized.

Creative Ways to Accessorize Your Built-In Spice Rack for a Stylish Kitchen

1. Hang a decorative wall art piece above the spice rack. Choose a piece that complements the colors of your kitchen and spices.

2. Place a small potted plant on top of the spice rack. This will add a touch of greenery to your kitchen and make it look more inviting.

3. Add a few colorful ceramic jars to the spice rack. This will add a pop of color and make the rack look more interesting.

4. Hang a few decorative kitchen towels from the spice rack. This will add a touch of style and make the rack look more organized.

5. Place a few decorative plates or platters on the spice rack. This will add a touch of sophistication and make the rack look more stylish.

6. Hang a few decorative kitchen utensils from the spice rack. This will add a touch of whimsy and make the rack look more interesting.

7. Place a few decorative candles on the spice rack. This will add a touch of warmth and make the rack look more inviting.

8. Hang a few decorative kitchen magnets from the spice rack. This will add a touch of fun and make the rack look more playful.

Conclusion

The Built-In Spice Rack is a great way to organize and accessorize your kitchen space. It is a convenient and stylish way to store your spices and other kitchen items. The rack is easy to install and can be customized to fit any kitchen space. With its sleek design and adjustable shelves, the Built-In Spice Rack is a great addition to any kitchen. It is a great way to keep your kitchen organized and looking great.

When You Want to Buy Garden Bench

It is a good thing to turn some of the yard outside your house into an outdoor space for your family. You can build a patio or garden space. It would be really useful to accommodate your family activities from as simple as sitting together over a cup of coffee in the morning to a fun barbeque with friends on a summer night. Of course, there are things to prepare to make the outdoor space accommodative enough and among them is looking for the right benches.

It would be more comfortable to sit and enjoy the outdoor atmosphere rather than standing all the time. That’s why having the right garden benches very important. It’s not just any bench but the one suitable for outdoor space or garden. For many people, swing benches would be more preferable option. Swing benches, including swing beds and porch swings, are really compatible with the relaxed atmosphere or an outdoor garden. It is also fun and enjoyable to sit on swing benches and get lazy.

Before you decide which bench to buy, it is very important to give more attention to the factors to consider when buying a garden bench. Those factors are including:

The space on the outdoor porch or patio

It is related to how many and what kind of type of benches the outdoor space can accommodate. Each bench needs certain space and between one bench to another, there must be proper space to allow free movement of people. In case you prefer swing beds or porch swings, the space needed will be much bigger.

Durability against harsh weathers

As the benches will be placed outdoor all the time, it will be exposed with possible extreme environment and not to mention different weather from one season to another. The benches must be durable enough to withstand. It must be made from materials and proper finishing strong enough to last for years.

How to assemble the bench

When you order the bench or porch swing online, it will be delivered to your place in knocked down packaging. You need to assemble all parts right to make the structure. The more sophisticated the structure, the more complicated to assemble it. However, including the package is the assembly instructions you can easily follow.

In case you are looking for a good looking and comfortable garden bench that is easy to assemble and will last for years, you are highly recommended to consider buying from The Charming Bench Company. This is the one stop online shop specializing in benches, swings, and outdoor furniture. It is committed to provide its customers with highly curated finely crafted benches and accessories. Among its collections are wide selections of garden bench and swing from top leading suppliers. You can choose from many different models with varieties of material and styles to find the one that really fits the outdoor space at your home. Your order will be delivered with easy to follow assembly instruction to make sure the bench and swing can be installed perfectly without any hassle.

How to Install Carpet on Stairs: Transforming Your Steps with Quality Flooring

Installing carpet on stairs can be a great way to transform your home and add a touch of luxury to your steps. Carpeting your stairs can be a relatively simple process, but it is important to take the time to do it correctly. With the right tools and materials, you can easily install carpet on your stairs and create a beautiful, comfortable, and safe environment for your family. In this guide, we will provide you with all the information you need to install carpet on your stairs, from selecting the right type of carpet to properly installing it. With the right preparation and attention to detail, you can easily install carpet on your stairs and enjoy the benefits of a beautiful, comfortable, and safe home.

Step-by-Step Guide to Installing Carpet on Stairs: What You Need to Know

Installing carpet on stairs can be a daunting task, but with the right tools and knowledge, it can be done with relative ease. This step-by-step guide will provide you with the information you need to successfully install carpet on your stairs.

1. Measure the stairs. Before you begin, you will need to measure the stairs to determine the amount of carpet you will need. Measure the length and width of each step, as well as the length of the stairway.

2. Purchase the necessary materials. Once you have determined the amount of carpet you need, you can purchase the necessary materials. This includes the carpet, padding, tack strips, and any other materials you may need.

3. Remove the old carpet. Before you can install the new carpet, you will need to remove the old carpet. This can be done by using a utility knife to cut the carpet away from the tack strips.

4. Install the tack strips. Once the old carpet has been removed, you can install the tack strips. These strips should be placed along the edges of each step, as well as along the length of the stairway.

5. Install the padding. Once the tack strips have been installed, you can install the padding. This should be placed on top of the tack strips and should be cut to fit the shape of the stairs.

6. Install the carpet. Once the padding has been installed, you can install the carpet. This should be cut to fit the shape of the stairs and should be secured to the tack strips.

7. Trim the edges. Once the carpet has been installed, you can trim the edges. This should be done with a utility knife and should be done carefully to ensure a neat finish.

By following these steps, you can successfully install carpet on your stairs. With the right tools and knowledge, you can have a beautiful and durable staircase in no time.

How to Choose the Right Carpet for Your Stairs: Tips for Selecting Quality Flooring

When it comes to selecting the right carpet for your stairs, there are several factors to consider. Quality flooring is essential for both safety and aesthetic reasons, so it is important to choose the right carpet for your stairs. Here are some tips to help you make the best decision.

First, consider the type of carpet you want. There are many different types of carpet available, from plush to berber to looped. Each type has its own advantages and disadvantages, so it is important to consider the look and feel you want for your stairs.

Second, consider the amount of traffic your stairs will receive. If your stairs are in a high-traffic area, you will want to choose a carpet that is durable and stain-resistant. If your stairs are in a low-traffic area, you may be able to choose a more luxurious carpet.

Third, consider the color and pattern of the carpet. You want to choose a carpet that will complement the rest of your home’s decor. If you have a modern home, you may want to choose a bold pattern or bright color. If you have a traditional home, you may want to choose a more subtle pattern or neutral color.

Fourth, consider the installation process. If you are installing the carpet yourself, you will want to make sure you have the right tools and supplies. If you are hiring a professional, make sure they are experienced in installing carpet on stairs.

Finally, consider the cost of the carpet. Quality carpet can be expensive, so it is important to shop around and compare prices. You may also want to consider purchasing a carpet pad, which can help extend the life of your carpet.

By following these tips, you can ensure that you choose the right carpet for your stairs. Quality flooring is essential for both safety and aesthetic reasons, so it is important to make the right decision.

Conclusion

Installing carpet on stairs is a great way to add a touch of style and comfort to your home. With the right tools and materials, you can easily transform your stairs into a beautiful and inviting space. With a little bit of patience and attention to detail, you can create a stunning staircase that will last for years to come.

Structural Beauty: Designing Retainer Walls for Elevation and Aesthetics

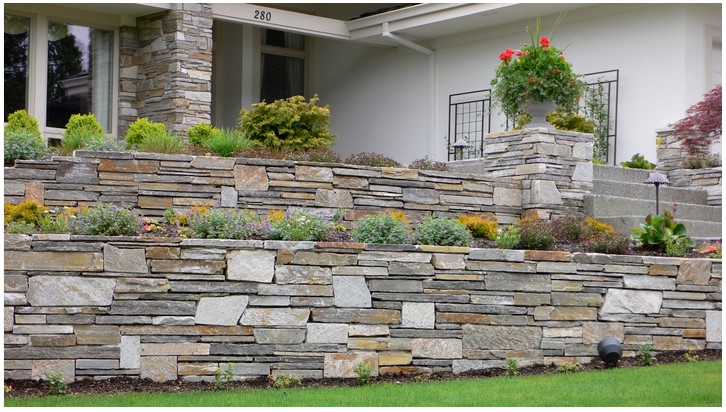
Structural Beauty: Designing Retainer Walls for Elevation and Aesthetics is a comprehensive guide to designing and constructing retaining walls that are both aesthetically pleasing and structurally sound. This book provides an in-depth look at the various materials, techniques, and design considerations that go into creating a successful retaining wall. It covers topics such as soil mechanics, drainage, and the use of geosynthetics. It also provides detailed instructions on how to build a variety of different types of retaining walls, from simple gravity walls to complex reinforced walls. With its clear explanations and step-by-step instructions, Structural Beauty: Designing Retainer Walls for Elevation and Aesthetics is an invaluable resource for anyone looking to build a beautiful and durable retaining wall.

Exploring the Benefits of Structural Beauty: How Retainer Walls Enhance Elevation and Aesthetics

Retainer walls are a popular landscaping feature that can add both elevation and aesthetic appeal to any outdoor space. These walls are typically constructed from stone, brick, or concrete blocks and are used to create a raised area or to separate different sections of a yard. Retainer walls can also be used to create a terraced effect, which can be used to create a more visually appealing landscape.

The primary benefit of using a retainer wall is that it can add elevation to a yard, creating a more interesting and visually appealing landscape. By adding elevation, the wall can create a sense of depth and dimension to the yard, making it appear larger and more inviting. Additionally, the wall can be used to create a terraced effect, which can be used to create a more visually appealing landscape.

Retainer walls can also be used to enhance the aesthetics of a yard. By adding a wall, the yard can be divided into different sections, allowing for more creative landscaping options. Additionally, the wall can be used to create a more attractive backdrop for plants and other landscaping features. The wall can also be used to create a more attractive boundary between different sections of the yard, such as between a patio and a garden.

Retainer walls can also be used to create a more secure environment. By creating a raised area, the wall can be used to create a barrier between the yard and the street, providing a sense of security and privacy. Additionally, the wall can be used to create a more secure boundary between different sections of the yard, such as between a patio and a garden.

Finally, retainer walls can be used to create a more attractive and inviting outdoor space. By adding a wall, the yard can be divided into different sections, allowing for more creative landscaping options. Additionally, the wall can be used to create a more attractive backdrop for plants and other landscaping features. The wall can also be used to create a more attractive boundary between different sections of the yard, such as between a patio and a garden.

In conclusion, retainer walls can be a great way to enhance the elevation and aesthetics of any outdoor space. By adding elevation, the wall can create a sense of depth and dimension to the yard, making it appear larger and more inviting. Additionally, the wall can be used to create a more attractive backdrop for plants and other landscaping features. Finally, the wall can be used to create a more secure environment and a more attractive boundary between different sections of the yard.

Designing Retainer Walls for Maximum Structural Beauty: Tips and Techniques for Creating a Beautiful Landscape

Retaining walls are an essential part of any landscape design, providing both structural support and aesthetic appeal. When designed correctly, they can add a unique touch to any outdoor space, creating a beautiful and functional landscape. Here are some tips and techniques for designing a beautiful and structurally sound retaining wall.

1. Choose the Right Materials: The materials you choose for your retaining wall will have a major impact on its overall look and durability. Natural stone, brick, and concrete are all popular choices, each offering its own unique aesthetic. Consider the climate and soil conditions of your area when selecting materials, as some may be more suitable than others.

2. Consider the Height: The height of your retaining wall will determine its structural integrity and aesthetic appeal. Generally, walls should be no higher than four feet, as taller walls can be unstable and difficult to maintain.

3. Plan for Drainage: Proper drainage is essential for a structurally sound retaining wall. Make sure to plan for adequate drainage by installing a drainage system or using a permeable material such as gravel.

4. Incorporate Landscaping: Incorporating landscaping into your retaining wall design can add a unique touch to your outdoor space. Consider adding plants, shrubs, and trees to the wall to create a beautiful and natural look.

5. Use Geotextiles: Geotextiles are a great way to reinforce your retaining wall and prevent soil erosion. They are made from a permeable fabric that allows water to pass through while still providing structural support.

By following these tips and techniques, you can create a beautiful and structurally sound retaining wall that will add a unique touch to your outdoor space. With the right materials, planning, and landscaping, you can create a stunning landscape that will last for years to come.

Conclusion

Structural beauty is an important concept in the design of retaining walls. By combining structural integrity with aesthetic appeal, designers can create walls that are both functional and visually pleasing. Retaining walls can be used to elevate land, protect against erosion, and provide a beautiful backdrop for landscaping. With careful consideration of the materials, design, and construction, retaining walls can be an attractive and effective addition to any landscape.

Home Improvement

Whether you want to sell your home or improve it to make it more comfortable, home improvements provide many benefits.

Your home improvements with best house company extensions Edgware London may entail:

  • Repairing structures that already exist.

  • Remodeling some areas of the home to renovate.

  • Extending your home with extension specialists Edgware London to enhance life quality.

  • Home improvement projects with local Extension Builders Edgware London to enhance the home’s energy efficiency and make it environment-friendly.

Considerations for Home Improvement

Deciding on a home improvement venture may seem challenging. But, if you have some useful home improvement tips, you can achieve the home you’ve always dreamt of. Many of these tips are simple to follow for home improvement projects like rear kitchen extension Edgware London.

  • You need to know the exact reason your home needs improvement, the amount you want to spend and the outcome you desire.

  • You should first consider repair moves for home improvements. Handle any ceiling repair issues, the plumbing task you have been postponing, or that attic insulation which has become essential. It applies whether you plan to reside in the home yourself, rent it out or sell it.

  • Remodeling your bathroom or kitchen is a smart home improvement step if you want to sell your home. It instantly raises the home’s value, and if you do proper research, it can be affordable.

Side return extension Edgware London home improvement projects, which involve remodeling, should be well thought out to avoid them appearing out of place in the home. Usually, they are done to enhance lighting, create more space or make the home glamorous. The home’s atmosphere improves when a home is remodeled. For example, if the walls of a kitchen are broken down to form an open kitchen, the home immediately becomes more sociable and friendly.

  • Making house extensions Edgware London or additions to a home like adding a pool, deck, or outdoor storage space is usually the outcome of the family’s requirements. However, they could also be excellent selling points if the home is put up for sale one day.

  • Home additions are home improvement projects if an additional outdoors space exists, which on its own do not enhance the home’s value. A great tip for improving exterior areas of the house is also to consider the surrounding and change and make suitable additions.

  • It is advisable for a householder to help a home enhance its energy efficiency also. It does not only reduce gas and electricity bills but it is good for the environment. Improving the home’s insulation can be a blessing in the long-term. Investing in a home to make it harvest solar energy partially is another method of improving the house for the future.

Conclusion


You should not do home improvement projects without proper planning. It is necessary to assess the reason a particular home improvement project is needed and what gains the investment will bring.

Home improvements linked to repairing makes the home more comfortable; but its longevity is essential as well. All other kinds of home improvement should be evaluated carefully before starting them.

How to Stain Brick: Giving Your Home Exterior a Fresh and Distinctive Look

Staining brick is a great way to give your home exterior a fresh and distinctive look. It can be used to create a unique and eye-catching design, or to simply update the look of your home. Staining brick is a relatively simple process that can be done in a few hours, and the results can be quite dramatic. In this guide, we’ll discuss the basics of staining brick, including the materials and tools you’ll need, the steps involved, and tips for achieving the best results. With a little bit of effort, you can give your home exterior a beautiful and unique look.

Step-by-Step Guide to Staining Brick: What You Need to Know Before You Start

Staining brick can be a great way to add a unique look to your home. However, it is important to understand the process and the materials needed before you begin. This step-by-step guide will provide you with the information you need to successfully stain your brick.

1. Prepare the Brick: Before you begin staining, you must first prepare the brick. This includes cleaning the brick with a pressure washer and removing any dirt, debris, or loose mortar.

2. Choose a Stain: Once the brick is clean, you can choose a stain. There are many different types of stains available, so make sure to select one that is appropriate for the type of brick you are staining.

3. Apply the Stain: Once you have chosen a stain, you can begin applying it. Make sure to use a brush or roller to evenly apply the stain. Allow the stain to dry completely before proceeding.

4. Seal the Brick: After the stain has dried, you must seal the brick. This will help protect the brick from moisture and other elements.

5. Clean Up: Once the brick is sealed, you can clean up any excess stain or sealant. Make sure to dispose of any materials properly.

Staining brick can be a great way to add a unique look to your home. However, it is important to understand the process and the materials needed before you begin. Following this step-by-step guide will help ensure that your staining project is successful.

How to Choose the Right Stain for Your Brick: Tips for Selecting the Perfect Color and Finish

When selecting the right stain for your brick, there are several factors to consider. The color and finish of the stain will have a significant impact on the overall look of your brick, so it is important to choose the right one. Here are some tips to help you select the perfect color and finish for your brick.

First, consider the color of your brick. If you have a light-colored brick, you may want to choose a darker stain to create a contrast. Conversely, if you have a darker brick, you may want to choose a lighter stain to create a more subtle look.

Second, consider the finish of the stain. There are several different finishes available, including matte, semi-gloss, and gloss. Matte finishes are best for creating a subtle, natural look, while semi-gloss and gloss finishes are better for creating a more dramatic look.

Third, consider the type of brick you have. Different types of brick may require different types of stains. For example, if you have a brick with a lot of texture, you may want to choose a stain that is designed to penetrate the texture and create a more uniform look.

Finally, consider the environment in which your brick is located. If your brick is exposed to a lot of moisture, you may want to choose a stain that is designed to resist moisture.

By considering these factors, you can select the perfect color and finish for your brick. With the right stain, you can create a beautiful and unique look for your brick that will last for years to come.

Conclusion

Staining brick is a great way to give your home exterior a fresh and distinctive look. It is a relatively simple process that can be done in a few hours and will last for years. With the right tools and materials, you can easily transform your home’s exterior and give it a unique and attractive look.

Crafting Beauty: Learn How to Fold a Paper Rose for Delicate Decor

Welcome to Crafting Beauty: Learn How to Fold a Paper Rose for Delicate Decor! In this tutorial, you will learn how to create a beautiful paper rose that can be used for a variety of decorative purposes. This tutorial will provide step-by-step instructions on how to fold and assemble the paper rose, as well as tips and tricks for making the most of your paper rose. With a few simple supplies and a bit of patience, you can create a stunning paper rose that will add a touch of beauty to any room. So let’s get started!

Crafting Beauty: How to Create a Floral Bouquet with Paper Roses

Creating a beautiful floral bouquet with paper roses is a fun and creative way to add a unique touch to any special occasion. Whether you’re looking to make a gift for a loved one or simply want to add a decorative touch to your home, crafting a paper rose bouquet is a great way to express your creativity.

To get started, you’ll need a few supplies. You’ll need a selection of paper roses, scissors, a hot glue gun, and a vase or container to hold the bouquet. You can find paper roses in a variety of colors and sizes at most craft stores. Once you have your supplies, you’re ready to begin crafting your bouquet.

Start by cutting the stems of the paper roses to the desired length. You can make the stems as long or as short as you like. Once the stems are cut, use the hot glue gun to attach the roses to the vase or container. Start by gluing the roses around the outside of the container and then work your way inwards.

Once all of the roses are attached, you can add some greenery to the bouquet. You can use artificial leaves or real leaves, depending on your preference. If you’re using real leaves, make sure to use a glue gun to attach them to the vase or container.

Finally, you can add some ribbon or twine to the bouquet to give it a finished look. You can tie the ribbon around the stems of the roses or wrap it around the entire bouquet.

With these simple steps, you can create a beautiful paper rose bouquet that is sure to be a hit at any special occasion. Crafting a paper rose bouquet is a great way to express your creativity and add a unique touch to any event.

Crafting Beauty: Tips and Tricks for Crafting the Perfect Paper Rose

Creating a paper rose can be a fun and rewarding craft project. With a few simple materials and a bit of patience, you can craft a beautiful paper rose that will last for years. Here are some tips and tricks to help you create the perfect paper rose.

1. Choose the right paper. The type of paper you use will determine the look and feel of your rose. For a more realistic look, choose a thicker paper such as cardstock or construction paper. For a more delicate look, choose a thinner paper such as tissue paper or crepe paper.

2. Cut the petals. To create the petals of your rose, use a template or draw your own petal shape onto the paper. Cut out the petals with scissors or a craft knife. For a more realistic look, cut the petals in a variety of sizes and shapes.

3. Curl the petals. To give your rose a more realistic look, curl the edges of the petals with a pencil or the back of a spoon. This will give the petals a more natural look.

4. Assemble the petals. Start by gluing the largest petal to the center of the rose. Then, glue the remaining petals around the center petal, overlapping them slightly.

5. Add the stem. To create the stem of your rose, roll a piece of green paper into a cylinder shape and glue it to the bottom of the rose.

6. Add details. To give your rose a more realistic look, add details such as veins or stamens. You can use a thin marker or paint to add these details.

With these tips and tricks, you can create a beautiful paper rose that will last for years. Have fun and be creative!

Conclusion

Crafting Beauty: Learn How to Fold a Paper Rose for Delicate Decor is a great resource for anyone looking to add a touch of beauty to their home or special event. With easy-to-follow instructions and helpful illustrations, this guide makes it easy to create a beautiful paper rose that will last for years to come. Whether you’re a beginner or an experienced crafter, this guide will help you create a stunning paper rose that will be the perfect addition to any room or event.

Boys Bed Canopy: Creating a Magical Hideaway

Creating a magical hideaway for your little boy is easy with a boys bed canopy. Whether you’re looking for a whimsical escape for your son or a cozy spot for him to read and relax, a boys bed canopy can provide the perfect solution. With a variety of styles and colors to choose from, you can create a unique and special space for your son to enjoy. From traditional designs to modern and contemporary looks, a boys bed canopy can transform any bedroom into a magical hideaway. With the right canopy, your son can drift off to sleep in a dreamy and peaceful atmosphere.

How to Create a Magical Boys Bed Canopy: Tips and Ideas for a Dreamy Bedroom

Creating a magical boys bed canopy is a great way to transform a bedroom into a dreamy and inviting space. With a few simple tips and ideas, you can create a canopy that will make your little one feel like they are in a magical world.

First, choose a fabric for the canopy that will create a magical atmosphere. Look for fabrics with a whimsical pattern or a bright, vibrant color. You can also use sheer fabrics to create a dreamy, ethereal look.

Next, decide on the shape of the canopy. You can choose from a traditional four-poster canopy, a round canopy, or a more modern, geometric shape. Consider the size of the bed and the room when selecting the shape.

Once you have chosen the fabric and shape, it’s time to hang the canopy. You can use a curtain rod or a tension rod to hang the canopy. Make sure the rod is securely attached to the ceiling and that it is the right size for the canopy.

Finally, add some finishing touches to the canopy. You can hang fairy lights, add tassels, or hang a garland of flowers or leaves. You can also add a few stuffed animals or other decorations to make the canopy even more magical.

Creating a magical boys bed canopy is a great way to make a bedroom more inviting and special. With a few simple tips and ideas, you can create a canopy that will make your little one feel like they are in a magical world.

DIY Boys Bed Canopy Projects: Transform Your Child’s Bedroom into a Magical Hideaway

Transform your child’s bedroom into a magical hideaway with a DIY boys bed canopy project. A bed canopy is a great way to add a touch of whimsy and enchantment to any bedroom. With a few simple materials and a bit of creativity, you can create a unique and beautiful canopy that your child will love.

To get started, you’ll need to decide on the size and shape of your canopy. Measure the bed and decide how much fabric you’ll need to cover it. You can use a variety of fabrics, from lightweight muslin to heavier canvas or even tulle. Once you’ve chosen the fabric, you’ll need to cut it to size and hem the edges.

Next, you’ll need to decide how you want to hang the canopy. You can use a curtain rod, a dowel rod, or even a rope. If you’re using a curtain rod, you’ll need to attach it to the ceiling with screws or hooks. If you’re using a dowel rod, you’ll need to attach it to the bed frame with screws or hooks. If you’re using a rope, you’ll need to tie it securely to the bed frame.

Once the canopy is hung, you can add some decorative touches. You can use ribbons, beads, or other trimmings to give the canopy a unique look. You can also add lights or a mobile to make the canopy even more magical.

Creating a DIY boys bed canopy is a fun and easy project that will transform your child’s bedroom into a magical hideaway. With a few simple materials and a bit of creativity, you can create a unique and beautiful canopy that your child will love.

Conclusion

Boys Bed Canopy is a great way to create a magical hideaway for your little one. It can be used to create a cozy and inviting atmosphere in any bedroom. With a variety of styles and colors to choose from, you can easily find the perfect canopy to fit your child’s personality and style. Whether you are looking for a whimsical hideaway or a more traditional look, a Boys Bed Canopy is sure to bring a touch of magic to any bedroom.

Submersible Pressure Transducer for Liquid Level Measurement

Liquid material handling is one of many challenging things in the industrial process. The liquid materials are stored inside a tank and vessel, and since the container is water tight, it will be impossible to see the level of materials inside the container. That’s why level sensors are highly needed to provide the measurement. There are different types of level sensors used to measure the level of liquid materials inside a tank or vessel, with contact or non-contact sensors. What kind of level sensor you should use depends on the characteristics of the materials stored inside the tank.

Among many different types of level sensors, there is a submersible pressure transducer. Like other pressure transducers, this sensor works by converting applied pressure into an electric signal. The sensor has elastic material that will be deformed by applied pressure and electrical component to detect the deformity and sending electric signal translated to measurement reading. The difference is that a submersible pressure transducer is submerged inside a water tight container, and as its application is to measure level, it reads in feet or inch of liquid instead of psi pressure.

This type of level sensor is widely used in various industrial processes. Its popularity is in its versatility, allowing the sensor to be used to measure the level of any type of liquid as long as the temperature is within its working range. This type of level sensor is also cost efficient. Not only is the sensor inexpensive, but it also has low power consumption making it ideal for battery powered level sensors. No wonder submersible pressure transducers are widely used in waste liquids processing, and also for remote tank monitoring.

Even for low cost sensors, accurate reading is still a vital factor. Without accurate reading, any sensor is practically useless. This also works for submersible pressure transducers. It is important to only use high quality products with high reliability and durability. This is only possible when the sensors come from the leading supplier with top reputation.

More than just accurate readings, pressure transducers need to have complete features to make it a reliable control instrument for industrial processes. One of the crucial features is built in lightning protection. Delicate sensors are vulnerable to lightning strikes. Built in lightning protection ensures it is well protected. There is also a multiple cage option that is another great feature. The sensor instrument cage is much more durable and has a longer lifespan than the sensor. The option to replace the sensor while keeping the cage can save a lot of money. The field zero adjust is another important feature. As the sensor is submersible, it is difficult to zero adjust the sensor. Field zero adjust allows zero adjusting using simple magnets touched to the sensor cage. Last but not least, is chemical compatibility. The submersible pressure transducer must be compatible to different types of chemicals.