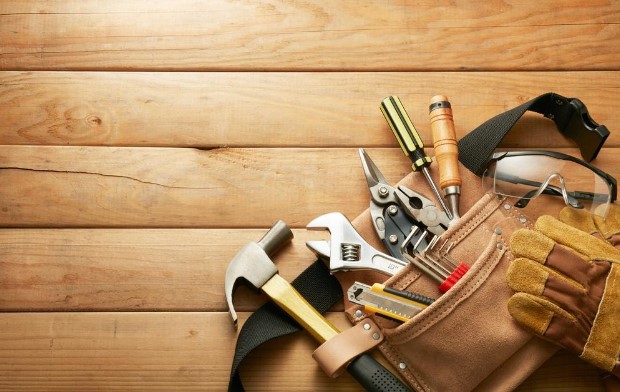
Fire Feature Finesse: Adding an Outdoor Fire Feature to Your Space

Fire Feature Finesse is a company that specializes in creating beautiful outdoor fire features for your home or business. We offer a wide range of fire features, from fire pits to fireplaces, to help you create the perfect outdoor living space. Our experienced team of professionals will work with you to design and install the perfect fire feature for your space. We use only the highest quality materials and craftsmanship to ensure that your fire feature will last for years to come. With Fire Feature Finesse, you can be sure that your outdoor space will be transformed into a beautiful and inviting area for you and your guests to enjoy.

How to Choose the Right Fire Feature for Your Outdoor Space: Tips for Selecting the Perfect Fire Feature for Your Home

When it comes to creating an outdoor space that is both inviting and functional, a fire feature can be the perfect addition. Whether you’re looking for a cozy spot to gather around with friends and family or a unique way to light up your outdoor space, a fire feature can provide the perfect solution. However, with so many options available, it can be difficult to know which fire feature is right for your home. To help you make the best decision, here are some tips for selecting the perfect fire feature for your outdoor space.

First, consider the size of your outdoor space. Fire features come in a variety of sizes, so it’s important to choose one that will fit comfortably in your space. If you have a large outdoor area, you may want to opt for a larger fire feature, such as a fire pit or outdoor fireplace. If you have a smaller space, a fire bowl or tabletop fire feature may be a better option.

Next, think about the type of fuel you want to use. Fire features can be powered by wood, gas, or electricity. Each type of fuel has its own advantages and disadvantages, so it’s important to consider which one is best for your needs. For example, wood-burning fire features are great for creating a cozy atmosphere, but they require more maintenance than gas or electric fire features.

Finally, consider the style of your outdoor space. Fire features come in a variety of styles, from modern to rustic. Choose a style that complements the overall look and feel of your outdoor space.

By following these tips, you can easily find the perfect fire feature for your outdoor space. With the right fire feature, you can create a cozy and inviting atmosphere that will be enjoyed by all.

Designing an Outdoor Fire Feature: Ideas for Creating a Stylish and Functional Fire Feature for Your Home

Creating an outdoor fire feature is a great way to add style and functionality to your home. Whether you’re looking for a cozy spot to gather around with friends and family or a stunning centerpiece for your outdoor space, a fire feature can be the perfect addition. Here are some ideas for designing an outdoor fire feature that is both stylish and functional.

First, consider the size and shape of your fire feature. If you’re looking for a large, dramatic centerpiece, a fire pit or fire bowl may be the perfect choice. For a more intimate gathering spot, a fire table or fire ring may be a better option. You can also choose from a variety of materials, such as stone, brick, concrete, or metal, to create a unique look.

Next, think about the fuel source for your fire feature. Wood-burning fire features are the most traditional option, but you can also choose from gas or electric models. Gas fire features are easy to use and require minimal maintenance, while electric fire features are a great choice for those who want a more eco-friendly option.

Finally, consider the accessories you’ll need to complete your fire feature. Firewood racks, fire screens, and fire tools are all essential for a safe and enjoyable experience. You can also add seating, such as benches or chairs, to create a comfortable gathering spot.

By following these tips, you can create a stylish and functional outdoor fire feature that will be the perfect addition to your home. With the right design and accessories, you can create a cozy and inviting space that will be enjoyed for years to come.

Conclusion

Fire Feature Finesse is an excellent way to add a unique and beautiful outdoor fire feature to your space. It is a great way to create a cozy atmosphere and provide a warm and inviting atmosphere for your guests. With the right design and materials, you can create a stunning outdoor fire feature that will be the centerpiece of your outdoor space. Fire Feature Finesse is a great way to add a unique and beautiful outdoor fire feature to your space that will be enjoyed for years to come.

Extend the Life of Your Paint by Cleaning Your Walls

There is an entire psychology and equation behind paint colors, which shows a correlation between visual appeal and the effect a particular pigment can have on your mood. In an effort to preserve the artistic and psychological value derived from paint, it’s important to ensure your home’s walls aren’t tainted with dirt or stains. Not only will routinely cleaning your walls ensure your home maintains its aesthetic allure, but it will also help extend the lifespan of your painted walls. Here are some tips to help you clean away any unwanted grime that has taken residence on top of your walls.

Get Rid of Dust Bunnies

Employ the help of a Swiffer or similar microfiber cloth to remove dust, lingering cobwebs, and dirt that have accumulated on your walls. If you want to get creative, try using a vacuum with a soft brush or use the old-fashioned approach and wrap a clean cloth around the handle of a broom. If available, attach one of the extension tools to your device to expand your reach to the ceiling and areas that are higher-up. Performing this small task every 2-3 months will help elongate the life of your paint and should only take about 10 minutes to sweep an entire room.

Cleanse High-Moisture Areas

Rooms prone to a high level of moisture, like bathroom or kitchen areas, need periodic washing to remove residue buildup from cooking and shower steam. This includes rooms that are furnished with a wood-burning stove or fireplace, where the fumes will have a similar effect on the walls. Clean at least once a year by using taking a wet sponge and gentle soap solution and delicately cleansing the area, concentrating on small sections at a time. After rinsing the space, pat the wall dry with a towel.

Inspect Walls Before You Act

It’s best to evaluate the area and ensure it’s safe to clean before taking any action that may jeopardize the integrity of the paint. Semi-gloss and gloss paints, most commonly seen in baths, kitchens, and on woodwork, are safe to clean. While a majority of satin and modern flat paints are safe to wash, you should first test a small patch (in a space that is hidden or unnoticeable) to ensure no paint ends up on your sponge. Hint: if paint is present on your sponge after doing a trial run on a particular spot, you do not want to continue washing that area. You’ll also want to stay away from TSP (trisodium phosphate), which is known to dull your paint’s finish, erasing your wall’s luminous shine.

Bustling, Frequented Rooms

Rooms that receive regular visits from family members will require washing. You can focus solely on areas around light switches or locations where dust and dander typically accrue, rather than cleansing the entire room. Loose pet (or human) hairs that tend to assemble behind sofas, TVs, and radiators, as well as any dirt that may accumulate in those spaces, will need to be washed if dusting does not eliminate them.

Routine maintenance is an important part of caring for your living quarters. Dusting and washing your walls will help extend the life of your wall paint, as well as preserve the investment you made in adorning your space with a decorative design.

Author’s short bio:

Jason Coke is https://nortexpainting.com’ founder with over 10 year experience in the housing industry, brings a unique vision to the painting industry on how deliver products and services to customers. Mr. Coke’s experience is diverse and includes collaboration with some of the Dallas-Fort Worth Area’s top interior designers and decorators. He also has been involved in construction of homes with one of the nation’s largest home builders.

Outdoor Cabanas: Creating Luxurious and Relaxing Outdoor Retreats

Outdoor cabanas are a great way to create a luxurious and relaxing outdoor retreat. Whether you are looking for a place to entertain guests, relax in the sun, or just enjoy the outdoors, an outdoor cabana can provide the perfect solution. With a variety of styles and materials to choose from, you can create a unique and inviting outdoor space that is perfect for any occasion. From traditional cabanas to modern designs, outdoor cabanas can provide a comfortable and stylish retreat for you and your guests. With the right design and materials, you can create a beautiful and inviting outdoor space that will be the envy of your neighbors.

How to Design an Outdoor Cabana for Maximum Comfort and Relaxation

Designing an outdoor cabana for maximum comfort and relaxation requires careful consideration of the space, materials, and amenities. With the right planning, you can create a luxurious and inviting retreat that will be the perfect spot to relax and unwind.

First, consider the size and shape of the cabana. It should be large enough to accommodate the number of people you plan to use it, but not so large that it overwhelms the space. If you plan to use the cabana for entertaining, you may want to opt for a larger size.

Next, choose the materials for the cabana. Natural materials such as wood, stone, and bamboo are ideal for creating a cozy and inviting atmosphere. If you want to add a touch of luxury, consider using high-end materials such as marble or granite.

When it comes to amenities, think about what will make your cabana the perfect spot for relaxation. Consider adding comfortable seating, a fire pit, and a bar area. If you plan to entertain, you may want to add a sound system and a television.

Finally, don’t forget to add some finishing touches. Add some outdoor lighting to create a warm and inviting atmosphere. You can also add some plants and flowers to create a tranquil and peaceful atmosphere.

By following these tips, you can create an outdoor cabana that is both comfortable and relaxing. With the right planning and design, you can create a luxurious retreat that will be the perfect spot to relax and unwind.

Tips for Incorporating Luxury Features into Your Outdoor Cabana Design

1. Invest in Quality Materials: When designing an outdoor cabana, it is important to invest in quality materials that will stand the test of time. Consider materials such as teak, cedar, or mahogany for the frame and roof of the cabana, as these materials are known for their durability and resistance to the elements.

2. Add a Fire Feature: Adding a fire feature to your outdoor cabana design is a great way to add a touch of luxury. Consider installing a fire pit or outdoor fireplace to provide warmth and ambiance.

3. Incorporate Natural Elements: Incorporating natural elements into your outdoor cabana design is a great way to add a luxurious feel. Consider adding a water feature, such as a fountain or pond, to create a tranquil atmosphere. You can also add plants and flowers to create a lush, inviting space.

4. Install Comfortable Seating: Installing comfortable seating is essential for creating a luxurious outdoor cabana. Consider investing in high-quality outdoor furniture that is both stylish and comfortable.

5. Add Lighting: Adding lighting to your outdoor cabana design is a great way to create a luxurious atmosphere. Consider installing string lights, lanterns, or even chandeliers to create a warm and inviting space.

6. Install a Sound System: Installing a sound system in your outdoor cabana is a great way to add a touch of luxury. Consider investing in a high-quality sound system that can be used to play music or even watch movies.

7. Add a Bar Area: Adding a bar area to your outdoor cabana is a great way to add a touch of luxury. Consider installing a bar area with a refrigerator, sink, and other amenities to create a luxurious space for entertaining.

Conclusion

Outdoor cabanas are a great way to create a luxurious and relaxing outdoor retreat. They provide a comfortable and private space to enjoy the outdoors, while also providing protection from the elements. With a variety of styles and materials to choose from, you can create a unique and stylish outdoor cabana that will be the perfect addition to your outdoor living space. Whether you are looking for a place to relax and entertain guests or just a place to escape from the hustle and bustle of everyday life, an outdoor cabana is the perfect solution.

Tips to Choose the Best Office Furniture


Furniture undeniably plays an important role in an interior design. Just imagine if the room has no furniture at all. Even if you move decorated it as beautiful as possible, it may look empty, boring, and not comfortable. It is not something exaggerated if for some people many efforts are needed to have a kind of furniture. The chairs, tables, cabinets, and others can simply add the sense of aesthetic anyway. Not only is it for your house, the same treatment must also be applied in your office. Well, if your office needs new furniture and you are responsible to buy and arrange it, some tips below are worth to read.

Choose Trusted Supplier

In a city or town, there must be more than one suppliers or shops that provide and even produce furniture. However, are you sure that they are trusted and reputable enough? In fact, there are many shops that provide cheap furniture but with low quality also. Based on that fact, make sure to conduct a small survey before starting to choose one of them. You have to know which one among them that are really giving many offers particularly related to the qualified furniture. Rather than buy it online, going directly to the shop is suggested so that you can touch it and even watch the process of production.

Take a Look at the Website

Yes, buying it offline is indeed recommended. However, a good furniture shop nowadays must also have its official website to promote its sales. The products offered must also be displayed on the website pages. It eases you to see them before directly going to the shop. It is better if the website provides feature like live chat. It enables you to ask them some questions particularly related to the products’ availability.

Choose the Qualified Ones

After dealing with the recommended shop, you can now start to choose the furniture itself. You must expect the furniture will be durable and long lasting, mustn’t you? If yes, there is no reason to pick one out them which is not really qualified even if the cost is probably lower. More than that, the furniture will be displayed in the office. It must apply both good materials and designs anyway. Wooden furniture made from teak is then really recommended. Even if teak is a type of wood, it is tested to be strong, durable, and not easily damaged. You can also choose metallic furniture like those made from stainless steel.

Determine the Design

You must know well what should be placed in your office. It is particularly about the design. Before hunting the furniture anyway, learn more about the interior design has been applied. If it is contemporary, the furniture must be in the same design. On the other hand, classic furniture must be for classic interior design for sure. If you find it confusing anyway where to buy the furniture for your office, you can see the collections in Office Furniture Dubai. Then, enjoy the products and services.

Reflecting Style: Elevating Your Space with an Ikea Stave Mirror

Welcome to Reflecting Style: Elevating Your Space with an Ikea Stave Mirror! This guide will provide you with all the information you need to create a beautiful and unique space with an Ikea Stave Mirror. We will discuss the different types of Stave Mirrors available, how to choose the right one for your space, and how to install and style it. We will also provide tips and tricks for making the most of your Stave Mirror and creating a space that reflects your personal style. So, let’s get started and learn how to elevate your space with an Ikea Stave Mirror!

How to Use an Ikea Stave Mirror to Create a Refined Look in Your Home

Creating a refined look in your home can be achieved with the help of an Ikea Stave Mirror. This stylish and versatile mirror is a great way to add a touch of sophistication to any room. Here are some tips on how to use an Ikea Stave Mirror to create a refined look in your home.

First, decide where you would like to place the mirror. Consider the size of the room and the amount of natural light available. If you have a large room, you may want to hang the mirror on a wall. If you have a smaller room, you may want to place the mirror on a dresser or shelf.

Next, consider the style of the mirror. The Ikea Stave Mirror comes in a variety of styles, from traditional to modern. Choose a style that complements the existing décor in your home.

Once you have chosen the style of the mirror, you can begin to accessorize it. Consider adding a few decorative items such as a vase, a picture frame, or a candle holder. These items will help to create a more refined look.

Finally, consider the lighting. The Ikea Stave Mirror is designed to be used with natural light, but you can also add additional lighting to create a more dramatic effect. Consider adding a few wall sconces or a floor lamp to create a more refined look.

By following these tips, you can use an Ikea Stave Mirror to create a refined look in your home. With the right accessories and lighting, you can create a sophisticated and stylish look that will be sure to impress your guests.

Tips for Incorporating an Ikea Stave Mirror into Your Home Decor for Maximum Impact

1. Choose a Location: When incorporating an Ikea Stave Mirror into your home decor, it is important to choose a location that will maximize its impact. Consider a wall in your living room, bedroom, or hallway that will be visible from multiple angles.

2. Consider the Size: The Ikea Stave Mirror comes in a variety of sizes, so it is important to consider the size of the wall space you are working with. If you have a large wall, you may want to opt for a larger mirror to make a bold statement.

3. Utilize the Frame: The Ikea Stave Mirror has a unique frame that can be used to your advantage. Consider painting the frame a bold color to make the mirror stand out. You can also use the frame to hang other decorative items, such as pictures or artwork.

4. Accessorize: To make the most of your Ikea Stave Mirror, consider accessorizing it with other items. Place a vase of flowers or a candle holder on the shelf below the mirror to add a touch of elegance. You can also hang a few pieces of artwork around the mirror to create a gallery wall.

5. Add Lighting: To really make the Ikea Stave Mirror stand out, consider adding some lighting. Place a few wall sconces around the mirror to create a warm, inviting atmosphere. You can also hang a pendant light above the mirror to draw attention to it.

By following these tips, you can easily incorporate an Ikea Stave Mirror into your home decor for maximum impact. With the right placement, accessories, and lighting, you can create a stunning focal point in any room.

Conclusion

The Ikea Stave Mirror is a great way to elevate any space with its modern and stylish design. Its reflective surface can help to create a sense of openness and light in any room, while its simple and elegant frame adds a touch of sophistication. With its versatility and affordability, the Ikea Stave Mirror is an excellent choice for anyone looking to add a touch of style to their home.

How to Make Raised Panel Cabinet Doors: Crafting Professional Woodwork

Raised panel cabinet doors are a classic and timeless way to add a touch of elegance to any kitchen or bathroom. They are also a great way to add a unique and custom look to any room. Making raised panel cabinet doors is a great way to practice your woodworking skills and create a beautiful piece of furniture. With the right tools and materials, you can make raised panel cabinet doors that look like they were made by a professional. This guide will provide you with the steps and tips needed to make raised panel cabinet doors that will look great in any home.

Step-by-Step Guide to Crafting Professional Raised Panel Cabinet Doors

Introduction

Raised panel cabinet doors are a classic and timeless design element that can add a touch of sophistication to any kitchen or bathroom. They are also relatively easy to make, provided you have the right tools and materials. This step-by-step guide will walk you through the process of crafting professional-looking raised panel cabinet doors.

Step 1: Gather Your Materials

Before you begin, make sure you have all the necessary materials. You will need: wood for the door frame and panel, wood glue, clamps, a router, a router bit, a saw, sandpaper, and a finish of your choice.

Step 2: Cut the Frame

Using the saw, cut the wood for the frame to the desired size. Make sure the corners are square and the edges are smooth.

Step 3: Glue the Frame

Apply wood glue to the edges of the frame and clamp them together. Allow the glue to dry completely before proceeding.

Step 4: Cut the Panel

Using the saw, cut the wood for the panel to the desired size. Make sure the corners are square and the edges are smooth.

Step 5: Route the Panel

Using the router and router bit, route the edges of the panel to create the raised panel effect.

Step 6: Glue the Panel

Apply wood glue to the edges of the panel and clamp it to the frame. Allow the glue to dry completely before proceeding.

Step 7: Sand and Finish

Using sandpaper, sand the door to remove any rough edges. Then, apply the finish of your choice.

Conclusion

By following these steps, you can easily craft professional-looking raised panel cabinet doors. With the right materials and tools, you can create a timeless and sophisticated look for your kitchen or bathroom.

Tips and Tricks for Achieving a Professional Finish on Raised Panel Cabinet Doors

1. Start by sanding the door with a medium-grit sandpaper to remove any imperfections. Make sure to sand in the direction of the grain.

2. Use a router to create the raised panel. Make sure to use a router bit that is the same size as the panel you are creating.

3. Use a chisel to clean up any rough edges or imperfections.

4. Apply a coat of primer to the door. This will help the paint adhere better and provide a better finish.

5. Use a brush to apply the paint. Make sure to use even strokes and to paint in the direction of the grain.

6. Once the paint is dry, use a fine-grit sandpaper to lightly sand the door. This will help to create a smooth finish.

7. Apply a coat of clear finish to the door. This will help to protect the paint and give the door a professional look.

8. Finally, use a soft cloth to buff the door and remove any dust or debris. This will help to create a glossy finish.

Conclusion

Making raised panel cabinet doors is a great way to add a professional touch to any woodworking project. With the right tools and materials, anyone can create beautiful and durable raised panel cabinet doors. With a little practice and patience, you can create a stunning piece of woodwork that will last for years to come.

Wainscoting Bathroom: Adding Elegance and Character

Wainscoting bathroom is a great way to add a touch of elegance and character to any bathroom. It is a decorative wall covering that is typically made of wood, but can also be made of other materials such as vinyl, plastic, or even metal. Wainscoting can be used to create a variety of looks, from traditional to modern, and can be used to create a focal point in the bathroom. It can also be used to hide imperfections in the walls, or to add texture and interest to the room. Wainscoting is a great way to add a unique and stylish look to any bathroom.

How to Choose the Right Wainscoting for Your Bathroom: Tips for Selecting the Perfect Style and Design

When it comes to selecting the perfect wainscoting for your bathroom, there are a few key factors to consider. Wainscoting is a great way to add texture and visual interest to your bathroom, but it’s important to choose the right style and design to ensure it complements the overall look and feel of the space. Here are some tips to help you choose the right wainscoting for your bathroom:

1. Consider the size of your bathroom. Wainscoting comes in a variety of sizes and shapes, so it’s important to consider the size of your bathroom when selecting the right style. If your bathroom is small, opt for a narrow wainscoting that won’t overwhelm the space. If your bathroom is larger, you can choose a wider wainscoting that will make a bold statement.

2. Choose a style that complements the existing décor. Wainscoting comes in a variety of styles, from traditional to modern. Choose a style that complements the existing décor in your bathroom. If you have a traditional bathroom, opt for a classic wainscoting style. If you have a modern bathroom, choose a contemporary wainscoting style.

3. Consider the material. Wainscoting is typically made from wood, but there are also other materials available, such as vinyl, plastic, and metal. Choose a material that is durable and easy to clean. Wood is a popular choice for wainscoting, as it is both attractive and long-lasting.

4. Think about the color. Wainscoting comes in a variety of colors, so you can choose a color that complements the existing décor in your bathroom. If you have a neutral-colored bathroom, opt for a bolder color to add a pop of color. If you have a brightly colored bathroom, choose a more subtle color to create a more subtle look.

By following these tips, you can easily choose the right wainscoting for your bathroom. With the right style and design, you can create a beautiful and inviting space that you’ll love for years to come.

DIY Wainscoting Bathroom Projects: Easy Ways to Add Elegance and Character to Your Space

Adding wainscoting to your bathroom is a great way to add elegance and character to the space. Wainscoting is a type of wall paneling that is typically made of wood and is used to cover the lower portion of a wall. It can be used to create a classic, timeless look in any bathroom.

DIY wainscoting projects are relatively easy to complete and can be done in a few hours. The first step is to measure the walls and decide on the height of the wainscoting. Once the measurements are taken, the next step is to purchase the materials. This includes the wood paneling, nails, and any other necessary supplies.

Once the materials are purchased, the next step is to cut the wood paneling to the desired size. This can be done with a saw or a jigsaw. After the paneling is cut, it is time to attach it to the wall. This can be done with nails or screws. It is important to make sure that the paneling is securely attached to the wall.

Once the paneling is attached, it is time to finish the project. This can be done by painting the paneling or staining it. If painting, it is important to use a high-quality paint that is designed for use on wood. If staining, it is important to use a wood stain that is designed for use on wood.

DIY wainscoting projects are a great way to add character and elegance to any bathroom. With a few simple steps, you can create a timeless look that will last for years to come.

Conclusion

Wainscoting bathroom is a great way to add elegance and character to any bathroom. It is a timeless and classic look that can be used in any style of bathroom. It is also a great way to add texture and interest to the walls. Wainscoting is easy to install and can be done in a variety of materials and colors. It is a great way to add a touch of sophistication and style to any bathroom.

Condo Buying Benefits

Buying a condo is something that most people do not consider because of the belief the price tag will be way too high. Due to the increase in demand noticed in the past few years, many developers like The Luxury Team actually offer units that are highly affordable for most people. Buying a family home means that you have to always set up an emergency fund for potential repairs that will be needed but when you buy the condo, this is not necessary since exterior work will be handled by the homeowners association. Consider this as being the first benefit of buying a condo, with the following also being of a high importance.

Increased Security

Condos are always going to offer increased security. Since all families want to be safe, this is a benefit that is of high importance for most interested buyers. It is really easy to simply lock your home when you go on a vacation and be 100% sure that all will be safe. There is normally extra security personnel employed, hi tech locks and much more.

Extra Facilities And Amenities

Condominiums will offer so many different facilities and amenities for those interested. Most of the complexes are going to include at least a beautiful communal swimming pool. Fitness centers are also quite common these days. Laundry facilities may be present and the list of possible amenities can be quite long. You basically gain access to a space that is luxurious, modern and has just high quality finishes, all with extra amenities.

Affordability

The condos now present on the market are much more affordable than they used to be. While you will pay more than what the apartment costs, you do get so much more. If we are to take a look at all the factors associated with buying real estate, it is easy to say that condo buying is highly affordable. You basically get to receive more for the money that you spend so the investment is a smart one, especially when compared with apartments.

Cleaning Outside Spaces

In most situations you cannot get the outside area cleaned by someone else without an extra financial investment. This is not the case with the condos. All will be maintained, including the present pool. You can be sure everything will be operational 24/7 since the Homeowners association takes care of everything. This means you do not have to worry about various different maintenance tasks you would need to take care of.

Conclusions

As you can so easily notice, it is not at all difficult to identify the benefits associated with buying condos. We are faced with others that we could talk about but these are definitely more than enough. Investing money into a good condo is definitely something you will want to take into account. It is an opportunity you are going to appreciate. The little extras that are offered, together with the luxury that instantly becomes available will make living a lot more enjoyable. At the same time, it is not at difficult to find some condos in locations that are truly stellar.

Arborist Certification

An arborist is an individual who is skilled and trained in the science and art of arboriculture. They are the who loves nature and are responsible in maintaining the plants health, researching, keeping us safe from falling branches and trees during storms and many more. This is why many people are now becoming interested in becoming an arborist. Though, there are many ways of becoming one and be certified, a person must still follow steps and be knowledgeable in what job they do.

Steps to become certified

To be a certified arborist, there are certain steps needed to take which can take some time to do. Always keep in mind that dedication and patience is important in going this path. Taylors Trees arborists are a certified tree care organization.

Below are some steps:

  1. Be a degree holder

Though not required by most, some employers seek a degree for arborist. This is also the beginning or start to be a certified so that an individual is aware and knowledgeable of the background and studies of what they will do in their future jobs. Some courses include forestry, soil fertility, and pathology.

  1. Have experience

They say “experience is the best teacher” which is true especially when a job requires you to be always on the field. Some companies offer on-the-job training to them to gain experience. Some of these tasks are identifying trees, using tree maintenance tools, pruning, clearing debris and many more.

  1. Acquire a certification

The International Society of Arboriculture or ISA are the ones responsible in giving certifications for arborist. They offer credential exams that requires a certain degree and experience to take for example an arborist with an associate’s degree requires at least two years of experience and a bachelor degree holder needs one year of experience. The ISA also give other certifications on similar field and provide Master Arborist designation. It must also be renewed every 3 years.

Arborist Tasks

In order to be a certified arborist, an individual must be aware of its task and jobs. It is essential to know this so that a person can be skilful on each task that will be assigned and done. Here are some of their tasks:

  • Pruning

This is one of the main tasks an arborist does. It is also the most important as pruning helps in maintain a trees health. It removes dead and weak branches that can affect a plant. It is also done for landscaping which makes it beautiful by reshaping its leaves.

  • Research

An arborist often do research about the tree’s welfare such as how and where it is best to plant it, how long it will thrive, type of care it requires, etc. they also are often needed to do research in how much budget will be needed in having a plant.

  • Safety

One of the jobs they do is to keep the neighbourhood safe during storms and fierce weathers. They cut weak trees that could fall and also its branches. They use cables and braces to secure it from strong winds

  • Tree care

Tree maintenance and care are also done by arborist. They identify weak and dying trees and find a way to bring it back to shape. They also do preventive measure to make the plants healthy and thrive longer.

How to Cut Through the Madness to Plan an Organized Remodeling Project

The number one question homeowners ask when planning a remodeling project is “how can I make it through a remodeling project with my sanity intact?” Remodeling projects are not without their peculiar hassles and as a result they are quite the dreaded event. However, with proper planning, any remodeling project can be a smooth process, from the minute the workers come traipsing around on the property till they pack up their tools to leave when the job is completed. Then you can start deciding on the finishing and evaluate if your furniture could use some repair services.

Leave Ample Time to Plan a Remodel

There’s so much that goes into planning a remodel that a reasonable amount of time is required to make it work smoothly. Leaving your remodel till crunch time has the exact opposite effect. You could be left running around like a headless chicken when you are short on time. With proper time given, you can contact the necessary workers who are going to be in charge of your project and have as many lengthy discussions as necessary to come to an agreement about your project.

Create time to choose a design professional and have a face-to-face meeting. Depending on the number of companies you are interviewing, this stage could take a lot more time than envisioned, so it needs to be done early. You will therefore have the opportunity to find out from the companies about their services, and understand their processes to decide if their offers are in line with your expectations. Another important factor is to find out the company offering the best quality at a price you can afford.

Prepare the ground

The part of your house where remodeling will be going on should be prepped long before the work men arrive. Pack up the space and neatly remove its contents to a safe place where they can remain until you are ready to move them back in. P2P Moving provides a great warehouse storage option where you can safely store your possessions while your home undergoes a remodeling.

Besides the major benefit of preparing the ground – which is being prepared and avoiding a mad rush – you can easily sort through the items you removed to choose only the necessary ones that would suit your new space. This means that you will have more space in your new extension, with less junk to scatter around the place.

Don’t Wait To Pay

Most homeowners believe that they have to hold on till the last nail has been hammered in by the builder into their property before they pay the contractors for their service. While contractors and homeowners can have different arrangements concerning payments, it is usually the owner’s prerogative where a legal payment agreement is not signed.

Typically, payment confirms that a job can be started, and barring other naturally occurring delays such as a heavy rain or something even worse, you can usually begin a remodeling project in your home at the agreed date.

When you officially pay a contractor for his services, you commit him to the job. Most contractors hate to disappoint their clients and will typically go out of their way to get the job done. This way, having to deal with contractors who leave your job halfway through and go off to start working on another project at the other end of the town.

These three steps, when carried out long before the actual remodeling is to commence will help you to cut through the crazy rush that makes remodeling a dreaded word for many homeowners. Leaving a lot of planning time before the remodel date, preparing the space for work and prompt payment are three major ways to carry out more organized home remodeling project.

How to improve the outside of your home

<2016/07/How-to-improve-the-outside-of-your-home.jpg">How to improve the outside of your home

No matter why you want to improve the outside of your home, whether to enjoy it yourself or whether it’s because you’re looking to sell in the near future, you will need to think about the various ways in which you can do this. The great news is that no matter whether you’re looking to improve your steel guttering or your garden, there are many tips for you to make the most of – so simply read on and look forward to metal gutters to be proud of.

Keep your garden neat and tidy

Nothing is more important than the first impression that people get when they walk to your home, and for this reason it is absolutely vital that they are met with a house that looks clean and tidy from the outside. Doing something as simple as cleaning up your garden is certain to help with this, so take time to mow your lawns, keep trees and bushes neat, and make sure that you brush your driveway regularly to get rid of any dirt that may have been brought in on the wheels of your car.

Think about your guttering

If you see a house with untidy and uneven guttering, it is certain to look a mess, and for this reason you should take the time to upgrade your guttering if you have the chance to do so. By asking for a professional to come and undertake this type of work, you can be certain that your house will look much better in no time, leaving a great impression on all those who walk by.

Consider your windows

Although washing your windows may seem like a never ending task, it is more than worth it, as it can make your house sparkle from the outside. Not only is this the case, but you will also be able to make sure that your house lets in as much light as possible, and this will help to improve the look of the inside of your home, too. If you haven’t replaced your windows at all for a number of years then this is something that you might wish to consider, as this is something that can really give a new lease of life to a property.

Get your jet wash out

A clean driveway always looks much better than a dirty one, and you would be surprised to see just how much of a difference it can make when you use a jet wash on your driveway. Simply doing this once a year will freshen up the outside of your home, meaning that it will stand out from the other houses in your street.

Being able to set the best possible first impression is vital, as this is certain to work to your advantage in the years to come. For this reason, it is well worth taking the time to consider improvements that you could make, as it will certainly be a great investment in the future.

Pathways of Distinction: Elevating Your Driveway with Paver Design

Pathways of Distinction is a company that specializes in creating beautiful and unique paver designs for driveways. With over 20 years of experience in the industry, Pathways of Distinction has become a leader in the paver design industry. They offer a wide range of services, from custom paver designs to installation and maintenance. Their team of experienced professionals will work with you to create a driveway that is both aesthetically pleasing and functional. Whether you are looking for a classic look or something more modern, Pathways of Distinction has the perfect paver design for you. With their attention to detail and commitment to customer satisfaction, Pathways of Distinction is the perfect choice for elevating your driveway with paver design.

How to Choose the Right Paver Design for Your Driveway

When it comes to choosing the right paver design for your driveway, there are several factors to consider. First, you should consider the overall look and feel of your home. Are you looking for a modern, contemporary look or a more traditional, classic style? This will help you narrow down your choices and determine which paver design will best complement your home’s aesthetic.

Next, you should consider the size and shape of your driveway. Different paver designs can be used to create different effects, such as a winding path or a straight line. You should also consider the amount of traffic your driveway will receive. If you have a lot of cars coming and going, you may want to opt for a more durable paver design that can withstand the wear and tear.

Finally, you should consider the cost of the paver design. Different materials and designs can vary greatly in price, so it’s important to do your research and find the best option for your budget.

By taking the time to consider these factors, you can ensure that you choose the right paver design for your driveway. With the right design, you can create a beautiful and functional driveway that will last for years to come.

Benefits of Installing a Paver Design for Your Driveway

Installing a paver design for your driveway is an excellent way to enhance the look and feel of your home. Pavers are a great choice for driveways because they are durable, attractive, and easy to maintain. Here are some of the benefits of installing a paver design for your driveway:

1. Durability: Pavers are made from a variety of materials, including concrete, brick, and stone. These materials are extremely durable and can withstand the elements, including extreme temperatures, heavy rain, and snow. This makes them an ideal choice for driveways, as they will last for many years with minimal maintenance.

2. Attractiveness: Pavers come in a variety of colors, shapes, and sizes, allowing you to create a unique and attractive design for your driveway. You can choose from a variety of patterns and textures to create a look that is both aesthetically pleasing and functional.

3. Low Maintenance: Pavers are easy to maintain and require minimal upkeep. They are resistant to staining and fading, and can be easily cleaned with a hose or pressure washer.

4. Cost-Effective: Installing a paver design for your driveway is a cost-effective way to improve the look and feel of your home. Pavers are generally less expensive than other driveway materials, such as asphalt or concrete.

Installing a paver design for your driveway is an excellent way to improve the look and feel of your home. Pavers are durable, attractive, and easy to maintain, making them an ideal choice for driveways. With a variety of colors, shapes, and sizes to choose from, you can create a unique and attractive design that will last for many years.

Conclusion

Pathways of Distinction: Elevating Your Driveway with Paver Design is an excellent resource for homeowners looking to upgrade their driveway with a unique and attractive paver design. With its comprehensive guide to paver design, Pathways of Distinction provides homeowners with the knowledge and tools they need to create a beautiful and durable driveway that will last for years to come. From selecting the right materials to understanding the installation process, Pathways of Distinction is an invaluable resource for anyone looking to elevate their driveway with a unique and attractive paver design.

How to get the right window replacement contractor

You will obviously decline to pay a huge sum of money for a house that has loosely hanging windows or broken window panes. That is why most homeowners and real estate developers have embraced the idea of window Renewal by Andersen Windows now more than ever. You will realize that there are many window replacement contractors claiming to offer awesome services to their clients. Here are some of the things to look out for before you hire a window replacement contractor.

Experience

As you know, the task of window replacement is quite difficult. You are placing the safety and value of your home on the line when you hire a window replacement contractor. It is therefore essential to get an expert that has the right skills and experience in delivering such services.

Type of windows you want to be installed

There are various types of windows and each of them requires the use of a specific technology for proper installation. It is advisable that you get a window replacement contractor that incorporates modern technology when building the windows for their clients. This will ensure that you get home that is energy efficient as well as pleasing to your personal taste and preferences. Make sure the contractor that you want to hire has a premium selection when it comes to quality of materials.

Quality of work

It is advisable that you get a contractor that is able to provide a guarantee for their services. You can double check the quality of services by having a look at the recommendations and complaints made by previous customers on the internet. Where possible, you can ask the contractor to refer you to their satisfied customers. This is a surefire way of getting the best services in the world of window replacement.

How to Bond Plastics Effectively with Alloys and Metals

The effective and efficient bonding of plastic materials to metals and alloys can sometimes be another obstacle to overcome in developing innovative products. There are various issues to consider, such as the types of plastic being bonded, the metal being used and the surfaces of both.

<2017/05/How-to-Bond-Plastics-Effectively-with-Alloys-and-Metals.jpg">

Image Credit

Material Considerations

Surface chemistry has a part to play in how well substances bond together. Some plastics are easily bonded, while other common plastic materials such as polypropylene and polyethylene require adequate surface preparation. Some plastic varieties, especially hybrid products such as GFN, can have levels of moisture in them that make bonding more difficult. In these cases, the adhesive must be selected carefully, and the surface prepared as well.

Metals have their own issues. Their surfaces may be oxidised (ie. reacted with oxygen) to form an obstructive layer on the metal’s surface. The metal’s surface may not be smooth either, being pocked, or scarred at a microscopic level. Particles may also be present on the surface, which can make adhesion more tricky. The bonds within metals however can be extremely strong. For more details, see this guide from the BBC.

<2017/05/How-to-Bond-Plastics-Effectively.jpg">

Image Credit

Where Size Does Matter

As all types of metals and plastics expand and contract as they heat and cool, the surface areas that must be bonded, along with environmental conditions, must be taken into account. A large bonded surface that is outside and must cope with sub-freezing temperatures and very hot summers will be subjected to a great deal of stress as the seasons change. This will affect the thickness of the metal bonding adhesive required, along with how adapatable and flexible it is during extreme variation of temperature.

The good news is that today’s adhesives have built in flexibility, and innovations mean that contraction and expansion rates of different materials are factored into the adhesive’s design. If you’re in need of the metal bonding adhesive that will get the job done, it would be a good idea to look at an expert range from a supplier such as http://www.ct1ltd.com/.

As adhesives have evolved, the number of materials they are suitable for has also increased. Today’s adhesives are a lot more adaptable than fasteners and provide a lighter, more reliable way of bonding metals and plastics that will deliver results and stand the test of time.

Floor Transformation: Exploring Paint Options for Concrete Floors

When it comes to transforming a concrete floor, there are many options available. From painting to staining, there are a variety of ways to give your concrete floor a new look. In this article, we will explore the different paint options available for concrete floors and discuss the pros and cons of each. We will also provide tips on how to choose the right paint for your project. With the right paint, you can transform your concrete floor into a beautiful and unique space.

How to Choose the Right Paint for Your Concrete Floor Transformation

When it comes to transforming a concrete floor, the right paint can make all the difference. Whether you’re looking to give your garage a facelift or you’re looking to spruce up a commercial space, the right paint can help you achieve the look you’re going for. Here are some tips to help you choose the right paint for your concrete floor transformation.

First, consider the environment in which the paint will be used. If the floor will be exposed to moisture or chemicals, you’ll need to choose a paint that is designed to withstand these elements. For example, epoxy paint is a great choice for garages and other areas that may be exposed to oil and other chemicals.

Second, consider the type of finish you’d like to achieve. If you’re looking for a glossy finish, you’ll need to choose a paint that is designed for this purpose. If you’re looking for a more matte finish, you’ll need to choose a paint that is designed for this purpose.

Third, consider the amount of traffic the floor will receive. If the floor will be subject to heavy foot traffic, you’ll need to choose a paint that is designed to withstand this type of wear and tear.

Finally, consider the color you’d like to achieve. If you’re looking for a bold, vibrant color, you’ll need to choose a paint that is designed for this purpose. If you’re looking for a more subtle color, you’ll need to choose a paint that is designed for this purpose.

By following these tips, you can ensure that you choose the right paint for your concrete floor transformation. With the right paint, you can create a beautiful, durable floor that will last for years to come.

Creative Ways to Transform Your Concrete Floor with Paint: Tips and Tricks

Painting your concrete floor is a great way to transform the look of your home or business. With the right preparation and the right paint, you can create a beautiful and unique look that will last for years. Here are some tips and tricks to help you get the most out of your concrete floor painting project.

1. Prepare the Surface: Before you begin painting, it is important to make sure the surface is clean and free of any dirt, dust, or debris. Use a broom or vacuum to remove any loose particles, then use a degreaser to remove any oil or grease. Once the surface is clean, use a concrete etcher to create a rough texture that will help the paint adhere better.

2. Choose the Right Paint: When selecting paint for your concrete floor, make sure to choose a product that is specifically designed for concrete surfaces. This type of paint will be more durable and will provide better coverage.

3. Apply Primer: Before you begin painting, it is important to apply a primer to the surface. This will help the paint adhere better and will also provide a better base for the paint to adhere to.

4. Use a Roller: When painting your concrete floor, it is best to use a roller instead of a brush. This will help you get an even coat of paint and will also help you avoid any drips or runs.

5. Add a Sealer: After you have finished painting, it is important to add a sealer to the surface. This will help protect the paint from wear and tear and will also help it last longer.

By following these tips and tricks, you can easily transform your concrete floor with paint. With the right preparation and the right paint, you can create a beautiful and unique look that will last for years.

Conclusion

In conclusion, paint is a great option for transforming concrete floors. It is relatively inexpensive, easy to apply, and can be used to create a variety of looks. With the right preparation and the right paint, you can create a beautiful and durable floor that will last for years to come.