5You are midway through installing a custom copper flashing around a chimney or wrapping a piece of galvanized ductwork for a new HVAC run. You take a pair of old, generic utility shears, line them up against the metal sheet, and squeeze with all your might. Instead of a clean, straight slice, the metal buckles, the edges fray into a jagged, razor-sharp mess, and a nasty sliver of metal slices right through your work glove. Within seconds, a simple weekend upgrade turns into a frustrating, bloody trip to the first-aid kit.
In my 10+ years of working on roofs, fabricating custom gutters, and remodeling vintage homes, I’ve seen this exact scene play out more times than I can count. Beginners often think working with sheet metal requires massive, expensive industrial machinery.
But here is a trade secret: the true foundation of precision fabrication fits right in your hand. Mastering a professional-grade tin snips set is the single fastest way to unlock incredible versatility and flawless accuracy on your project site.
Decoding the Color Code: Why Your Shears Aren’t Created Equal
Think of a tin snips set like a set of specialized golf clubs. You wouldn’t use a driver to putt, and you certainly shouldn’t use a left-cutting shear to make a tight right-hand curve.
When I first stepped onto a commercial job site over a decade ago, I watched an apprentice try to cut a tight circle out of a piece of 24-gauge steel using the wrong pair of shears. He was fighting the natural physics of the metal, shredding his material and his hands. That is when I taught him the industry-standard color system.
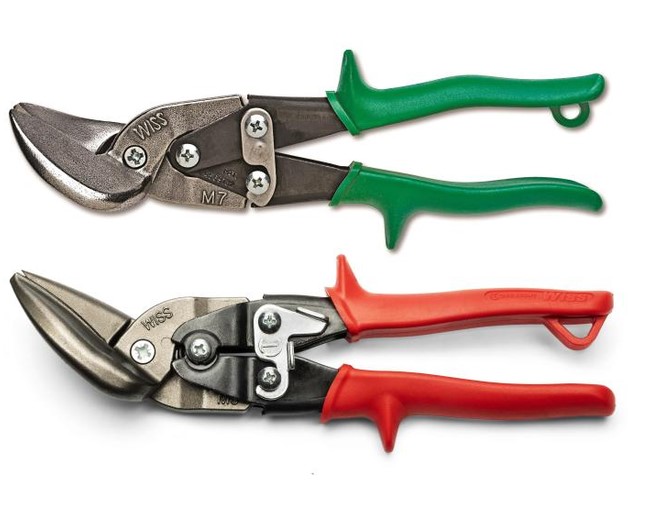
Most high-quality aviation snips feature brightly colored handles for a very specific, technical reason. These colors tell you exactly which way the tool is engineered to manipulate the metal waste:
Red Handles (Left Cuts)
These are engineered to cut straight and, more importantly, make tight counter-clockwise (left-hand) curves. As you cut, the tool pushes the waste material down and away to the right, giving you a crystal-clear view of your cut line on the left side.
Green Handles (Right Cuts)
The exact mirror image of the reds. Green snips excel at making clockwise (right-hand) curves. They deflect the scrap metal down to the left, which keeps your cut path perfectly visible on the right.
Yellow Handles (Straight Cuts)
Yellow-handled snips are designed to plow straight ahead through flat sheets. While they can handle wide, gentle sweeping curves, their primary job is delivering a laser-straight split with minimal binding.
+------------------+-----------------------------+----------------------------+
| Handle Color     | Primary Cutting Direction   | Best Used For              |
+------------------+-----------------------------+----------------------------+
| Red              | Left / Counter-Clockwise    | Tight radiuses, left arcs  |
| Green            | Right / Clockwise           | Tight radiuses, right arcs |
| Yellow           | Straight / Wide Sweeps      | Long straight seams        |
+------------------+-----------------------------+----------------------------+
The Mechanical Advantage: Compound Leverage vs. Standard Snips
For intermediate DIYers looking to upgrade their toolkit, it is crucial to understand the structural anatomy of your shears. You will generally choose between traditional “tinner’s snips” (which look like giant heavy scissors) and modern aviation snips.
Traditional tinner’s snips rely purely on single-pivot leverage. They are fantastic for long, continuous straight cuts through soft metals like aluminum, but they require massive forearm strength when things get thick.
Modern aviation snips utilize a compound leverage mechanism. By incorporating multiple pivot pins into the handle assembly, these tools act like a mechanical pulley system for your hand.
They convert a relatively gentle squeeze into thousands of pounds of concentrated mechanical pressure right at the cutting blades. This compound action allows you to slice through stubborn cold-rolled steel and stainless steel sheets without throwing out your wrist.
Technical Performance: Matching Gauges to Blades
As an expert, I cannot stress this enough: always respect the maximum gauge capacity of your tool. Steel thickness is measured in gauges—and counterintuitively, the smaller the gauge number, the thicker the metal is.
-
Most standard aviation snips are rated for up to 18-gauge steel.
-
If you are working with stainless steel, that capacity drops significantly, usually capping out at 22-gauge.
If you try to force a standard tin snips set through a piece of 16-gauge structural steel, you will permanently spring the blades out of alignment. Once the cutting edges lose their tight tolerances, the tool will start chewing and folding the metal rather than shearing it cleanly.
The Fish-Hook Danger
When cutting long paths across a metal sheet, never close the blades completely all the way to the tip on a single stroke. Stopping right before the tip prevents the blades from punching a tiny, jagged V-shaped tear into the metal—known in the trade as a “fish-hook.” These fish-hooks are incredibly sharp, structurally weaken the metal, and ruin your clean line. Instead, use smooth, overlapping 3/4-length strokes.
Pro Techniques for Flawless Metal Fabrication
Once your material is marked and your tin snips set is ready, execution comes down to body positioning and proper tool control.
-
Elevate the Waste Side: As you cut, the metal will naturally want to bind against the body of the shears. Use your free gloved hand to gently lift and curl the scrap metal up and away from the tool as you progress. This keeps your path friction-free.
-
The Circle Trick: Need to cut a perfect round hole in the middle of a metal panel? Drill a 1/2-inch pilot hole inside the circle first. Then, use your red (left-cut) or green (right-cut) snips to spiral outward from that pilot hole toward your scribed line. It is a seamless process once you let the tool’s natural curve orientation do the work.
-
Keep the Blades Perpendicular: Always hold your shears at a perfect 90-degree angle relative to the sheet metal surface. If you let the snips tilt or lean to one side, the blades will pinch the material, causing immediate binding and premature blade dulling.
Investing in Structural Precision
Ultimately, home improvement isn’t just about wood and drywall. Expanding your skills into precision sheet metal fabrication opens up a completely new world of custom flashing, clean accent pieces, and structural repairs.
By investing in a high-quality, professional tin snips set and respecting the mechanics of left, right, and straight cuts, you eliminate the guesswork, save your hands from injury, and elevate your craftsmanship to a truly professional standard.
Over to You!
Are you planning to tackle a custom metal roofing project, gutter repair, or ductwork modification soon? Which color snips do you find yourself reaching for the most in your workshop? Drop your layout challenges, metal thickness questions, or project victories in the comments below—let’s build something indestructible together!
