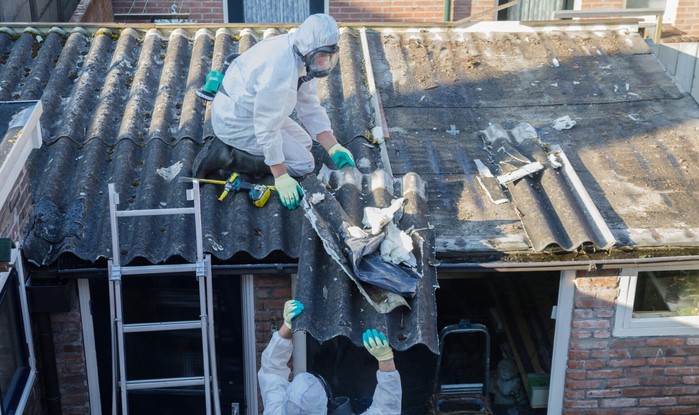
During my second year as a general contractor, I was helping a young couple renovate a quaint 1968 mid-century ranch home. We were eager to strip away the dated textured popcorn ceilings in the living room. Just before scraping off the first square foot, a subtle hunch stopped me in my tracks. We pulled back, gathered a sample under full containment, and sent it to a lab. The result came back with 8% Chrysotile asbestos content. That small pause saved that young family and my crew from exposing our lungs to dangerous microscopic hazards.
Over my 10+ years in home improvement and structural restoration, I have seen hundreds of enthusiastic homeowners dive headfirst into demolition without realizing what is lurking behind their drywall, under their linoleum, or inside their pipe insulation. Taking on asbestos testing DIY is entirely doable, but it requires surgical precision and absolute respect for safety protocols. This guide breaks down the exact steps, safety equipment, and sampling techniques I use in the field so you can evaluate your home without compromising your long-term health.
Understanding the Risks Before Attempting Asbestos Testing DIY
Asbestos is not a single chemical; it is a family of naturally occurring silicate minerals once prized for their extraordinary heat resistance, fireproofing, and structural reinforcement properties. Before federal regulations severely restricted its usage in the late 1970s, asbestos was incorporated into over 3,000 common building materials.
To understand the health hazard, think of asbestos as microscopic glass needles. When undisturbed, these materials are harmlessly bound inside a matrix. However, when you cut, scrape, sand, or break them, millions of invisible fibers escape into the air. Inhaling these fibers can lead to irreversible respiratory conditions, including asbestosis, lung cancer, and mesothelioma, often decades after initial exposure.
When assessing your home, you must categorize materials into two main risk profiles:
-
Friable Materials: Materials that can be easily crumbled, pulverized, or reduced to powder by hand pressure when dry (e.g., pipe insulation, sprayed-on acoustic ceilings, thermal block insulation). Friable asbestos poses the highest immediate danger because it releases fibers into the air with minimal force. Think of it like dry, brittle chalk that instantly turns to dust.
-
Non-Friable Materials: Materials bound in a dense matrix that do not easily break down unless sanded, sawed, or aggressively pulverized (e.g., vinyl floor tiles, transite siding, roofing felt). These are like dense hard rubber—relatively stable until mechanical tools grind them down.
If you suspect friable asbestos is damaged or crumbling severely across a large area, stop immediately. DIY sampling is meant for localized testing of intact or semi-intact suspect materials.
Essential Safety Gear and Isolation Protocols
You cannot perform asbestos testing DIY with standard dust masks and working clothes. Microscopic asbestos fibers cling to woven fabrics, pet fur, and standard furnace filters. Before taking a single sample, you must suit up and seal the testing zone like a cleanroom environment.
Required Personal Protective Equipment (PPE)
-
Half-Face Respirator with P100 Filters: Standard N95 masks will NOT protect you from microscopic asbestos fibers. You need an elastomeric half-face respirator equipped with NIOSH-approved P100 particulate filters (color-coded pink).
-
Disposable Tyvek Coveralls: Choose a full-body disposable suit equipped with an integrated hood and shoe booties. Once the testing is complete, this suit stays sealed in hazardous waste containment.
-
Nitrile or Latex Gloves: Wear heavy-duty disposable gloves that can be taped to the cuffs of your coveralls to eliminate bare skin exposure.
-
Safety Goggles: Non-vented safety goggles prevent airborne dust from settling into your eyes.
Setting Up the Isolation Zone
-
Shut Down HVAC Systems: Turn off all central heating, air conditioning, and ventilation fans in the home. Air movement is your enemy because it distributes loose fibers throughout the house.
-
Seal Off the Area: Close all doors leading into the room. Use 6-mil polyethylene sheeting and high-tack painter’s tape to seal interior doorways, supply vents, and return grilles.
-
Restrict Access: Ensure pets, children, and family members remain out of the work zone during testing and subsequent clean-up.
Pro Tip: Keep a small spray bottle filled with water and a few drops of liquid dish soap nearby. Plain water tends to bead up and roll off synthetic or painted surfaces. Adding dish soap breaks the surface tension, allowing water to penetrate the material quickly and trap potential dust particles at the source.
Step-by-Step Protocol: How to Safely Execute Asbestos Testing DIY
Sampling suspect material requires minimal disruption to the substrate. Your goal is to collect a small, representative sample while generating zero airborne dust. Follow this proven protocol step by step:
Step 1: Prepare the Wetting Solution and Sample Containers
Fill your spray bottle with water and dish soap. Have two heavy-duty, sealable plastic bags ready. Label both bags clearly using a permanent marker with the sample location, date, and description (e.g., “Living Room Ceiling Popcorn, Sample #1”).
Step 2: Wet the Sample Area Thoroughly
Generously mist the exact spot you intend to cut into. Never cut, scrape, or break dry suspect material. Wetting down the fibers weighs them down and prevents them from floating into your breathing zone.
Step 3: Extract the Material Carefully
Using a sharp utility knife, chisel, or pliers, carefully remove a small section of the material.
-
For ceilings or drywall compound: Collect roughly 1 square inch of material down to the substrate.
-
For pipe insulation or vinyl flooring: Collect a piece roughly the size of a quarter or a small teaspoonful.
-
Ensure you cut deeply enough to capture all layers (e.g., flooring backing as well as the top surface).
Step 4: Double-Bag the Sample
Place the sample directly into the first labeled sealable plastic bag without touching the outside of the bag. Wipe the exterior of the first bag with a damp paper towel, seal it tightly, and place it into the second labeled plastic bag. Seal the outer bag securely.
Step 5: Seal the Disturbed Area
Immediately patch or seal the small area where you extracted the sample. Use a dab of joint compound, heavy duct tape, or clear spray sealant to trap any newly exposed edges.
Step 6: Decontaminate and Clean Up
Clean the immediate work area using wet paper towels or specialized damp wipes. Dispose of all used paper towels inside a heavy-duty contractor trash bag. Never use a standard household vacuum cleaner or shop vac—they will blow microscopic asbestos dust directly into your indoor air unless equipped with a certified, factory-sealed HEPA filtration system.
Hidden Warning: Standard shop vac filters (even those labeled “fine dust”) pass microscopic asbestos fibers directly through their exhaust ports. This distributes millions of invisible fibers across your living space, creating a far greater hazard than the original untouched material. Always use wet-wiping techniques or an industrial HEPA vacuum certified specifically for hazardous remediation.
Submitting Your Sample to an Accredited Laboratory
A DIY sample is only as good as the laboratory analyzing it. You cannot determine whether a material contains asbestos simply by inspecting its texture, age, or color under a magnifying glass.
Package your double-bagged sample in a sturdy padded envelope alongside the laboratory’s Chain of Custody form. Ensure the laboratory you choose meets the following criteria:
-
NVLAP Accreditation: Choose a testing facility accredited by the National Voluntary Laboratory Accreditation Program for Bulk Asbestos Analysis via Polarized Light Microscopy.
-
Clear Turnaround Options: Most accredited labs offer 24-hour to 5-day turnaround times depending on urgency.
-
Comprehensive Report: The final report will specify the exact asbestos percentage and mineral type (such as Chrysotile, Amosite, or Crocidolite).
According to EPA guidelines, materials containing greater than 1% asbestos are officially classified as Asbestos-Containing Materials. If your lab report confirms an asbestos reading above 1%, leave the surrounding material undisturbed.
Interpreting Results and Knowing When to Hire an Abatement Specialist
Receiving a positive asbestos lab report does not mean you need to evacuate your home or panic. Intact, undamaged asbestos-containing material poses very little risk if left alone. However, if you plan major renovations that involve cutting, drilling, or tearing down these structures, you must decide between encapsulation and professional abatement.
-
Encapsulation: Involves treating the material with a sealant that binds the fibers together or building a physical barrier (such as laying new laminate flooring over intact asbestos vinyl tile). This is often the safest, most cost-effective path for non-friable materials.
-
Professional Abatement: If the material is friable, heavily damaged, or in the direct line of a major structural remodel, hire a certified asbestos abatement contractor. Professional teams establish negative pressure containment zones, utilize commercial HEPA air scrubbers, and follow strict municipal disposal protocols.
Taking control of asbestos testing DIY gives you the knowledge required to make safe, budget-conscious decisions during a renovation. By treating suspect materials with care, gearing up with proper P100 filtration, and sending samples to an accredited NVLAP laboratory, you protect both your family’s health and your home’s structural future.
Have you encountered suspect materials like popcorn ceilings or vintage floor tiles in your home renovation project? Drop your questions or experiences in the comments below, and let’s discuss how to tackle your next project safely!
