Think about the last time you hosted a dinner party or a casual family gathering. No matter how comfortable your living room sofa is, or how beautifully decorated your formal dining room stands, where did everyone actually end up congregating? Ninety percent of the time, guests jam themselves into the kitchen, hovering awkwardly around the kitchen island or blocking the path to the refrigerator.
In my ten-plus years as a home improvement contractor, I’ve remodeled kitchens of every size imaginable. The biggest complaint I hear isn’t a lack of counter space—it’s a lack of a comfortable, informal spot where people can connect without getting in the cook’s way.
This is where a strategically planned kitchen nook table becomes the ultimate game-changer for your home’s layout.
Redefining the Kitchen Footprint: Why a Nook Beats a Formal Dining Set
For decades, standard home design dictated a rigid separation between the cooking zone and the eating zone. But modern life is fluid. We need spaces that can smoothly transition from a morning coffee station to a remote work desk, a homework hub, and finally a cozy dinner spot.
Space Efficiency and Flow Dynamics
Many homeowners initially tell me they want to squeeze a traditional four-legged dining set into an awkward corner near a window. I almost always steer them away from this approach. Traditional tables require a massive clearance zone—usually 36 inches of clearance from the table edge to the wall just so people can pull their chairs out.
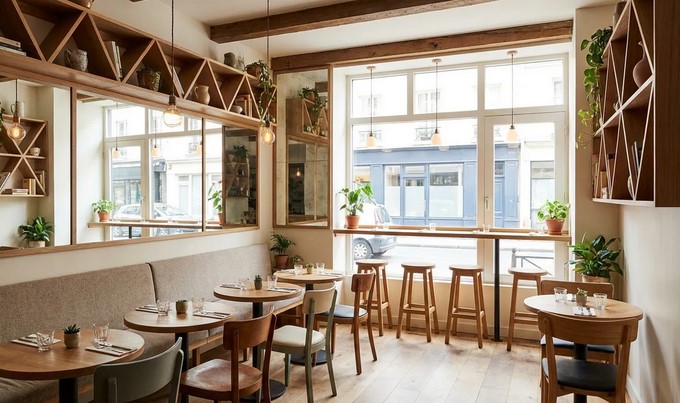
A kitchen nook table, especially when paired with built-in bench seating or a banquette, operates on entirely different spatial math. Think of it like a restaurant booth. By fixing the seating against the wall, you eliminate the need for “chair-pulling space” altogether. This small design shift can save you up to 30-40% of usable floor space, instantly opening up your kitchen’s traffic lanes.
Anatomy of a Perfect Kitchen Nook Table Setup
Designing a nook that actually gets used—rather than one that just collects stray mail and groceries—requires a deep understanding of technical scale and ergonomics.
The Proportions Matter: Height, Clearance, and Overlap
If your table and seating heights don’t align perfectly, the space will feel awkward, and your family will avoid it. Over the years, I’ve developed a foolproof cheat sheet for standard built-in nooks:
-
Seat Height: Your bench cushion should sit at 18 inches from the finished floor.
-
Table Height: A standard kitchen nook table should stand between 29 to 30 inches high.
-
The Overlap Rule: The edge of your table should overlap the edge of your bench seat by exactly 3 to 4 inches. This prevents people from having to lean forward uncomfortably while eating or working.
Shape Selection Based on Layout
Choosing the right shape for your table isn’t just an aesthetic choice; it dictates how people interact within the social zone.
-
Round and Oval Tables: These are the champions of flow. Without sharp corners, they make it incredibly easy for people to slide into curved banquettes or L-shaped corner seating. They break up the rigid, boxy lines of standard kitchen cabinetry.
-
Square and Rectangular Tables: Best suited for straight, single-bench configurations. They maximize surface area, making them ideal if your nook pulls double duty as a crafting station or a homework zone.
Material Selection: Choosing a Table Top That Survives Real Life
In a high-traffic culinary social zone, your table material needs to be as tough as it is beautiful. Spilled coffee, red wine, stray permanent markers, and hot laptops are all part of the daily routine.
Solid Wood vs. Engineered Surfaces
While solid oak or walnut looks gorgeous, it requires regular maintenance and is susceptible to water rings and scratches. If you go the wood route, ensure it is sealed with a commercial-grade polyurethane or a durable marine varnish.
For busy families, I frequently recommend engineered quartz or high-pressure laminates (HPL). Modern laminates can mimic the look of natural stone or wood grain flawlessly while remaining entirely non-porous, heat-resistant, and scratch-resistant.
Step-by-Step Installation Strategy: Integrating Your Nook Table Like a Pro
If you are a mid-level DIYer looking to tackle a nook transformation over a weekend, success lies entirely in your sequencing. Here is the process my team uses to ensure a seamless fit.
Expert Advice from the Field
Before you rush out to buy your new furniture set, keep these hard-earned insights in mind.
⚠️ Beware of the “Deep Corner Trap”
If you build a massive, wrap-around L-shaped or U-shaped booth with a large rectangular table, the person sitting in the dead center is effectively trapped. To get out to use the restroom or grab a drink, three other people have to stand up. Keep your table length manageable, or opt for an open-ended oval table to provide multiple exit points.
💡 Pro-Tip: Capitalize on Dead Volume with Smart Storage
The space inside a built-in nook bench is prime real estate. Never seal it up with solid drywall. Install deep drawers that slide out from the sides of the benches, or use heavy-duty gas struts (like the ones that hold up a car’s hatchback) to make the bench tops flip open effortlessly. It is the perfect spot for storing seasonal tablecloths, slow cookers, or bulky baking pans.
Evaluating the Impact: Nook vs. Traditional Island Seating
Many homeowners wonder if they should just extend their kitchen island rather than building a dedicated nook. Let’s look at how they stack up side-by-side:
| Feature | Kitchen Island Barstools | Built-In Kitchen Nook Table |
| Social Dynamic | Linear seating (hard to make eye contact) | Facing configuration (fosters conversation) |
| Comfort Level | High perches (tiresome for long periods) | Low, supported seating (encourages lounging) |
| Safety for Kids | High fall risk for toddlers | Low to the ground, highly secure |
| Storage Potential | Sacrifices under-counter prep space | Adds massive hidden bench storage |
Conclusion: Transform Your Kitchen Into a True Hub
A kitchen should be more than just a room where food is prepared; it should be the emotional anchor of your home. By thoughtfully integrating a kitchen nook table into an underutilized corner, you create a dedicated destination that naturally draws people together. It bridges the gap between functional utility and cozy hospitality.
Are you dealing with an awkward, empty corner in your kitchen right now? What shape of table do you think would fit your home’s layout best? Let me know your thoughts or share your current dimensions in the comments below—let’s brainstorm your kitchen’s ultimate social upgrade!
