Tackling plumbing issues can be a daunting task, especially if you don’t have the right tools or knowledge. Insta-Flo is a drain cleaning product that can help you quickly and easily clear clogged drains. This guide will provide you with an overview of how to use Insta-Flo for drain cleaning, as well as tips and tricks for getting the most out of the product. With Insta-Flo, you can tackle plumbing issues with confidence and ease.
How Insta-Flo Can Help You Tackle Common Plumbing Issues
Plumbing issues can be a major source of frustration and inconvenience. From clogged drains to leaky pipes, plumbing problems can be difficult to diagnose and repair. Fortunately, Insta-Flo is here to help.
Insta-Flo is a professional plumbing service that offers a wide range of services to help you tackle common plumbing issues. Our experienced technicians are trained to diagnose and repair a variety of plumbing problems, from clogged drains to broken pipes. We also offer preventive maintenance services to help you avoid costly repairs in the future.
Our team of experienced technicians can help you with a variety of plumbing issues, including:
• Clogged drains: Our technicians can quickly and effectively unclog your drains using a variety of methods, including hydro-jetting and snaking.
• Leaky pipes: We can identify the source of the leak and repair it quickly and efficiently.
• Broken pipes: Our technicians can replace broken pipes and fittings, as well as install new pipes and fixtures.
• Low water pressure: We can diagnose and repair the source of the problem, whether it’s a clogged pipe or a faulty valve.
• Sewer line issues: We can inspect and repair your sewer line, as well as install new lines.
At Insta-Flo, we understand that plumbing issues can be stressful and inconvenient. That’s why we strive to provide fast, reliable service to help you get your plumbing system back up and running as quickly as possible. Our technicians are available 24/7 to provide emergency services, so you can rest assured that help is just a phone call away.
If you’re dealing with a plumbing issue, don’t hesitate to contact Insta-Flo. Our experienced technicians are here to help you tackle common plumbing issues quickly and efficiently.
Tips for Using Insta-Flo to Clean Your Drains and Keep Your Plumbing System Running Smoothly
1. Start by pouring a half cup of Insta-Flo down the drain. This will help to break up any clogs and debris that may be blocking the drain.
2. Allow the Insta-Flo to sit in the drain for at least 15 minutes. This will give it time to work and dissolve any clogs.
3. After 15 minutes, flush the drain with hot water. This will help to flush out any remaining debris and help to clear the drain.
4. Repeat this process once a month to keep your drains running smoothly.
5. If you have a stubborn clog, you can use a plunger to help break it up.
6. If the clog persists, you may need to call a professional plumber to help clear the drain.
7. To prevent clogs from forming in the future, avoid pouring grease, oil, and other food particles down the drain.
8. You can also use a drain strainer to catch any debris before it goes down the drain.
9. Finally, make sure to inspect your plumbing system regularly for any signs of wear and tear. This will help to prevent any major plumbing issues from occurring.
Conclusion
Tackling plumbing issues can be a daunting task, but with the help of Insta-Flo for drain cleaning, it can be made much easier. Insta-Flo is a powerful and effective drain cleaner that can help to clear out clogs and keep your drains running smoothly. With its easy-to-use design and powerful cleaning capabilities, Insta-Flo is an ideal choice for tackling plumbing issues.


 It is easy to find
  The cadaverous smell quickly spreads in the room, penetrating through ventilation and sockets. The cadaverous odor appears a day after a person’s death. When the heating is on, the processes of decay and decomposition proceed even faster. In an apartment where the deceased person stayed for more than 3-4 days, it is not recommended to be in the room without protective equipment that’s why cleaners who provide a


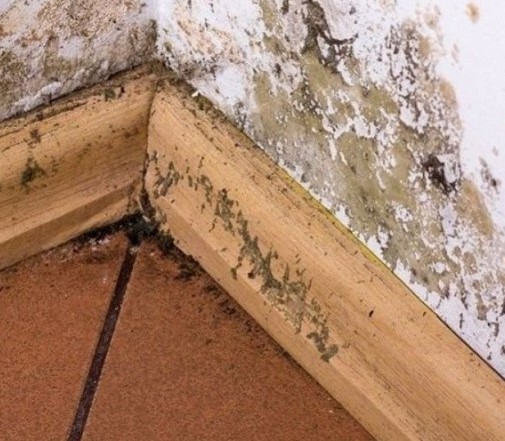
 Cleaning an apartment after a person’s death can be an emotionally overwhelming and challenging task. Such factors, bio-pollution or putrid smell, often exacerbate the solution of this problem and require special cleaning services like