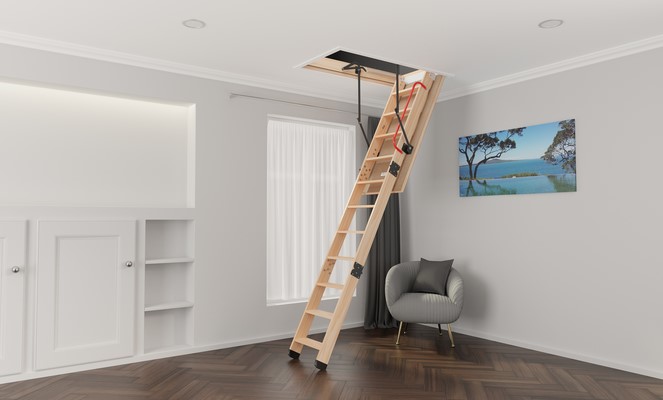
I remember sitting in a freezing living room in upstate New York three years ago, staring at a client’s fireplace that looked like it had been salvaged from a 1970s basement. They had spent $8,000 on a high-efficiency wood-burning stove, but the floor beneath it was a scorched, mismatched mess of cracked ceramic. It was a classic “million-dollar engine in a ten-dollar car” situation.
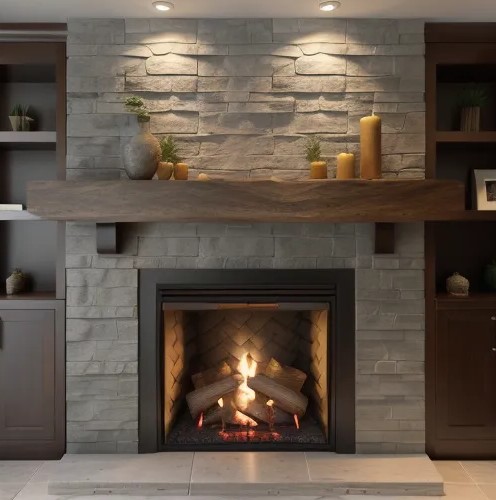
In my ten years as a home improvement specialist, I’ve seen homeowners overlook the one component that bridges the gap between raw industrial heat and high-end interior design: the hearth. When you choose a Slate Hearth Tile, you aren’t just buying a floor covering; you are investing in a thermal heat sink that anchors the entire room’s aesthetic. If you want a return on investment (ROI) that you can actually feel on a cold February night, you have to look at slate.
Why Slate? The Science of the “Cold-to-Touch” Stone
Beginners often ask me why they shouldn’t just use standard porcelain or marble for their fireplace floor. The answer lies in Thermal Conductivity and Porosity.
Think of your hearth tile like a cast-iron skillet. You want something that can handle intense, localized heat without cracking (thermal shock) and something that can hold that heat long after the fire has died down. Unlike synthetic tiles, Slate Hearth Tile is a metamorphic rock formed under intense pressure and heat deep within the earth. It was born for this.
The Durability Factor
Slate is naturally slip-resistant due to its “cleft” surface—the natural ridges formed when the stone is split. In a fireplace setting, this is vital. When you’re carrying heavy oak logs or dealing with stray embers, you need a surface that offers grip and won’t show a scratch the moment a piece of kindling drops.
Maximizing Aesthetic ROI with Slate Hearth Tile
In the world of professional flipping and high-end remodeling, “Aesthetic ROI” refers to improvements that make a house sell faster because they create an emotional “wow” factor. Slate provides a timeless, organic look that fits everything from a rustic cabin to a mid-century modern loft.
1. Choosing the Right Finish: Honed vs. Natural Cleft
-
Natural Cleft: This is the rugged, textured look. It’s perfect for traditional wood stoves and hides soot and ash exceptionally well.
-
Honed Slate: This is sanded flat for a matte, velvety finish. If you have a sleek, wall-mounted gas fireplace, a honed Slate Hearth Tile offers a sophisticated, contemporary vibe that screams “custom build.”
2. Large Format vs. Mosaic Patterns
To maximize your ROI, I always recommend Large Format Tiles (12×24 inches or larger). Why? Fewer grout lines. In a hearth setting, grout is the enemy—it’s where ash settles and stains form. A seamless-looking slate surface creates a cleaner, more expansive visual field that makes the entire fireplace look grander.
Technical Specifications: Installation for Thermal Safety
This is where we move from “looks” to “laws.” A hearth isn’t just a decoration; it’s a fire-safety barrier designed to protect your combustible subfloor (like plywood or joists).
Non-Combustible Clearances
Most building codes require a non-combustible hearth to extend at least 16 to 18 inches in front of the fireplace opening. Using a Slate Hearth Tile ensures you meet these requirements while maintaining a premium look.
The Substrate and Thinset
You cannot simply “glue” slate to plywood. For a professional install, you need:
-
Cement Backer Board: A rigid, heat-stable base.
-
Modified Thinset: Look for a high-bond, heat-resistant mortar.
-
Expansion Gaps: Slate expands slightly when heated. I always leave a 1/8-inch gap at the perimeter, hidden by the baseboards or the fireplace surround, to prevent “tenting” or cracking.
Maintenance: Keeping Your Slate “Showroom Ready”
Analogy: Think of slate like a high-quality leather jacket. If you leave it out in the rain and never condition it, it gets brittle and dull. But if you treat it right, it develops a “patina” that looks better with age.
To keep your Slate Hearth Tile looking sharp, you must address its one weakness: its thirst. Slate is porous. If you spill red wine or drop an oily piece of treated wood on it, it will soak in.
-
Step 1: The Initial Seal. Use a high-quality, penetrating solvent-based sealer immediately after installation.
-
Step 2: The Color Enhancer. If you want that deep, “wet” black look (popular with Brazilian Black Slate), use an enhancing sealer.
-
Step 3: Ph-Neutral Cleaning. Never use vinegar or lemon-based cleaners. The acid will eat into the calcium carbonate in the stone, causing “etching” (permanent dull spots).
Scannable Pro-Tips for Homeowners
-
Buy 15% Extra: Slate is a natural product. You will find tiles with color variations or odd inclusions that you don’t like. Having “attic stock” ensures you can cherry-pick the best pieces.
-
Check the Thickness: Slate varies in thickness (gauged vs. ungauged). For a hearth, always buy gauged slate, which has been ground flat on the bottom. It makes leveling your stove much easier.
-
The “Ring” Test: Before laying a tile, tap it with a screwdriver. If it makes a dull “thud,” it might have an internal fissure. You want a clear “ring.”
Conclusion: A Hearth That Speaks Volumes
A fireplace is the heart of the home, but the hearth is its foundation. By choosing a Slate Hearth Tile, you are choosing a material that respects the technical demands of heat management while offering a sophisticated, natural beauty that synthetic materials simply cannot replicate.
Whether you’re looking to increase your home’s resale value or just want a cozy spot to rest your feet, slate is the expert’s choice for a reason. It’s durable, it’s thermal, and it’s undeniably premium.
What does your fireplace say about your home? Is it time to ditch the dated ceramic and embrace the raw, thermal elegance of natural stone?
If you’re planning a hearth remodel and have questions about mortar types or slate sourcing, drop a comment below—I’ve laid thousands of these tiles and I’m happy to help you get the job done right the first time!