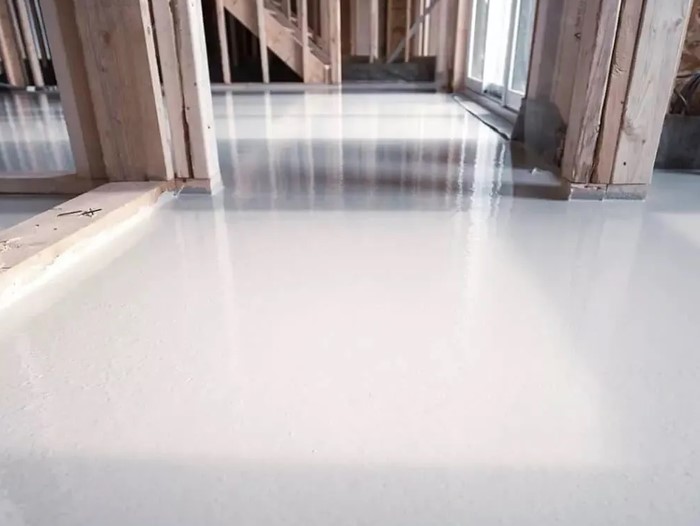
Imagine spending thousands of dollars on luxury hardwood planks or sleek large-format porcelain tiles, only to walk across your newly finished room and feel a subtle hollow bounce underfoot. Or picture setting up a brand-new kitchen island, only to discover your cabinet doors won’t align because the floor beneath them slopes downward by half an inch.
Over my 10+ years as a home improvement specialist and flooring contractor, I have walked into countless job sites where homeowners blamed defective flooring materials for popping tiles, squeaking planks, and unsightly grout line cracks.
Here is an unvarnished truth straight from the field: 90% of finished flooring failures have nothing to do with the tile or wood you selected. The real culprit hides underneath—an uneven, uncalibrated subfloor that was never prepared correctly through precision floor leveling.
What Is Floor Leveling and Why Is Subfloor Preparation Non-Negotiable?
Think of your subfloor as the structural foundation of a skyscraper. You can install the finest architectural glass and steel on the upper floors, but if the foundation is out of plumb, the entire building compromised.
In surface engineering, floor leveling is the precise process of correcting planar dips, humps, and slope variances across concrete slabs or wooden subfloors using self-leveling underlayments (SLU), mechanical grinding, or targeted patching compounds.
During my early years in residential retrofitting, I often watched eager DIYers bypass subfloor prep to save time and money. They viewed underlayment compounds as an optional luxury.
In reality, modern click-lock vinyl planks, engineered hardwoods, and large-format porcelain tiles demand flat substrates to distribute point loads evenly. Without a flat surface, every step flexes the locking joints or strains the mortar bed until the system fails completely.
Technical Performance: Tolerances, Self-Leveling Underlayment (SLU), and Surface Prep
When evaluating subfloor readiness, home improvement professionals don’t guess—we measure against Industry Standard Tolerances established by groups like the National Wood Flooring Association (NWFA) and the Tile Council of North America (TCNA).
For standard tile and wood installations, the acceptable subfloor variance is typically 1/4 inch over a 10-foot radius. For modern large-format tiles (where any single edge exceeds 15 inches), that tolerance tightens to 1/8 inch over a 10-foot radius.
[ Subfloor Deflection Mechanics ]

Unleveled Subfloor (Dip / Depression)
═══════════════╲                     ╱═══════════════
                ╲  Point Load (Foot)╱
                 ▼                 ▼
          ┌─────────────┬─────────────┐  ◄── Click-Lock Joint Flexes
          │ Plank A     │  Plank B    │
          └─────────────┴─────────────┘
═════════════════════════════════════════════════════ (Void Space Below)
* Result: Broken locking tabs, squeaks, and hollow sounds over time.

Properly Executed Floor Leveling
═════════════════════════════════════════════════════
          ┌─────────────┬─────────────┐
          │ Plank A     │  Plank B    │
          ├─────────────┴─────────────┤  ◄── Continuous Support
          │ Self-Leveling Underlayment│
═════════════════════════════════════════════════════ Solid Subfloor Base
* Result: Zero joint movement, quiet acoustics, lifetime durability.
Achieving structural uniformity requires choosing the correct technical method based on your substrate:
-
Self-Leveling Underlayment (SLU): Polymer-modified cementitious hydraulic compounds that flow like liquid pancake batter when mixed with precise water ratios, seeking a true horizontal plane before curing.
-
Mechanical Scarification & Grinding: Using diamond-cup grinders to knock down raised concrete humps or ridged plywood seams before applying liquid underlayments.
-
Subfloor Moisture Priming: Applying specialized acrylic or epoxy primers to block porous concrete from sucking hydration out of the leveling compound prematurely.
Substrate Comparison: Concrete Slabs vs. Wooden Subfloors
Not every surface reacts to leveling compounds the same way. Understanding your underlying material ensures you don’t experience adhesive debonding or cracking down the road.
| Metric / Parameter | Concrete Slab Substrate | Plywood / OSB Wooden Subfloor |
| Primary Leveling Method | High-flow cementitious SLU or diamond grinding | Feather-finish patch, sander, or reinforced SLU |
| Primer Requirement | Acrylic porous/non-porous concrete primer | Specialty wood primer + lathed structural reinforcement |
| Flexibility / Deflection | Rigid (zero structural flex) | Dynamic (subject to joist deflection and moisture swelling) |
| Cure Time Before Flooring | 12 to 24 hours (depending on thickness) | 16 to 24 hours |
Step-by-Step Field Guide: Executing Precision Floor Leveling
Leveling a floor with self-leveling underlayment is a fast-paced operation. Once you mix the powder with water, the chemical clock starts ticking. Follow this field protocol:
Step 1: Mapping the Subfloor Deflection
Clean the subfloor thoroughly of all dust, drywall mud, paint, and oils. Place a 6-foot or 10-foot aluminum straightedge (or sweep a cross-line laser level) across the room. Mark low dips with a pencil and circle high spots that need grinding.
Step 2: Sealing Gaps and Perimeter Foam Installation
Self-leveling compound has the viscosity of heavy cream; if there is a pinhole leak in your subfloor or along wall perimeters, the liquid will pour straight into your basement or lower wall cavity. Seal all subfloor seams with silicone caulk and install foam perimeter edge strip along all walls.
Step 3: Substrate Priming
Never skip the primer! Roll on an engineered acrylic primer evenly across the surface. The primer seals porous concrete to prevent air bubbles (pinholes) from rising through your pour and creates a chemical bridge for maximum adhesion.
Step 4: Mixing and Pouring the Compound
Mix the SLU powder with water in a clean bucket using a high-torque drill equipped with an eggbeater mixing paddle for exactly 2 minutes. Pour the mixture starting at the lowest identified dip in the room, letting the fluid naturally flow outward.
Step 5: Agitating with a Gauge Rake and Spiked Roller
Use a gauge rake set to your target depth to push the material into corners. Immediately follow with a gauge spiked roller to burst trapped air bubbles and blend consecutive bucket pours into a single seamless, monolithic slab.
Expert Advice: Tips Pro & Hidden Warnings from the Field
Expert Insight: Early in my career while retrofitting an older home, I poured five bags of self-leveling underlayment over an un-primed, dusty concrete basement slab. Two weeks after laying down expensive hardwood, we heard loud popping sounds. The SLU had completely delaminated from the concrete because the dry slab sucked the water out of the mix before it could hydrate and bond. Always, always use the manufacturer-recommended primer!
Peringatan Tersembunyi (Hidden Warnings from the Field)
-
Measure Water Ratios to the Milliliter: Self-leveling underlayment relies on delicate hydraulic chemical bonds. Adding just one extra cup of water to make it “flow easier” will weaken the compressive strength of the cured cement, causing the surface to chalk, crack, and crumble under load.
-
Account for Structural Joist Deflection: If you are pouring SLU over a wooden subfloor on an upper level, calculate your floor’s L/360 or L/720 deflection rating first. Heavy cementitious underlayments add substantial dead weight; if joists are undersized, the subfloor will sag under the new weight, cracking your new tiles.
-
Mind Door Threshold Clearances: Remember that raising a low spot by 1/2 inch with leveling compound raises your entire finished floor height. Check door casings, closet clearances, and transitions to adjacent carpeted or tiled rooms before you pour.
Conclusion
Precision surface engineering is the unsung hero of every stunning interior space. While floor leveling happens completely out of sight beneath your finished floor, it dictates whether your investment will last for 30 years or fail within 12 months.
Taking the time to measure your subfloor tolerances, prime your substrate, and pour a flat underlayment guarantees quiet steps, tight joints, and flawless finishes throughout your home.
Have you ever encountered squeaky planks, hollow tiles, or uneven slopes in your own home? Are you planning a flooring renovation project soon? Drop your questions and field experiences in the comments below—let’s discuss!
