Two months ago, I was inspecting a stunning mid-century aniline leather armchair for a client in Seattle. The owner was ready to haul this $4,000 piece to the landfill simply because her new rescue cat had left a jagged, three-inch tear across the cushion, alongside unsightly surface scuffs on the armrests. Replacing the hide entirely would have cost thousands and ruined the chair’s authentic aged patina. Instead, we spent about two hours using a professional-grade leather repair kit, bridging the tear from underneath and re-pigmenting the worn grain. When we finished, the repair was virtually invisible, and the client retained a prized piece of furniture while saving a fortune.
Over my 10+ years in structural restoration and interior asset management, I have seen far too many homeowners toss out high-value upholstery at the first sign of cracking, fading, or tearing. Leather is essentially an organic structural matrix—much like human skin—and with the right tools, it possesses incredible self-healing potential. Mastering the use of a comprehensive leather repair kit is one of the most cost-effective skills you can cultivate to protect your interior investments.
Understanding Leather Substrates Before Applying Any Repair
Before unboxing your kit and mixing compounds, you must diagnose the specific type of leather you are working on. Treating all hides the same way is the fastest route to a failed repair that peels off within weeks.
Think of leather repair like auto body work: you wouldn’t apply plastic filler over an un-sanded, waxed car door and expect the paint to hold. You need to understand the underlying material’s porosity and finish to ensure proper mechanical and chemical bonding.
Here is how the most common leather types behave under repair conditions:
-
Top-Grain / Pigmented Leather: Features a protective polymer topcoat over the hide. It is the easiest to repair using standard liquid vinyl compounds and water-based colorants because the surface is non-porous and uniform.
-
Aniline / Semi-Aniline Leather: Dyed with soluble dyes without a heavy protective surface coat, preserving natural grain and markings. Repairs require specialized absorbable sub-patches and translucent dye matching to prevent dark, blotchy patches.
-
Bicast / Bonded Leather: Composed of shredded leather fibers backed with polyurethane. When this material flakes or peels, a leather repair kit acts as a structural stabilizer, but it requires a flexible backing mesh to prevent further delamination.
Anatomy of a Professional Leather Repair Kit
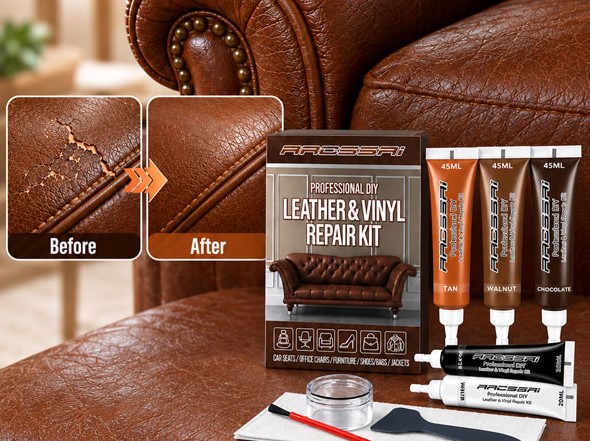
A complete, high-performance kit contains much more than a simple tub of colored paste. To achieve invisible, durable results on worn or torn hide, your kit should include several specialized components:
-
Sub-Surface Fabric Mesh: A flexible, heavy-duty woven backing material inserted beneath deep cuts or tears to distribute tension across the hide.
-
Heat-Cure or Air-Dry Compound: Flexible structural filler resins used to level out deep gauge marks, punctures, or missing surface grain.
-
Intermixable Pigment Palette: Concentrated liquid colorants that allow you to custom-blend shades to match your upholstery’s exact hue, undertones, and sheen.
-
Grain Paper Templates: Textured transfer sheets pressed into wet compound during curing to replicate natural hide patterns like pebbled, smooth, or coarse grain.
-
Clear Protective Topcoat (Satin/Matte/Gloss): A sealing agent applied over the color layer to lock in the dye, resist UV damage, and match the surrounding sheen.
Step-by-Step Execution: Seamless Asset Recovery Protocol
Fixing a jagged tear or deep gouge requires patience and systematic execution. Follow this battle-tested restoration protocol to achieve seamless results:
Step 1: Surface Decontamination and Preparation
Clean the damaged zone using a dedicated leather cleaner or a mild isopropyl alcohol solution to strip away oils, silicone conditioners, and dirt. Any residual body oils will prevent the repair compound from adhering securely to the grain matrix. Trim away any frayed, fibrous edges around the tear using sharp micro-scissors.
Step 2: Insert the Sub-Surface Structural Anchor
For deep cuts or full-thickness tears, cut a piece of backing mesh approximately 1/2-inch larger than the damage on all sides. Tuck the mesh underneath the hide using a pair of tweezers or a flat spatula. Apply a thin layer of leather adhesive between the underside of the hide and the mesh, then press firmly until set to create a strong tension bridge.
Step 3: Layering the Flexible Fill Compound
Apply thin coats of heat-cure or air-dry compound into the recessed tear using a flexible palette knife. Do not attempt to fill a deep gouge in a single heavy pass—thick layers shrink, crack, or dry unevenly. Build up the repair in thin layers, allowing each pass to dry completely until the surface sits level with the surrounding hide.
Step 4: Color Matching and Grain Replication
Mix your base pigments on a clean palette, testing the wet blend on a hidden swatch or piece of paper until the color match is exact. Once applied over the filled repair, gently press your chosen grain paper template onto the wet compound or heat-cure it with a micro-iron to transfer authentic grain texture into the patch.
Step 5: Sealing and Topcoat Application
Lock in your repair by misting or sponging a thin layer of clear topcoat over the restored area. This step matches the surrounding surface sheen (gloss, satin, or matte) and protects the fresh pigment from premature wear caused by friction and cleaning.
Expert Advice: Pro Tips and Hidden Pitfalls
Pro Tip: Master the “Dry-Color Drift” RuleLiquid leather dyes and pigments almost always dry one to two shades darker than they appear when wet on your palette. Always mix your color slightly lighter than your target upholstery tone, apply a tiny test dot on an inconspicuous area (like the underside of a cushion flap), and let it dry completely using a hair dryer before committing to the main repair.
Hidden Warning: Never Skip the Flexibility Test on Seating ZonesStandard rigid epoxy fillers or generic super glues will turn brittle and snap when subjected to the weight of someone sitting on a sofa cushion. Ensure your leather repair kit utilizes cross-linking polyurethane or acrylic-elastomer compounds designed specifically for high-flex areas. Using rigid adhesives on flexible leather will tear the surrounding hide along the repair margin, turning a minor tear into a massive structural failure.
Investing a small amount of time into learning how to use a leather repair kit reclaims thousands of dollars in furniture value while keeping classic, well-built pieces out of landfills. With proper hide identification, sub-surface structural backing, and precise color matching, you can breathe decades of new life into your high-value upholstery.
Have you ever tried restoring a torn leather sofa or car interior at home? What was your biggest challenge when matching colors or repairing tears? Drop your questions or tips in the comments below, and let’s get your restoration projects handled like a pro!
