You’re standing on the top rung of a rickety step ladder, balanced precariously while trying to hoist a 40-pound box of holiday decorations through a tiny, dark hole in your ceiling. Your fingers are slipping, the ladder is wobbling, and you realize that one wrong move means a trip to the emergency room and a hole in your drywall. This “attic acrobatics” is a scene I’ve witnessed in hundreds of homes, and frankly, it’s the most dangerous way to manage your storage.
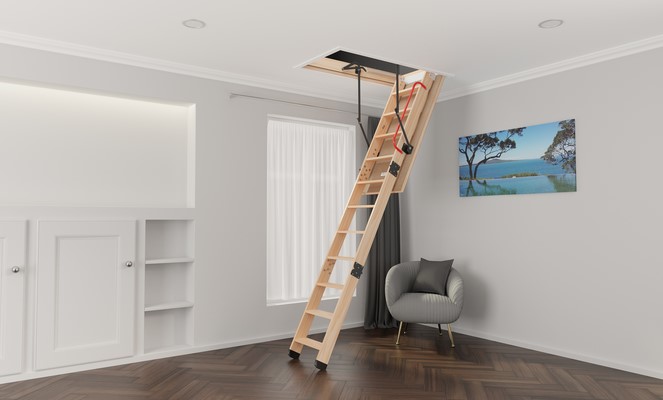
In my ten years of structural renovations, I’ve found that an Attic Ladder Install is one of the highest-return “quality of life” upgrades you can make. It’s the difference between your attic being a terrifying, forgotten wasteland and it becoming a functional extension of your home’s square footage. I remember a client who lived in a beautiful 1950s ranch; they were paying for a monthly storage unit until we installed a heavy-duty aluminum pull-down. Within a week, they had canceled their subscription and moved everything into the “bonus room” above their heads.
The Portal Concept: Why Vertical Access is Strategic
Think of an attic ladder as a permanent bridge between your living space and your hidden warehouse. Without it, your attic is like a bank vault without a door—you know the treasure is in there, but getting to it is so much work that you eventually stop trying.
A professional Attic Ladder Install changes the “psychology of the space.” When access is as easy as pulling a cord, you start to use that vertical real estate for more than just dusty suitcases. You can monitor your insulation levels, check for roof leaks early, and keep your garage floor clear of clutter. It transforms a dark void into a strategic asset.
Choosing the Right Hardware: Wood vs. Aluminum vs. Steel
When I consult on an Attic Ladder Install, the first question is always about material. Most big-box stores push the basic wood models, but as an expert, I look at the duty rating and longevity data.
-
Wood Ladders: These are the traditional choice. They are sturdy but heavy. In humid climates, wood can warp over time, leading to gaps in the ceiling seal. If you go with wood, ensure it is premium-grade pressure-treated pine.
-
Aluminum Ladders: This is my personal recommendation for 90% of homeowners. They are incredibly lightweight, rust-proof, and have a much higher “strength-to-weight” ratio. Because they are lighter, there is less strain on the tension springs and the person pulling them down.
-
Steel Ladders: These are the “industrial” option. If you are a big guy carrying heavy toolboxes into a workshop attic, the 375-lb duty rating of a steel ladder provides unmatched stability.
Technical Deep-Dive: The Rough Opening and Structural Integrity
For the intermediate DIYer, the most intimidating part of an Attic Ladder Install is cutting into the ceiling. You aren’t just making a hole; you are altering the ceiling joists.
Most residential joists are spaced 16 or 24 inches on center. A standard attic ladder requires a “Rough Opening” of 22.5″ x 54″. This means you will almost certainly have to cut a joist. When you do this, you must “frame out” the opening with headers to redistribute the weight to the adjacent joists.
Think of it like removing a leg from a chair. If you don’t reinforce the frame, the chair will eventually collapse. I always use double-headers and joist hangers to ensure the ceiling doesn’t sag under the weight of the ladder and the person using it.
Energy Efficiency: The “Hidden” Heat Leak
Here is a technical insight many general contractors miss: an attic ladder is a giant hole in your thermal envelope. Without proper insulation, that thin plywood door acts like an open window, letting your expensive AC leak into the attic during the summer.
During an Attic Ladder Install, I always prioritize the R-Value. Look for models that include integrated weather stripping. If the model you love doesn’t have it, you must build or buy an Attic Tent—an insulated cover that sits over the ladder in the attic. This single addition can save you 10% on your monthly energy bills by preventing convective heat transfer.
Step-by-Step Precision: The Installation Arc
If you’re tackling this yourself, precision is your best friend. A ladder that is 1/4 inch too long will “bow” in the middle, and a ladder that is too short will put dangerous stress on the hinge plates.
-
Check for Obstructions: Before cutting, go into the attic and clear away electrical wires, HVAC ducts, or plumbing lines.
-
Square the Frame: Use a framing square to ensure your headers are at perfect 90-degree angles. If the frame is “diamond-shaped,” the ladder door will never close flush.
-
Temporary Support: Use “cleats” (small scraps of wood) screwed into the ceiling to hold the ladder unit in place while you bolt it to the joists. This is a two-person job—don’t try to be a hero.
-
The Final Cut: Aluminum and wood ladders usually come “over-long.” You must measure the distance from the hinge to the floor and trim the feet at an angle so they sit perfectly flat on the ground.
Tips Pro: The Safety Shim
Never rely solely on nails. During an Attic Ladder Install, use 1/4-inch x 3-inch lag screws or structural timber screws to secure the frame. Nails can pull out under the dynamic load of a person climbing. Also, always shim the gaps between the ladder frame and the joists to prevent the frame from “twisting” when you tighten the bolts.
Maintenance and Operational Safety
Once your ladder is in, it requires an annual “physical.” I’ve seen 20-year-old ladders snap because the pivot points were bone-dry and rusted.
-
Lubrication: Use a dry silicone spray on the springs and hinges every year. Avoid WD-40, as it attracts dust and becomes “gunk” over time.
-
Bolt Check: The vibration of walking up and down can loosen the nuts. Give them a quick turn with a wrench once a year.
-
Clearance Zone: Ensure the “swing path” of the ladder is always clear. Don’t place a permanent piece of furniture where the ladder needs to unfold.
An Attic Ladder Install is about more than just storage; it’s about taking control of your home’s infrastructure. It provides safety, energy efficiency, and a massive amount of “hidden” space that was previously doing nothing for you. By choosing the right materials and respecting the structural engineering required, you turn a dangerous chore into a seamless transition.
Stop balancing on that old step ladder. It’s time to build a bridge to your home’s full potential.
What’s the most interesting thing currently “lost” in your attic? Are you planning to use the new access for a workshop, or just to finally get the holiday boxes organized? Drop a comment below—I’d love to help you figure out the best ladder dimensions for your specific ceiling height!
Would you like me to walk you through how to build an insulated attic cover or explain how to relocate electrical wiring that might be in the way of your new opening?
