Last summer, I stood in a client’s backyard looking at a scorched patch of Kentucky Bluegrass right next to a literal swamp of overwatered hydrangeas. The homeowner was baffled; “The weather app said it rained an inch yesterday!” he exclaimed. I reached over, pulled a simple glass tube from a decorative stake in his flower bed, and showed him the truth: it hadn’t rained an inch at his house—it had rained barely a tenth of an inch.
In a world of localized microclimates, relying on a weather station five miles away at the airport is like trying to monitor your own heart rate by checking your neighbor’s pulse. If you want to stop wasting money on water bills and start growing a professional-grade landscape, you need to stop guessing. You need a Rain Gauge Garden strategy that transforms your outdoor space from a decorative plot into a data-driven ecosystem.
Why Your Local Forecast is Lying to You
Weather apps provide “regional averages.” However, in the home improvement world, we know that “micro-bursts” and “rain shadows” are real. Your house might sit in a dip that catches less moisture, or perhaps your neighbor’s tall oak trees create a dry zone on your property.
Think of your garden like a bank account. Rainfall is the deposit, and evaporation (evapotranspiration) is the withdrawal. If you don’t keep a ledger—a physical record of exactly how much water hit your specific soil—you are essentially spending blind. A Rain Gauge Garden setup provides the exact “deposit” slip you need to manage your landscape’s hydration balance.
The Technical Anatomy of a Precision Rain Gauge
Not all gauges are created equal. When I’m advising on a professional setup, I look past the decorative “cute” plastic ones and focus on the technical specs that ensure data integrity.
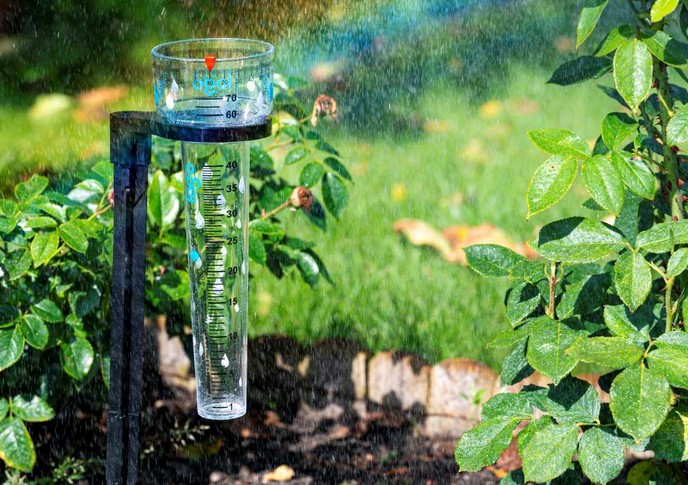
1. The Collection Aperture
A high-quality gauge should have a wide opening. The physics here is simple: a wider funnel minimizes the impact of wind-driven rain skipping over the top. For a Rain Gauge Garden to be accurate, the ratio between the collection area and the measurement tube must be calibrated perfectly to magnify the reading, allowing you to see increments as small as 0.01 inches.
2. Materials: Glass vs. UV-Stabilized Polycarbonate
-
Glass: Excellent for clarity and scratch resistance, but one freeze-thaw cycle in late autumn will shatter it.
-
Polycarbonate: This is my go-to recommendation. It’s nearly indestructible and won’t yellow or crack under the intense UV exposure of a July heatwave.
3. Mounting Stability
A gauge that wobbles in the wind provides “noisy” data. A professional mount should be level and plumb. If the gauge tilts even by 10%, your collection data can be off by as much as 15% because the effective “catch area” is reduced.
Strategic Placement: The “No-Obstacle” Rule
In my decade of experience, I’ve seen gauges placed under eaves, next to tall fences, or beneath tree canopies. These are all “dead zones.”
To get an accurate Rain Gauge Garden reading, you must follow the 2-to-1 Rule. If an obstacle (like your house or a shed) is 20 feet tall, your rain gauge should be at least 40 feet away from it. This ensures that “rain shadows” or “splash-back” from hard surfaces don’t corrupt your data.
[Image Suggestion: A diagram showing the 2:1 ratio for gauge placement relative to a house.]
Turning Data into Growth: The 1-Inch Standard
Most residential lawns and gardens require approximately 1 inch of water per week to maintain deep root health. Here is how you use your data to optimize your irrigation system:
-
Step 1: Check your gauge every Monday morning.
-
Step 2: If your Rain Gauge Garden shows 0.4 inches of rain fell over the weekend, you know your “hydration gap” is 0.6 inches.
-
Step 3: Calculate your sprinkler’s “precipitation rate” (how many minutes it takes to put down an inch) and run the system only long enough to cover that 0.6-inch deficit.
Analogy: Imagine trying to fill a bucket to a specific line while wearing a blindfold. That’s gardening without a gauge. Removing the blindfold allows you to stop the hose the second you hit the mark—saving money and preventing root rot.
Advanced Hydration Analysis: LSI Terms for the Pro-Sumner
If you’re moving into the “Intermediate” category, you need to look at more than just the water level. You need to consider Soil Infiltration Rates and Effective Rainfall.
-
Soil Saturation Point: If your gauge shows 2 inches of rain fell in 30 minutes, most of that was “runoff.” Your plants didn’t actually “drink” 2 inches because the soil couldn’t absorb it that fast.
-
Evapotranspiration (ET): On a 90°F day with 10% humidity, that inch of rain you caught might disappear from the soil in just 48 hours. A smart Rain Gauge Garden enthusiast tracks rainfall against heat waves to adjust watering frequency.
Scannable Maintenance Checklist
To keep your data accurate, follow this pro-level maintenance routine:
-
Clear Debris: Check the funnel weekly for bird droppings, spider webs, or pine needles that can block the flow.
-
Algae Prevention: Occasionally clean the tube with a mild soap solution. Algae growth can make the meniscus (the curve of the water) hard to read.
-
Level Check: Use a small spirit level once a month to ensure the stake hasn’t shifted in the soil.
-
Winterization: Unless you have a heated gauge, bring it inside before the first hard frost to prevent the base from cracking.
Expert Advice: The Hidden Warning
Tips Pro: Don’t buy a gauge that is too small. I’ve seen many “decorative” gauges that max out at 2 inches. During a heavy tropical storm or a severe thunderstorm, these will overflow in an hour, leaving you with no idea how much water actually hit your foundation. Look for a capacity of at least 5 to 7 inches.
The Financial Impact of Precise Monitoring
Why does this matter for home improvement? It’s about Asset Protection.
-
Foundation Health: Overwatering near the house leads to soil expansion and foundation cracks.
-
Plant Replacement Costs: Over-saturation is the #1 killer of expensive ornamental shrubs.
-
Water Utility Savings: By watering only what is necessary based on your Rain Gauge Garden data, I’ve seen homeowners cut their summer water bills by 30% to 45%.
Conclusion: Become the Expert of Your Own Microclimate
Precision soil management isn’t just for commercial farmers. By implementing a dedicated Rain Gauge Garden strategy, you transition from a “reactive” gardener to a “proactive” environmental manager. You’ll stop over-stressing your plants and start protecting your home’s most valuable exterior assets with the power of real-time data.
Do you know exactly how much water your garden “earned” last week? If you’re still relying on the evening news for your rainfall totals, it’s time for an upgrade. Grab a high-quality polycarbonate gauge this weekend and start your ledger.
Have you noticed a “dry spot” in your yard that seems to defy the weather forecast? Let’s talk about it in the comments below—I’d love to help you troubleshoot your property’s microclimate!
