It’s 2:00 AM, and the rain is coming down in sheets—the kind of torrential downpour that makes your gutters groan. You’re lying in bed, listening to the rhythmic thump-whirr of your sump pump, feeling confident that your basement is dry. But then, you notice a strange sound: every time the pump stops, you hear a heavy clunk followed by the sound of rushing water falling back into the pit. Within seconds, the pump kicks back on again. You’re witnessing a “short-cycling” death spiral that, if left unchecked, will burn out your motor and leave your basement a swimming pool by morning.
In my ten years of wading through flooded basements and performing forensic plumbing audits, I’ve found that the most common point of failure isn’t actually the pump—it’s the $30 plastic component sitting right above it. The Check Valve Sump assembly is the unsung hero of your home’s flood defense. I’ve seen homeowners spend $600 on a high-end cast iron pump, only to handicap it with a faulty or missing check valve. It’s like buying a Ferrari and then putting wooden wheels on it.
The Anatomy of Backflow: Why One-Way Traffic Matters
To understand why a Check Valve Sump is non-negotiable, we have to look at the physics of your discharge pipe. When your pump pushes water out, it has to fight gravity to move that water up and out of your basement. Once the pump’s float switch reaches the bottom and the motor cuts out, gravity takes over.
Think of your check valve like a security turnstile at a stadium. People (water) can go out through the gate, but the moment someone tries to push back in, the gate locks tight. Without this “gate,” all the water remaining in the vertical pipe—sometimes 5 to 10 gallons—crashes back down into the basin.
This creates a “ghost” cycle. The pump just finished clearing the pit, but the backflow fills it right back up, triggering the pump to run again. This constant starting and stopping (short-cycling) is what kills 90% of residential pumps prematurely.
Technical Deep-Dive: Swing vs. Spring Check Valves
If you’re moving into the “intermediate” DIY category, you need to know that not all Check Valve Sump units are created equal. In my experience, choosing the wrong type can be the difference between a quiet home and one that sounds like a construction site.
1. The Swing Check Valve
This is the most common residential type. It uses a weighted “flipper” that hangs on a hinge.
-
The Good: They are cheap and offer very little resistance to the pump’s flow.
-
The Bad: When the pump stops, that flapper slams shut with a loud “thud,” known as a water hammer. It can be loud enough to wake you up through the floorboards.
2. The Spring-Loaded (Silent) Check Valve
This is the professional’s choice. It uses a light spring to help the valve close gently before the water has a chance to gain downward momentum.
-
The Good: They are virtually silent. They reduce stress on the pipe joints by eliminating the water hammer effect.
-
The Bad: They are slightly more expensive and require a pump with enough “head pressure” to push against the spring.
Installation Insights: Positioning for Peak Performance
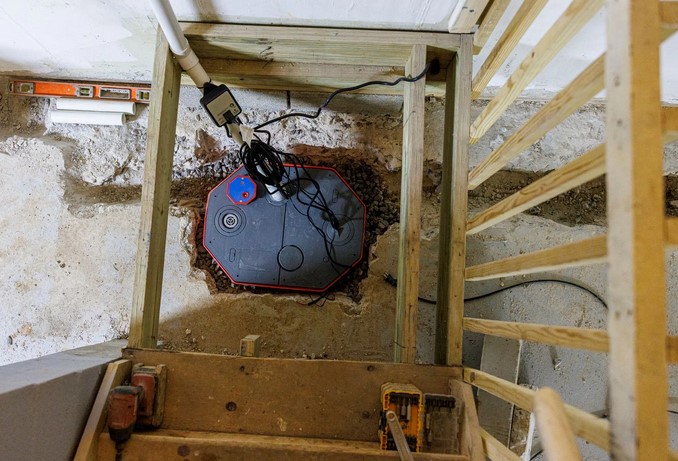
When I’m on a job site, I often see Check Valve Sump units installed at the wrong height or, worse, backward. If you’re installing this yourself, keep these technical data points in mind:
-
Vertical vs. Horizontal: While some valves are rated for both, always try to install your check valve in a vertical section of the pipe. This allows gravity to assist the seal, ensuring a watertight closure.
-
The “3-Foot Rule”: I prefer to install the valve roughly 2 to 3 feet above the pump. This keeps the valve accessible for maintenance without having to reach into the muck at the bottom of the basin.
-
Flow Direction: Look for the arrow molded into the side of the valve. It sounds simple, but I’ve been called to “broken” pumps that were simply trying to push water against a valve installed upside down.
Managing Static Pressure and “Air Lock”
For the more advanced homeowner, we need to discuss Air Lock. This is a condition where a bubble of air gets trapped between the pump and the check valve. Since air is compressible, the pump’s impeller spins wildly but can’t push the air through the valve to get to the water.
Tips Pro: The Weep Hole Secret
Every time you install a Check Valve Sump, you MUST drill a 1/8-inch or 3/16-inch “weep hole” in the discharge pipe below the check valve but inside the sump pit. This allows trapped air to escape when the pump starts. I’ve seen brand-new pumps burn out because the installer forgot this 10-second step, leaving the pump spinning in a pocket of air.
Material Reliability: PVC vs. Rubber Couplings
Your Check Valve Sump is under immense pressure every time the pump kicks on. In my decade of practice, I’ve moved away from the “all-plastic” threaded valves. Instead, I recommend valves that use heavy-duty rubber shielded couplings with stainless steel clamps.
The reason is simple: vibration. A sump pump vibrates when it runs. A rigid, threaded PVC connection can crack over time due to that vibration. A rubber-booted coupling acts as a shock absorber, protecting your plumbing and making the entire system run quieter.
Maintenance Checklist: Ensuring Year-Round Reliability
A Check Valve Sump is a mechanical device, and mechanical devices eventually fail. Debris—like small pebbles, pet hair, or construction dust—can get caught in the seat of the valve, preventing it from closing fully.
Semi-Annual Audit:
-
Listen: After the pump stops, do you hear a “whoosh” of water? If yes, the valve is leaking.
-
Inspect: Look for “crusting” or white mineral deposits around the couplings, which indicate a slow leak.
-
Test: Pour a 5-gallon bucket of water into the pit to trigger a cycle. Watch the water level after the pump stops; it should remain perfectly still.
Conclusion: Protecting Your Most Valuable Asset
Your home’s foundation is only as dry as your drainage system is reliable. Integrating a high-quality Check Valve Sump isn’t just about plumbing; it’s about infrastructure integrity. It’s a small investment that pays massive dividends in equipment longevity and peace of mind.
Don’t wait for a flood to realize your valve is stuck. Take a flashlight down to your basement today and listen to how your system breathes. If it’s thumping, slamming, or leaking back, it’s time for an upgrade.
How does your sump pump sound during a storm? Do you hear that dreaded “thud,” or is it a silent protector? If you’re unsure about your current valve type or need help locating your weep hole, drop a comment below—I’d love to help you bulletproof your basement!
Would you like me to recommend a specific “silent” model for your pipe diameter or explain how to install a secondary backup pump in tandem with your check valve?
