You’ve spent thousands on mid-century modern furniture, curated the perfect lighting, and picked a “designer” paint color, yet your living room still feels like a carbon copy of a furniture catalog. It lacks a soul. In a world of mass-produced wallpaper and peel-and-stick decals, true luxury isn’t found in what you can buy off a shelf—it’s found in customization. What if I told you that a $40 sheet of laser-cut Mylar and a quart of metallic paint could increase the perceived value of your home more than a $2,000 area rug?
In my decade of transforming bland residential spaces into high-end “branded” interiors, I’ve found that Wall Stencils are the ultimate bridge between DIY and professional artistry. I remember a project for a boutique hotel lobby where the client wanted the look of $200-per-roll hand-blocked wallpaper. By using custom-designed stencils and a multi-tonal glazing technique, we achieved a seamless, bespoke look for a fraction of the cost. The best part? There were no visible seams to peel or patterns to misalign.
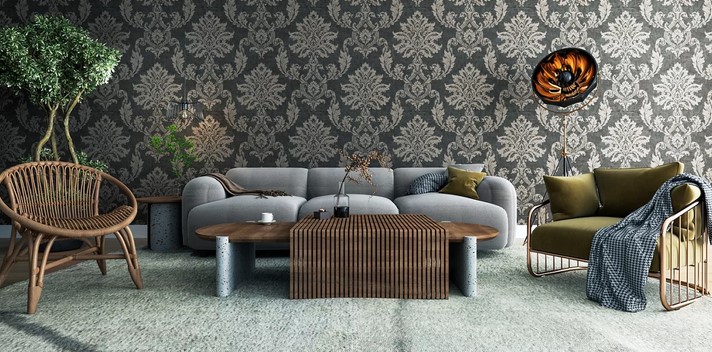
The Art of the Impression: Why Stenciling Trumps Wallpaper
Think of stenciling as the “couture” of wall treatments. Wallpaper is like a high-quality suit you buy off the rack; it looks great, but it’s made to fit everyone. Using Wall Stencils is like having a tailor measure every inch of your body to create a one-of-a-kind garment.
When you use stencils, you aren’t limited by the manufacturer’s color palette. You can pull the exact navy blue from your velvet sofa and the champagne gold from your curtain rods to create a cohesive aesthetic identity. Furthermore, stencils allow the natural texture of your wall to breathe, creating a depth and “hand-painted” feel that flat vinyl simply cannot replicate.
Technical Foundations: Choosing Your Mylar and Media
For the beginner and intermediate enthusiast, the technical side of stenciling starts with the equipment. If you use the wrong tools, you don’t get a pattern—kamu get a blurry mess.
1. The Stencil Material
Most professional Wall Stencils are made from Mylar, a durable, flexible polyester film. For wall applications, I always recommend a 10-mil thickness. It’s sturdy enough to withstand repeated washings but thin enough to ensure your paint doesn’t create a “heavy ridge” at the edge of the design.
2. Paint Chemistry and Sheen
In my experience, flat or eggshell acrylics are the best media for stenciling. If you use a high-gloss paint, it tends to be too “slippery,” leading to paint bleed. If you want a luxury finish, I suggest using a metallic plaster or a stencil cream. These have a higher viscosity (they are thicker), which significantly reduces the risk of the paint seeping under the stencil.
Mastering the “Dry Brush” Technique: The Pro’s Secret
The biggest mistake I see beginners make is thinking they are “painting” the stencil. In reality, stenciling is more like dusting.
-
The Loading Phase: Dip just the tip of your high-quality stencil brush (natural bristles are a must) into the paint.
-
The Off-Loading Phase: This is the most critical step. Rub the brush onto a paper towel until it looks like there is almost no paint left.
-
The Application: Use a light “pouncing” or swirling motion. If you see wet paint on the wall, you have too much on your brush. It should feel like you are building up the color in layers, similar to applying makeup.
By using this “dry” method, you ensure that the edges of your Wall Stencils remain crisp and professional, avoiding the amateur “blobs” that ruin the bespoke look.
Strategic Layout: Mapping Your Aesthetic Identity
High-end interior branding isn’t just about the pattern; it’s about the spatial rhythm. Before you even open a paint can, you must plan your “registration points.”
-
The Focal Point Start: Always start your first stencil in the center of the wall or at eye level in the most prominent part of the room. This ensures that the pattern is perfectly balanced where the eye naturally lands.
-
Leveling: Never trust your ceiling or baseboards—they are almost never straight. Use a laser level to project a horizontal and vertical grid. Align your stencil to the laser, not the corner of the room.
-
The “Fade” Technique: For a modern, high-end look, you don’t always have to do the whole wall. I love “fading” a geometric stencil from the bottom up, creating a custom ombre effect that feels like an intentional art installation rather than just a wall covering.
Expert Advice: Managing the “Bleed” and “Tack”
Tips Pro: The Hidden Warning
Even with the best dry-brush technique, gravity is your enemy. Always use a repositionable spray adhesive on the back of your Wall Stencils. Tape alone isn’t enough to hold the fine details of an intricate pattern against the wall. A light mist of adhesive ensures every tiny “bridge” of the Mylar stays flush, preventing “ghosting” or blurry edges.
Maintenance and Facility Longevity
One of the logistical advantages of stenciling over wallpaper is repairability. In a high-traffic facility or a home with kids and pets, wallpaper gets nicked, and once it’s torn, the whole strip is compromised.
With Wall Stencils, if a section gets damaged, you simply pull out your stencil, align it with the existing pattern, and “touch up” the specific area. It’s a sustainable, long-term solution for maintaining a pristine brand identity without the need for professional installers or expensive removals.
Scannable Checklist for a Successful Project:
-
Preparation: Wash the walls with a TSP substitute to remove oils.
-
Adhesion: Use low-tack painter’s tape and spray adhesive.
-
Tools: Dedicated stencil brushes or dense foam rollers (for larger patterns).
-
Cleanup: Clean your stencil every 3-4 repeats. Dried paint buildup will eventually distort the pattern.
Utilizing Wall Stencils is about more than just decorating; it’s about taking ownership of your environment’s narrative. It’s a technical skill that, once mastered, allows you to infuse your personality into the very skin of your home. You move from being a consumer of design to a creator of it.
Whether you choose a bold Moroccan trellis or a subtle botanical motif, remember that the “bespoke” feel comes from the imperfections and the deliberate choices you make with color and placement.
What kind of pattern reflects your personal “brand”? Are you drawn to the rigid symmetry of Art Deco or the organic flow of a floral damask? Drop a comment below—I’d love to help you choose the right paint sheen for your specific wall texture!
Would you like me to create a step-by-step guide on how to multi-color a single stencil or perhaps explain how to create a 3D “raised” effect using joint compound?
