Choosing A Floor Finishing For Your Concrete Garage

Let’s face it a concrete garage floor isn’t the most exciting thing in the world, but it don’t have to be the most boring thing either. For instance, when you open up your garage door in the morning you could be welcomed but style and flare, rather than standard grey.

If you are wanting to add style and colour to your concrete garage without it looking garish, one of the best places to begin is the floor. Standard concrete garage floors are created for functionality not style, but with a little creativity it can become much more attractive and even comfortable.

However, what many concrete garage owners will find out when it comes to adding style to your garage floor, it is not whether to do it or not but the shear amount of choice there is. If you are having trouble settling on one type of flooring for your concrete garage these most popular options may help you decide.

Coatings

There are two different types of products when it comes to concrete garage floor coatings, they are paint and epoxy. Although they may be easy to confuse the two, from them both being applied with rollers and brushes, these two products are actually quite different from a chemical and performance point of view.

One of the most popular reasons for doing something with your floor is to get rid of unsightly stains such as oil, grease and rust. This can easily be done through coating and will give the concrete garage floor a new life. Using latex paint intended for use on concrete floors is relatively inexpensive method and very simple to apply.

Coverings

Depending on what you have planned for your concrete garage, covering the floor may be a more suitable option. For example, if you not wanting to use the garage storing vehicles but rather as a multifunctional room to the main house such as an home office or children’s playroom, then carpet may be a more suitable option. However, if you intend to cover the concrete floor and still intend to use the garage for storing cars, a more specialist products may be required. There are three main types of garage floor tiles; these being rigid plastic tiles, flexible rubber and plastic tiles and wood composite tiles, and all will require research into their durability for your needs.

Repairs and Preparation

The main focuses should be on what you would like to use the garage for. Adding a floor finish should be seen as an opportunity to revive the concrete garage floor and add personal style to the space. If the garage floor is currently covered in a number of oil and grease stains, the majority of flooding will likely cover the stains, however, if you are planning on still using the garage to same way as before the stains are equally likely to reappear.

Hopefully these suggestions have been helpful and have inspired you to look at you concrete garage floor and see the potential.
Tips in Looking for an Ideal Tile Floor Contractor

<2016/10/Tips-in-Looking-for-an-Ideal-Tile-Floor-Contractor.jpg">tips-in-looking-for-an-ideal-tile-floor-contractor

A good tile floor contractor should know that the kitchen counter, floor or wall must be rock solid. They may even spend more time setting up a solid surface than laying tile. Yet, that’s the only one of many factors deciding job quality. To get your money’s worth, and a job that looks great and lasts, here are tips on tiling from looking a good contractor.

Search for experienced contractors that satisfy customer.

Tiling work is regularly a do-it-without anyone else’s help work, so how hard would it be able to be? But, we put this tip first for a reason. A good contractor can turn wobbly floors and other issues into a good-looking, successful project, while a bad contractor can turn the new materials into a disaster. Start by asking neighbors, friends and partners for suggestions.

Don’t be afraid to ask for clarification

While the temporary worker checks the site and takes measurements, ask how he or she has taken care of different projects like yours.Laying the main field of tile is the simple part, so focus on the edges. Let them know you’ll need a firm beginning and completion dates, in addition to confirmation of insurance and a contractor’s permit, where required. If a contractor can’t come through with these points of the proposal and details, who knows what may happen during the actual job.

In case you’re the kind of property holder who’d rather not sweat the small stuff, employing an expert to install floor tile will take a lot of the mystery out of the process, and give you a much-improved chance of having the job done right in a short measure of time. Not just a tile floor contractor have the capacity to carry out the job professionally and quickly, yet they’ll have the capacity to offer you some sound advice on what tiles will work best in your situation, and give you a few tips on taking care of it, as well.


How to tile your floor with a Tile Leveling Systems

homegalleryatr

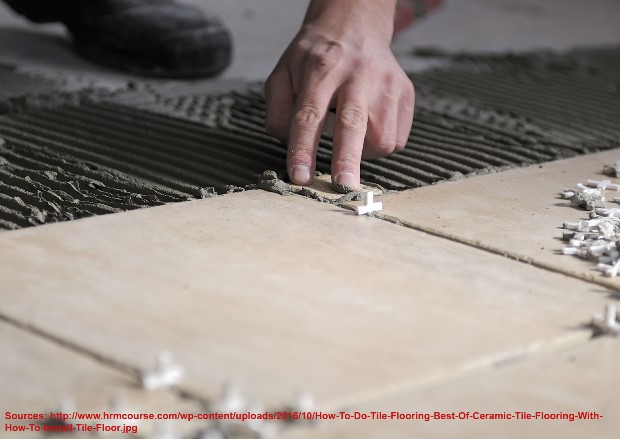
If you think the installation of a tile floor is expensive or labor intensive, think again! Today tile can be installed with a leveling system that will make tiling a breeze, especially if you are doing it on your own.

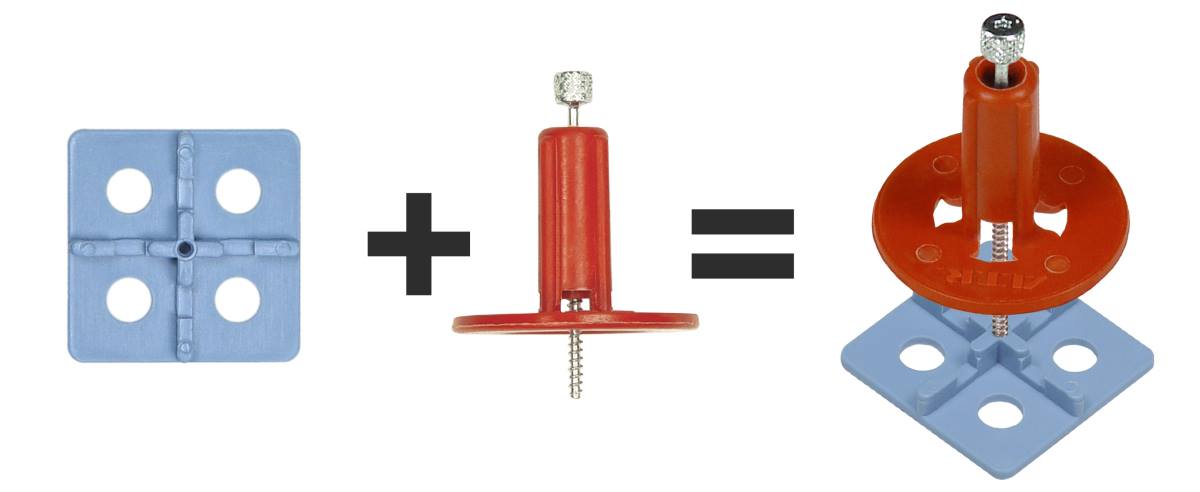
There are many tile leveling systems to make the installation of tile easer and lippage free. The ATR Tile leveling and tile alignment system is a system of 2 pieces and is ideal for medium to large format tile and stone using only your hands!

Tile may look even and leveled during installation, but after the thinset cures, a difference in height may appear which can compromise the aesthetics. The ATR system holds the tiles together, creating a single flat slab surface while the setting material is curing. The interlocking design reduces and eliminates settling and minimizing the possibility of warping.

This tile system will drastically reduce the need for grinding and polishing the surface of tile and will also cut in half the Installation time. In addition, with the ATR system you only need 1 cross spacing plate for 4 tiles not 4 Clips like many other leveling systems. Moreover, the ATR come with 2 options for Grout Spacers: 2mm or 3mm. Moreover, The ATR tile leveling system is the preferred tile system by professional tile man, home remodelers and designers because it is the most reliable and effective floor levelling system.

With the ATR tile and alignment system tiling is made with three easy steps! The first step is to spread the mortar over the area you want to tile, then put the tile in place. After this, you’ll need to screw the provided spindle into the spacing plate, which you’ll then need to slide under the tile before placing the adjacent tiles down. From there it’s as easy as screwing in the spindle until all the tiles are aligned and level. Afterwards, you simply let the mortar dry before you screw it out.

Keywords

atr tile leveling alignment system, atr leveling system, atr plastics, atr tile leveling system review, tile leveling system reviews, best tile leveling system, tile lippage system, atr tile leveling system , lippage free leveling system