 Pathways of Beauty: Creative Sidewalk Ideas for Your Home is a comprehensive guide to creating beautiful and unique pathways for your home. Whether you are looking to create a winding path through your garden, a straight path to your front door, or a decorative pathway to your backyard, this guide will provide you with the information and inspiration you need to create a stunning pathway. With detailed instructions and helpful tips, you will be able to create a pathway that is both functional and aesthetically pleasing. From choosing the right materials to designing the perfect layout, this guide will help you create a pathway that will be the envy of your neighbors.
How to Transform Your Sidewalk into a Work of Art: Creative Ideas for Pathways of Beauty
Creating a beautiful pathway in your yard or garden can be a rewarding and creative endeavor. With a few simple steps, you can transform your sidewalk into a work of art that will be admired by all who pass by. Here are some creative ideas for pathways of beauty:
1. Use colorful stones or pebbles to create a mosaic pattern. Choose stones in a variety of sizes and colors to create a unique design. You can also use glass beads or tiles to add a touch of sparkle.
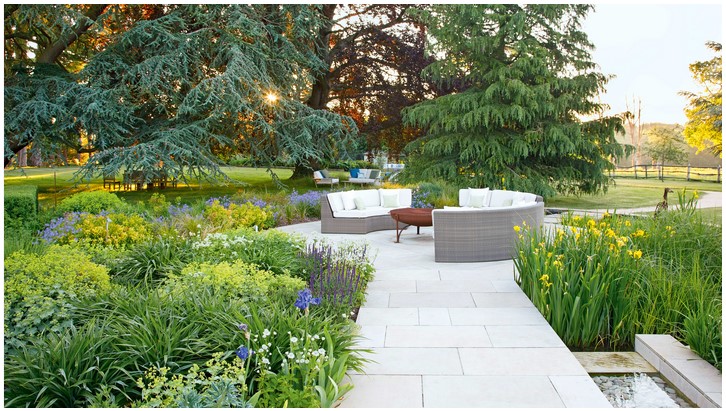
2. Plant a variety of flowers and plants along the sides of the path. This will add color and texture to the area and will attract butterflies and other wildlife.
3. Incorporate a water feature into the design. A small fountain or pond can add a tranquil and peaceful atmosphere to the area.
4. Use lighting to highlight the path. Solar-powered lights are a great option as they are energy-efficient and easy to install.
5. Add a few benches or chairs along the path for people to sit and enjoy the view.
6. Create a pathway of stepping stones. Choose stones in different shapes and sizes to create a unique design.
7. Use decorative pavers to create a patterned path. Pavers come in a variety of colors and textures and can be arranged in a variety of patterns.
By following these simple steps, you can transform your sidewalk into a work of art that will be admired by all who pass by. With a little creativity and imagination, you can create a beautiful pathway that will be enjoyed for years to come.
Get Creative with Your Sidewalk: Tips for Incorporating Pathways of Beauty into Your Home Design
When it comes to home design, the sidewalk is often overlooked. However, it can be a great way to add beauty and interest to your outdoor space. Here are some tips for incorporating pathways of beauty into your home design:
1. Choose the Right Materials: When selecting materials for your sidewalk, consider the overall look and feel of your home. Natural stone, brick, and concrete are all popular choices that can add a unique touch to your outdoor space.
2. Incorporate Color: Adding color to your sidewalk can make it stand out and create a beautiful contrast with the surrounding landscape. Consider using colored stones, tiles, or even paint to create a unique look.
3. Add Interest with Patterns: Incorporating patterns into your sidewalk design can add visual interest and make it stand out. Consider using geometric shapes, stripes, or other patterns to create a unique look.
4. Incorporate Lighting: Adding lighting to your sidewalk can create a beautiful ambiance and make it stand out at night. Consider using solar-powered lights or LED lights to create a unique look.
5. Plant Greenery: Incorporating plants into your sidewalk design can add a touch of nature and make it stand out. Consider using shrubs, flowers, or other plants to create a unique look.
By following these tips, you can create a beautiful and unique sidewalk that will add beauty and interest to your home design. With a little creativity and planning, you can create a pathway of beauty that will be the envy of your neighborhood.
Conclusion
Pathways of Beauty: Creative Sidewalk Ideas for Your Home is a great resource for anyone looking to add a unique and creative touch to their outdoor space. With a variety of materials, colors, and designs to choose from, you can create a beautiful and inviting pathway that will be the envy of your neighbors. Whether you are looking for a simple and elegant design or something more elaborate, Pathways of Beauty has something for everyone. With the help of this guide, you can create a stunning pathway that will be the perfect addition to your home.
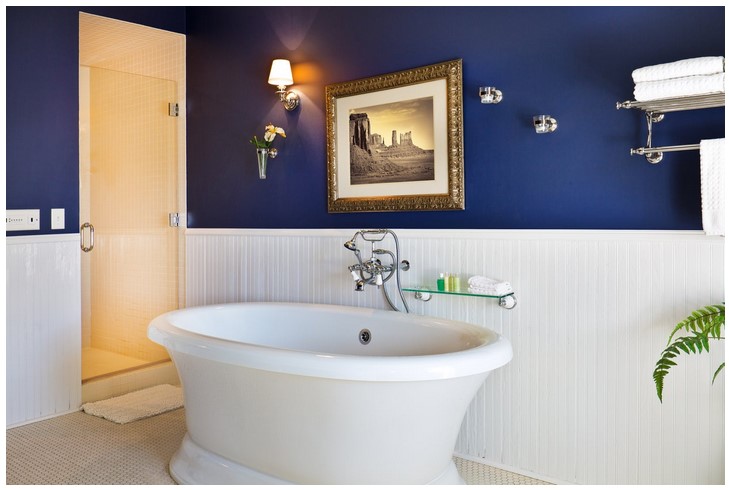 Renewed Luxury is a blog dedicated to exploring the world of cast iron tub refinishing kits for bath upgrades. Whether you’re looking to give your bathroom a facelift or just want to add a touch of luxury to your home, cast iron tub refinishing kits are a great way to do it. With a variety of colors, finishes, and styles to choose from, you can easily customize your tub to fit your unique style. In this blog, we’ll explore the different types of cast iron tub refinishing kits available, as well as the benefits of using them. We’ll also provide tips and tricks for getting the most out of your cast iron tub refinishing kit. So, if you’re looking to upgrade your bathroom, Renewed Luxury is the perfect place to start.
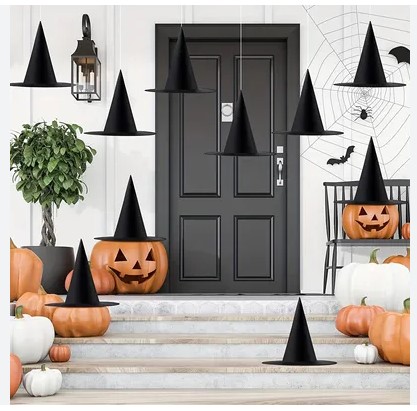 Welcome to Spooktacular Ambiance! If you’re looking for some DIY scary Halloween decorations to make your home extra spooky this season, you’ve come to the right place. We have a wide variety of ideas for creating a hauntingly fun atmosphere in your home. From creepy cobwebs to eerie lighting, we have everything you need to make your Halloween decorations truly spooktacular. So get ready to get creative and have some fun!
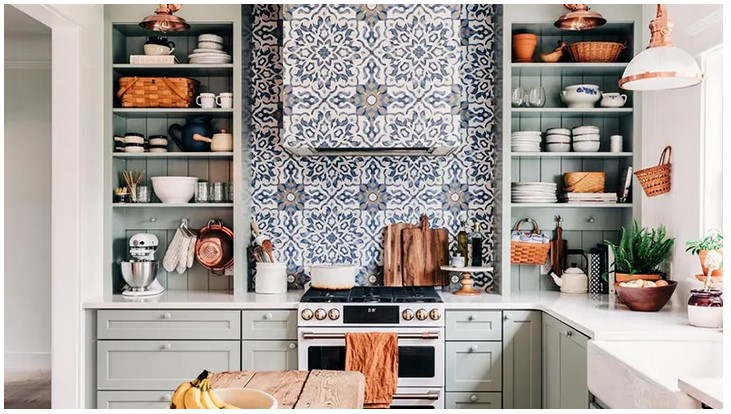 If you’re looking for an easy and affordable way to update your kitchen, then look no further than Lowes Peel and Stick Backsplash. This stylish backsplash is perfect for those who want to add a modern touch to their kitchen without breaking the bank. Lowes Peel and Stick Backsplash is easy to install and comes in a variety of colors and patterns to match any kitchen décor. With its easy installation and low cost, Lowes Peel and Stick Backsplash is the perfect way to give your kitchen a fresh new look.
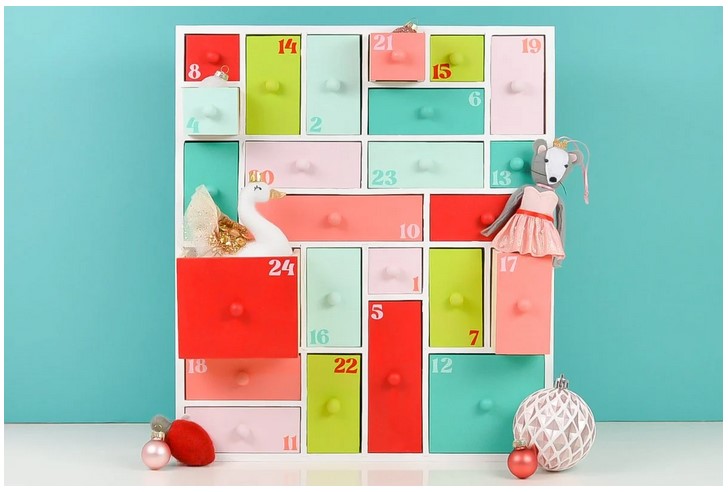 Countdown to Joy: Crafting a Wood Advent Calendar for Holiday Excitement is a great way to get into the holiday spirit. This project is perfect for those who love to craft and want to create something special for the holiday season. With a few simple materials, you can make a beautiful wooden advent calendar that will bring joy and excitement to your home. This project is easy to customize and can be tailored to fit any holiday theme. Whether you want to make a traditional advent calendar or something more unique, this project will help you create a beautiful and meaningful holiday decoration.
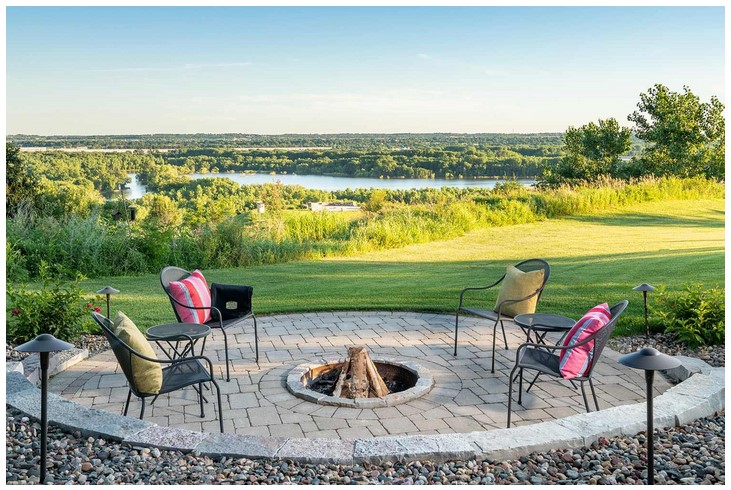 Welcome to Paving Perfection: Exploring Brick Patio Patterns for Outdoor Elegance. This guide is designed to help you create a beautiful and unique outdoor space with brick patio patterns. We will explore the different types of brick patio patterns, the benefits of using brick, and the best practices for laying brick patios. We will also discuss the various design options available to you and how to choose the right pattern for your outdoor space. With this guide, you will be able to create a stunning outdoor area that will be the envy of your neighbors. So let’s get started and explore the world of brick patio patterns!
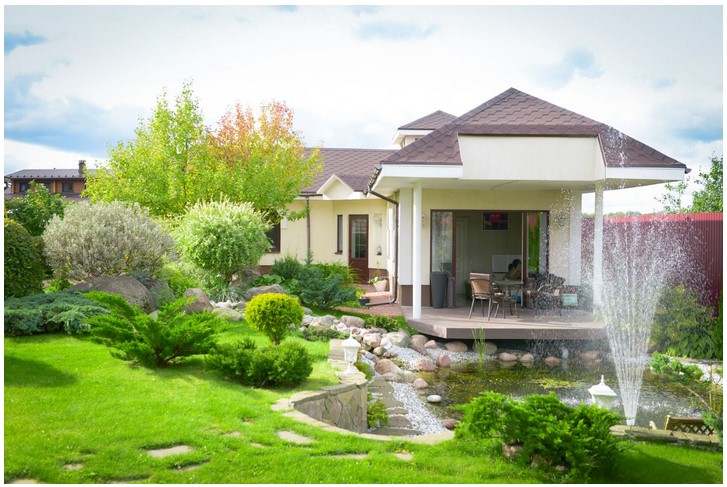 Welcome to Budgeting Your Oasis: Understanding Landscaping Prices for Dream Designs! This guide is designed to help you understand the costs associated with landscaping projects and how to budget for them. We will discuss the different types of landscaping projects, the materials and labor involved, and the estimated costs associated with each. We will also provide tips and tricks for getting the most out of your landscaping budget. With this guide, you will be able to create the oasis of your dreams without breaking the bank.
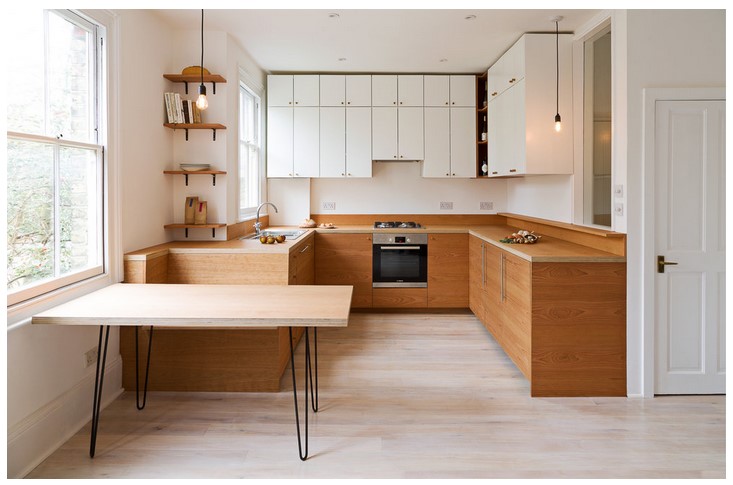 Knobs of Character: Embracing Anthropology Knobs for Cabinet Elegance is a book that explores the use of anthropological knobs to add a unique and elegant touch to cabinets. The book provides an in-depth look at the history and cultural significance of these knobs, as well as how to incorporate them into your own home. It also provides a comprehensive guide to the different types of knobs available, from traditional to modern, and how to choose the right one for your cabinets. With its detailed information and beautiful photographs, Knobs of Character is an invaluable resource for anyone looking to add a touch of character to their cabinets.
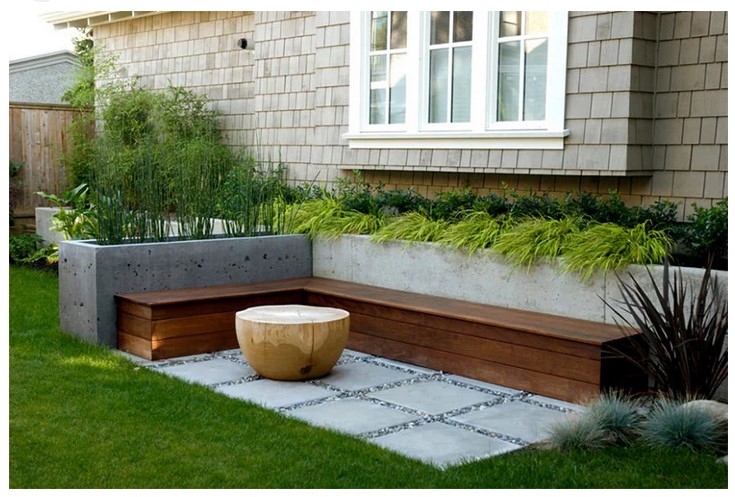 Concrete Creations is a great way to add a unique touch to your home. With a few simple steps, you can create a beautiful concrete planter for your greenery. This guide will walk you through the process of creating a concrete planter from start to finish. You’ll learn how to mix the concrete, form the planter, and finish it off with a few decorative touches. With a little bit of patience and creativity, you can create a stunning planter that will be the envy of your friends and family. So let’s get started!
 Turquoise Harmony: Discovering Colors That Go Well with Turquoise is a comprehensive guide to understanding the color turquoise and how to use it in your home decor. This book provides an in-depth look at the history of turquoise, its symbolism, and how to use it to create a beautiful and harmonious space. It also explores the various shades of turquoise and how to pair them with other colors to create a stunning palette. With this book, you will learn how to use turquoise to create a unique and inviting atmosphere in your home.
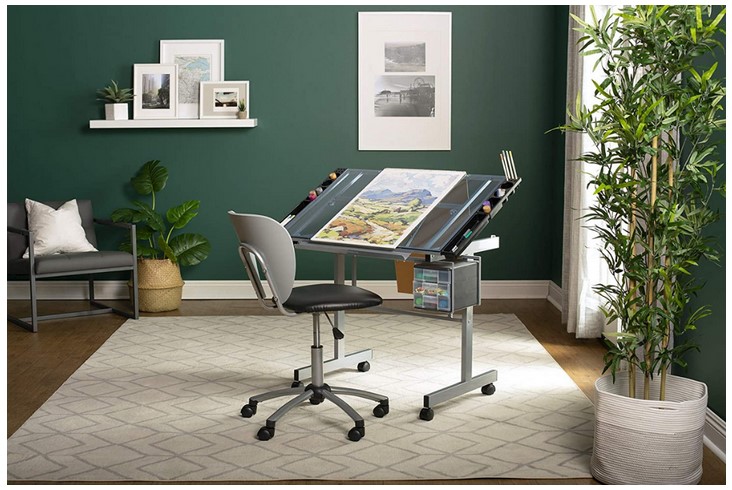 Design and Draft is a project that focuses on creating a desktop drafting table for creative spaces. This project is designed to provide a space for creative professionals to work on their projects in a comfortable and efficient manner. The drafting table is designed to be adjustable, allowing users to customize the height and angle of the table to suit their needs. The table also features a variety of storage options, allowing users to store their supplies and tools in an organized manner. Additionally, the table is designed to be lightweight and portable, making it easy to move around and set up in different locations. With its adjustable design and storage options, the Design and Draft desktop drafting table is an ideal solution for creative professionals looking for a comfortable and efficient workspace.
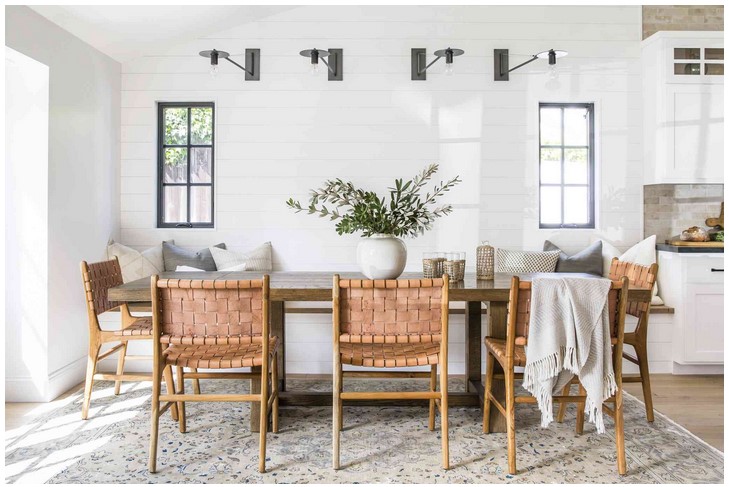 Welcome to Farmhouse Find! We are here to help you find the perfect farmhouse table for sale. Whether you are looking for a rustic, vintage, or modern farmhouse table, we have something for everyone. Our selection of farmhouse tables includes a variety of styles, sizes, and materials to fit any home. We also offer a variety of custom options to make sure your table is exactly what you want. With our selection of farmhouse tables, you can create a cozy and inviting atmosphere in your home. So, let us help you find the perfect farmhouse table for sale today!
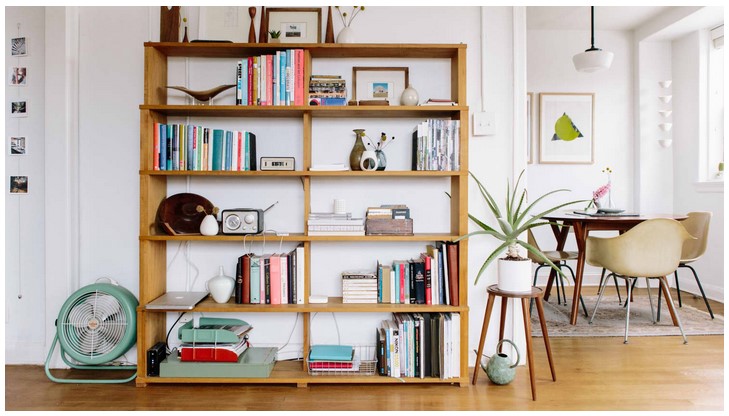 Faux literature is a great way to add a touch of style and sophistication to any space. Whether you’re looking to spruce up a bookshelf or add a unique conversation piece to your living room, faux literature can be a great way to do it. Faux literature is the art of creating fake books that look like real books, but are actually just decorative pieces. They can be used to fill empty shelves, add a touch of color to a room, or even as a conversation starter. With a little creativity and some basic supplies, you can create your own faux literature to add a unique and stylish touch to your home.