A homemade firepit brings warmth and charm to outdoor gatherings, turning ordinary evenings into cozy and memorable experiences. Crafted with care and creativity, these DIY firepits offer a personal touch to your outdoor space, inviting friends and family to gather around its flickering flames, share stories, and enjoy the beauty of nature.
Creating a warm and inviting outdoor space doesn’t have to be an expensive endeavor. Building a homemade fire pit can be a fantastic addition to your backyard, providing a cozy gathering spot for friends and family. With a little creativity and some basic tools, you can craft a fire pit that suits your style and fits your budget. In this DIY guide, we’ll walk you through the process of building your very own homemade fire pit in 7 easy steps.
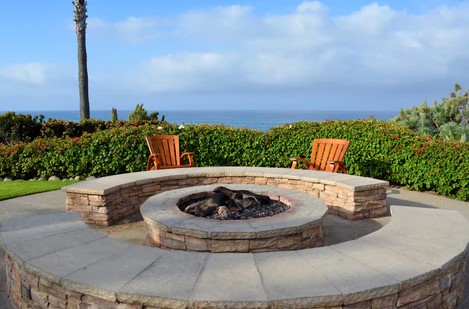
Step 1: Choose the Perfect Location
Before you start digging or gathering materials, it’s crucial to pick the right spot for your fire pit. Select an area that’s safe and well-ventilated, away from any flammable objects like trees, bushes, or buildings. Consider the wind direction to prevent smoke from blowing into seating areas. A flat, level surface will make construction easier and enhance the fire pit’s stability.
Step 2: Gather Your Materials and Tools
For this project, you’ll need the following materials and tools:
Materials:
– Pavers or fire bricks
– Sand or gravel
– Steel fire pit ring or metal mesh
– High-heat resistant paint (optional)
Tools:
– Shovel
– Tamper
– Level
– Tape measure
– Rubber mallet
– Safety gloves and goggles
Step 3: Prepare the Base
Clear the chosen area of any debris or vegetation. Begin by digging a shallow circular pit, around 2 feet in diameter and 6-8 inches deep. Make sure the edges are neat and even. This pit will serve as the foundation for your fire pit.
Step 4: Create the Foundation
After digging, spread a layer of gravel or sand evenly in the pit. Use a tamper to compact the material and create a firm base. This layer will help with drainage and prevent the pavers or bricks from shifting over time.
Step 5: Arrange the Pavers
Now it’s time to arrange your pavers or fire bricks in a circle on top of the compacted base. You can choose to dry-stack them or use a small amount of construction adhesive between each layer for added stability. The pavers should form a sturdy wall for your fire pit. Use a level to ensure they’re evenly aligned.
Step 6: Place the Fire Pit Ring or Mesh
For added safety and durability, place a steel fire pit ring or metal mesh inside the paver circle. This will contain the flames and provide a barrier between the fire and the paver walls. Ensure the ring is centered and sits flush against the paver walls.
Step 7: Finishing Touches
If desired, you can give your fire pit a polished look by applying high-heat resistant paint to the exposed surfaces. This paint will help protect the materials from the elements and add a decorative touch to your creation.
Safety Tips:
– Always follow local fire regulations and guidelines before building a fire pit.
– Keep a bucket of water or a fire extinguisher nearby in case of emergencies.
– Never leave the fire unattended, especially if children or pets are around.
– Avoid using accelerants such as gasoline to start the fire.
– Use heat-resistant gloves when handling hot materials.
Conclusion:
Building your own homemade fire pit can be a rewarding and enjoyable DIY project. It’s a cost-effective way to enhance your outdoor space and create a warm, inviting atmosphere for gatherings. By following these 7 easy steps, you can create a fire pit that’s not only functional and safe but also reflects your personal style. Remember to prioritize safety throughout the construction process and enjoy the cozy evenings around your newly built fire pit.
