You’ve spent the weekend staring at that patch of scorched earth in your backyard—the one where the grass refuses to grow and the soil feels like sun-baked concrete. You want a lush, vibrant garden, but the thought of excavation, soil testing, and heavy landscaping equipment feels like an expensive nightmare. What if I told you that you could bypass the “bad dirt” entirely and increase your property value by up to 15% with nothing more than a few cedar planks and a drill?
In my ten years of transforming mundane yards into sustainable sanctuaries, I’ve found that the DIY Planter Box is the “Swiss Army Knife” of landscaping. It’s not just a box for dirt; it’s a controlled environment that solves drainage issues, protects against invasive weeds, and saves your lower back from the tyranny of ground-level weeding. I remember my first project—a set of three tiered boxes for a client with zero gardening experience. Within one season, they were harvesting heirloom tomatoes in a space that used to be a gravel parking strip.
The Physics of the Planter: Why Raised Beds Win
To understand why a DIY Planter Box is a superior landscaping choice, think of it like a custom-built apartment complex for your plants. In the ground, your plants are at the mercy of whatever the previous builder left behind—clay, rocks, or construction debris. In a planter box, you are the “Landlord of the Soil,” controlling the nutrient density, moisture levels, and temperature.
Raised beds warm up faster in the spring than the surrounding ground, extending your growing season by weeks. Furthermore, because the soil isn’t being stepped on, it remains loose and aerated. This prevents soil compaction, allowing roots to spread easily and absorb oxygen—a luxury that in-ground plants rarely enjoy in high-traffic suburban yards.
Material Selection: The Technical Foundation of Durability
One of the biggest mistakes I see beginners make is choosing “pretty” wood that rots within two seasons. If you are building a DIY Planter Box, your choice of lumber is a 10-year decision.
-
Cedar and Redwood: These are the gold standards. They contain natural oils that resist rot and insects without the need for chemical treatments.
-
Pressure-Treated Lumber: Modern ACQ-treated wood is safer than the arsenic-based versions of the past, but I still recommend lining the interior with polyethylene film if you plan on growing edibles.
-
Composite Decking: Great for aesthetics and zero maintenance, though it lacks the “breathability” of natural wood.
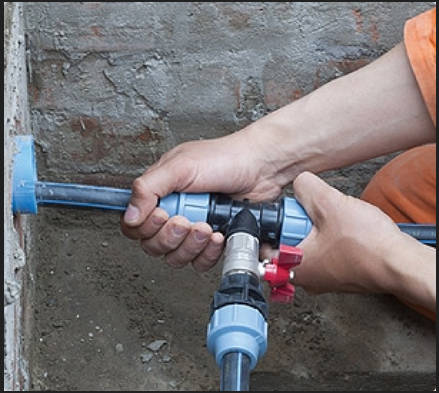
Technical Data Point: Always use stainless steel or high-quality ceramic-coated deck screws. Standard nails will pull out over time as the wood expands and contracts with moisture, and zinc screws will corrode against the natural acids in the soil.
Step-by-Step Engineering for the Intermediate Builder
Building a DIY Planter Box is about more than just four walls. It’s about structural integrity against the immense lateral pressure of wet soil.
1. The Layout and Sizing
Keep your width to a maximum of 4 feet. Why? Because you should be able to reach the center of the bed from either side without stepping into it. Stepping into the box defeats the purpose of maintaining aerated soil.
2. The Drainage Strategy
If your box is sitting on a patio or deck, you need a bottom. If it’s on the ground, you can leave it open-bottomed but must install a layer of hardware cloth (metal mesh). This prevents gophers and moles from treating your garden like a 5-star buffet.
3. Assembly and Reinforcement
Don’t just butt the joints together. I always use 4×4 corner posts inside the box. Screwing the side planks into these posts provides a massive increase in “shear strength,” ensuring the box doesn’t “blow out” at the seams during a heavy rainstorm when the soil weight doubles.
Optimizing the “Fill”: The Hugelkultur Method
Once your DIY Planter Box is built, don’t just fill it with expensive bagged potting mix from the big-box store. That’s a rookie move that empties your wallet and underperforms.
I advocate for a modified Hugelkultur approach. Fill the bottom 30% of your deep planter with old logs, fallen branches, and dried leaves. As this organic matter slowly decomposes over years, it acts like a giant sponge, holding onto moisture during droughts and releasing nitrogen back into the soil.
Top the remaining 70% with a “Mel’s Mix” style blend: 1/3 Compost, 1/3 Peat Moss (or Coconut Coir), and 1/3 Vermiculite. This creates a high-performance substrate that drains perfectly while retaining enough moisture to keep your plants happy during a heatwave.
Expert Advice: The “Hidden” Liner Secret
Tips Pro: The Breathable Barrier
Never use solid plastic to line the bottom of a planter box sitting on soil. You want your box to have a relationship with the earth. Instead, use a double layer of heavy-duty landscape fabric. It allows water to drain and beneficial microbes to move up, but it stops weed seeds from the “old world” below from infiltrating your new, sterile soil.
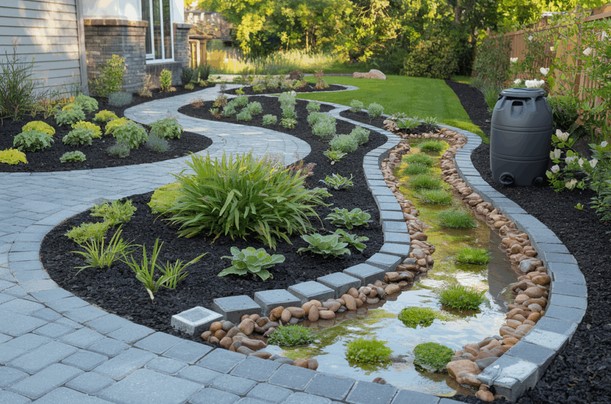
Sustainable Aesthetics: Integrating into Property Design
A DIY Planter Box shouldn’t look like an afterthought. To elevate your property’s aesthetics, consider these architectural touches:
-
The Cap Rail: Install a horizontal 2×6 board around the top perimeter. This creates a “seat” for you to sit on while you garden and gives the box a finished, professional furniture look.
-
Staining and Sealing: Use a non-toxic, food-safe sealer on the exterior. Not only does it protect the wood, but it allows you to match the box color to your home’s trim or deck.
-
Lighting Integration: Low-voltage LED strip lights tucked under the cap rail can turn your planter boxes into glowing architectural features at night, drastically improving your “curb appeal” and safety.
Maintenance Logistics: Protecting Your Investment
Even a well-built DIY Planter Box requires maintenance. Every spring, I check the corners for any “gapping.” If the soil has settled (which it will, especially with the Hugelkultur method), top it off with fresh compost. This “top-dressing” acts as a slow-release fertilizer and refreshes the aesthetics of the bed.
If you live in a region with heavy snow, I recommend clearing the snow off the cap rails. While cedar is tough, the constant freeze-thaw cycle of sitting snow can cause the wood fibers to check (split) prematurely.
Landscaping is often seen as a chore of maintenance, but with the right DIY Planter Box strategy, it becomes an act of creation. You are building a sustainable asset that improves your soil, saves your back, and provides a stunning focal point for your home.
Whether you’re a beginner picking up a drill for the first time or an intermediate DIYer looking to refine your technique, remember: the best time to build a planter box was last year; the second best time is today.
What are you planning to grow in your first box? Are you leaning toward a kitchen herb garden or a vibrant floral display? Drop a comment below with your dimensions—I’d love to help you troubleshoot your lumber list before you head to the hardware store!
Would you like me to create a specific material list for a standard 4×8 box, or perhaps a guide on installing a drip irrigation system for your new planters?