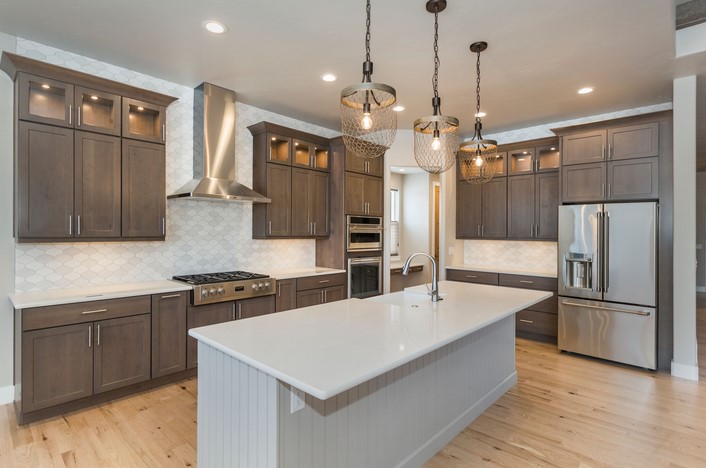
A raised panel cabinet door can elevate the look of any kitchen, bathroom, or living space with its timeless and elegant design. Whether you’re updating your current cabinetry or building custom cabinets from scratch, incorporating a raised panel cabinet door can provide a sense of sophistication and craftsmanship. In this guide, we’ll walk you through the steps of installing or creating raised panel cabinet doors, along with some essential tips and considerations. This DIY project is perfect for homeowners looking to add style and value to their home through a hands-on approach to cabinet upgrades.
1. Understanding Raised Panel Cabinet Doors
A raised panel cabinet door is one of the most popular door styles used in cabinetry. Characterized by a prominent, raised center panel surrounded by a frame, these doors offer depth and texture that add a traditional yet refined look to any space. Typically, the panel is made of solid wood or MDF, and the frame is also constructed from wood, offering both durability and aesthetic appeal. The raised panel design is often used in kitchens, bathrooms, and even custom furniture pieces like wardrobes and bookcases.
Raised panel doors are a great option for both contemporary and traditional styles, and they can be customized with different wood types, finishes, and design variations to match the overall decor of your home. While purchasing pre-made raised panel doors is an option, crafting your own can be a satisfying and budget-friendly project that adds a personal touch to your space.
Subheading: Why Choose Raised Panel Cabinet Doors?
There are several advantages to choosing raised panel cabinet doors for your home improvement projects. The most obvious benefit is the added beauty and elegance they bring to your cabinetry. Raised panel doors create a dynamic and visually interesting surface, with the center panel adding dimension to the overall design. This feature makes them stand out compared to flat-panel doors, which tend to have a more minimalistic appearance.
In addition to their aesthetic appeal, raised panel cabinet doors are also durable and sturdy. The construction of the door—with the frame surrounding a solid panel—adds strength to the overall structure, making them ideal for high-traffic areas such as kitchens and bathrooms. If you’re looking to create custom cabinets that can withstand the rigors of daily use, raised panel doors are an excellent choice.
2. Materials Needed for a Raised Panel Cabinet Door DIY Project
Before you begin crafting your raised panel cabinet doors, it’s essential to gather the proper materials and tools. Here’s a list of what you’ll need to get started:
Subheading: 1. Materials
- Wood or MDF Boards: The frame and raised panel can be made from wood such as oak, maple, or cherry for a high-end look, or MDF for a more budget-friendly option. If you’re using MDF, ensure that it is of high quality for durability.
- Wood Glue: Strong wood glue will be necessary to secure the frame pieces together and create a solid, seamless joint.
- Wood Screws: Screws will be required to attach the frame to the panel and secure the door hardware.
- Finishing Products: Stain, paint, and a clear topcoat will help protect and finish the cabinet door, giving it a polished, professional look.
Subheading: 2. Tools
- Table Saw or Circular Saw: A table saw is best for cutting straight and accurate edges for the frame, while a circular saw can be used for cutting larger panels.
- Router: A router with a raised panel bit is essential for shaping the edges of the panel and creating the raised effect. This tool will help you achieve the signature curve and profile of a raised panel.
- Miter Saw: To cut the frame pieces at precise angles, a miter saw is indispensable.
- Drill and Screws: A drill will be used to secure the screws into the frame and the panel, ensuring the door is properly assembled.
- Clamps: Use clamps to hold the frame pieces together while the glue dries.
By having these materials and tools on hand, you’ll be prepared to create a raised panel cabinet door that is both functional and beautiful.
3. Step-by-Step Guide to Making a Raised Panel Cabinet Door
Now that you’ve gathered all the materials and tools, it’s time to get started. Follow these steps to make your own raised panel cabinet doors:
Subheading: 1. Measure and Cut the Frame Pieces
Start by measuring the dimensions of the cabinet door you wish to make. This includes the height and width of the door, keeping in mind any allowances for the space in the cabinet frame. Once you’ve determined the size, cut the four pieces of wood that will form the frame of the door—two vertical pieces and two horizontal pieces. These cuts should be made at precise 90-degree angles, ensuring the frame fits snugly together.
Use a miter saw to cut the ends of the frame pieces at a 45-degree angle if you prefer a more polished look. The mitered edges will give your door a seamless, clean appearance.
Subheading: 2. Cut the Raised Panel
Next, cut the piece for the raised panel. Measure and cut a panel that fits within the frame, leaving a small gap around the edges for a perfect fit. The panel can be a solid piece of wood or MDF, depending on your preference. Use a table saw to cut the panel to size, ensuring that it is perfectly square and fits within the frame without being too tight.
Once the panel is cut, use a router with a raised panel bit to create the signature curve along the edges of the panel. This step is crucial to achieve the raised effect, giving the center of the panel a subtle, dimensional curve.
Subheading: 3. Assemble the Door
Apply wood glue to the edges of the frame pieces where they meet and secure them using clamps while the glue sets. Once the glue is dry, drill small pilot holes and insert screws into the frame to reinforce the bond.
Next, attach the raised panel to the frame by applying glue along the edges of the frame, where the panel will sit. Ensure that the panel is centered within the frame and then use screws or finishing nails to secure it in place. Be sure not to over-tighten the screws, as this can cause the wood to split.
Subheading: 4. Finish the Raised Panel Cabinet Door
Once the door is fully assembled, it’s time to finish it. Sand the entire surface to smooth out any rough edges, ensuring the panel is flush with the frame. Then, apply the stain, paint, or finish of your choice to protect the wood and enhance the overall look. A clear polyurethane topcoat will provide added durability and a professional finish.
Allow the door to dry completely before attaching hardware, such as hinges and knobs, to complete the look.
Conclusion
Creating a raised panel cabinet door is a rewarding DIY project that can significantly improve the look of your home. By choosing high-quality materials and following the steps outlined in this guide, you can craft beautiful and durable cabinet doors that will enhance the functionality and style of any room. Whether you’re looking to build custom cabinets for your kitchen, bathroom, or living room, learning how to make a raised panel cabinet door is a valuable skill that can save you money and add a personal touch to your home improvement projects. So, roll up your sleeves, and get ready to create stunning raised panel cabinet doors that will impress for years to come.

 If you’re looking for a stylish way to organize your kitchen, then look no further than incorporating cabinet plate racks. Plate racks are a great way to store and organize your plates, bowls, and other dishes in an attractive and efficient manner. Not only do they look great, but they also help to maximize the storage space in your kitchen. With a variety of styles and sizes available, you can easily find the perfect plate rack to fit your kitchen’s decor and storage needs. In this article, we’ll discuss the benefits of incorporating cabinet plate racks for kitchen organization, as well as some tips for choosing the right one for your home.