HVLP sprayers are not a stranger for DIY doers and professional painters after all. However, using this machine might be a bit overwhelming for beginners.
In this article, we have the instructions on using an HVLP sprayer as well as the full review of the best sprayers on the market. The review is useful for those who look for the best HVLP sprayer for the next projects.
Step #1
Find a large wing-nut and unscrew that item so you can remove the wing-nut as well as its collar. Retract the needle by pulling the trigger and pull out the gun’s tip. The tip looks like a mushroom.
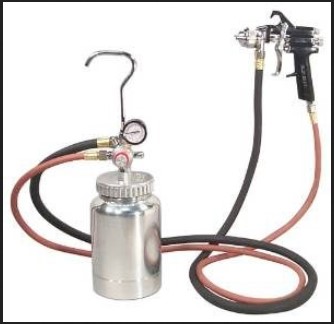
Once you’ve replaced the wing-nut and collar, you can move on to the next part. If you are not sure how every part looks like, you can check the full review of HVLP sprayers though. You need to remove the tank on top of the gun and fill it with paint.
Put it back on once you’ve filled the tank and connect this part with the air hose located in the gun’s handle. Here you also can pick the air pressure.
Step #2
You better test the gun before starting to paint. Reducing the air pressure can be done by adjusting the knob under the gun. 15psi to 20psi is such the right air pressure to paint your home cabinet.
Adjusting the paint volume can also be done by turning the knob on the handle. Meanwhile, a knob you can find right above the volume knob is used for adjusting the pattern. You are setting everything right if the pattern is about 8 inches wide without runs or drips.
Step #3
This step is where you start to take care of the cabinet. Make sure you remove any drawer and door from the cabinets. Put them on a sawhorse and locate the doors facedown.
When painting the cabinets, make sure you spray them from inside out. It is recommended to hold the gun about 16 inches from the inside part of the cabinet. The patterns will overlap each other by about an inch.
When painting the frame, it is better to spray vertically first and keep the sides for the last. Once everything looks wet, stop the spray and let them dry.
Step #4
Hand-sanding the surface lightly by using 180-grit sandpaper. You may need to spray the entire thing like the first time once again. Or, feel free to repeat the spraying and sending up to three times to get a metallic yet smooth look as you wanted. Technically, the drawers and cabinets are done so you can move on to the doors.
Step #5
The step of painting the doors are similar to how you paint the cabinets and drawers. Spray the faces and sides evenly. Let them sit for a while to dry.
Once everything is well-dried, you can start sanding with 180-grit sandpaper until it looks evenly smoother. Finish the project by spraying the doors. Feel free to read the full review of the best HVLP sprayers before starting your project.
