Minty Fresh Makeover: Infusing Your Home with Mint Green Paint

Source : https://cdn.apartmenttherapy.info

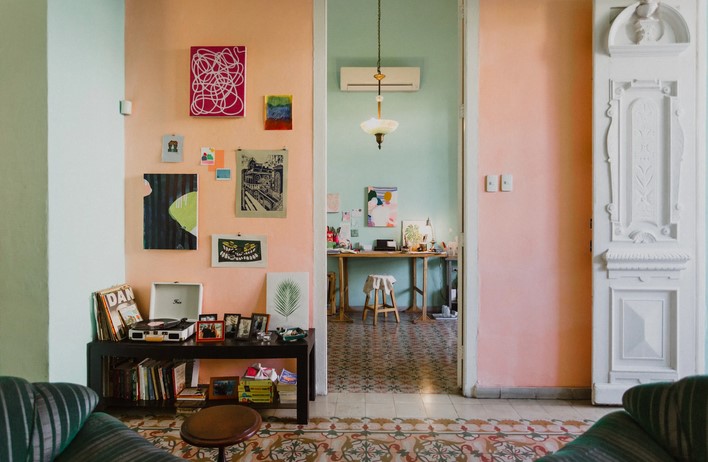
Minty Fresh Makeover is a great way to add a touch of freshness and vibrancy to your home. Mint green paint is a popular choice for many homeowners, as it can bring a sense of calm and serenity to any room. Whether you’re looking to create a tranquil bedroom, a bright and airy living room, or a cheerful kitchen, mint green paint can be the perfect choice. With its versatility and range of shades, you can easily find the perfect hue to match your home’s decor. With Minty Fresh Makeover, you can easily infuse your home with a minty fresh makeover that will leave your home feeling refreshed and revitalized.

How to Choose the Right Shade of Mint Green Paint for Your Home

When selecting a shade of mint green paint for your home, it is important to consider the overall look and feel of the space. Mint green is a versatile color that can be used to create a variety of different looks, from a bright and cheerful atmosphere to a more subdued and calming atmosphere. To ensure that you choose the right shade of mint green paint for your home, consider the following tips.

First, consider the size of the room. If the room is small, opt for a lighter shade of mint green paint to create a more open and airy feel. For larger rooms, a darker shade of mint green can be used to create a more dramatic and sophisticated look.

Second, consider the existing color palette in the room. If the room already has a lot of color, opt for a lighter shade of mint green paint to create a more subtle and calming atmosphere. If the room is mostly neutral, a darker shade of mint green can be used to add a pop of color.

Third, consider the lighting in the room. If the room has a lot of natural light, opt for a lighter shade of mint green paint to create a bright and cheerful atmosphere. If the room has limited natural light, a darker shade of mint green can be used to create a more subdued and calming atmosphere.

Finally, consider the overall style of the room. If the room has a modern aesthetic, opt for a brighter shade of mint green paint to create a more contemporary look. If the room has a more traditional aesthetic, a darker shade of mint green can be used to create a more classic look.

By considering the size, existing color palette, lighting, and overall style of the room, you can ensure that you choose the right shade of mint green paint for your home.

Creative Ways to Incorporate Mint Green Paint into Your Home Decor

Mint green is a popular color choice for home decor, as it is a calming hue that can be used to create a tranquil atmosphere. Here are some creative ways to incorporate mint green paint into your home decor:

1. Accent Walls: Mint green paint can be used to create an eye-catching accent wall in any room. This is a great way to add a pop of color to a neutral space.

2. Kitchen Cabinets: Mint green paint can be used to give kitchen cabinets a fresh, modern look. This is a great way to add a touch of color to a neutral kitchen.

3. Furniture: Mint green paint can be used to give furniture a unique look. This is a great way to add a touch of color to a room without overwhelming it.

4. Doors: Mint green paint can be used to give doors a unique look. This is a great way to add a touch of color to a room without overwhelming it.

5. Trim: Mint green paint can be used to give trim a unique look. This is a great way to add a touch of color to a room without overwhelming it.

6. Ceilings: Mint green paint can be used to give ceilings a unique look. This is a great way to add a touch of color to a room without overwhelming it.

7. Floors: Mint green paint can be used to give floors a unique look. This is a great way to add a touch of color to a room without overwhelming it.

By using mint green paint in creative ways, you can add a touch of color to any room in your home. Whether you choose to use it as an accent wall, on furniture, trim, doors, ceilings, or floors, mint green paint can be used to create a tranquil atmosphere in any space.Minty Fresh Makeover is a great way to add a touch of freshness and vibrancy to any home. With its calming and soothing qualities, mint green paint can be used to create a tranquil atmosphere in any room. Whether you choose to use it as an accent color or as a main color, mint green paint is sure to bring a unique and refreshing look to your home.

Ceiling Popcorn: What Is a Popcorn Ceiling and How to Deal with It

Source : https://fillopainting.com

A popcorn ceiling, also known as a stucco ceiling or a cottage cheese ceiling, is a type of textured ceiling that was popular in the 1970s and 1980s. It is made by spraying a mixture of joint compound and Styrofoam beads onto the ceiling. The result is a textured, bumpy surface that resembles popcorn. Popcorn ceilings are often found in older homes and can be difficult to remove. However, there are several methods for dealing with popcorn ceilings, including painting, scraping, and covering them with a new material. This article will discuss the pros and cons of each method and provide tips for dealing with popcorn ceilings.

The Pros and Cons of Popcorn Ceilings: Is It Worth the Hassle?

Popcorn ceilings, also known as acoustic ceilings, are a type of textured ceiling that was popular in the 1970s and 1980s. While they are still used in some homes today, they have become increasingly unpopular due to their dated look and the difficulty of removing them. Before deciding whether or not to install a popcorn ceiling, it is important to consider the pros and cons.

Pros

One of the main advantages of popcorn ceilings is that they are relatively inexpensive and easy to install. They are also good at hiding imperfections in the ceiling, such as cracks and uneven surfaces. Additionally, popcorn ceilings can help to reduce noise, making them a good choice for homes with multiple floors or rooms with high ceilings.

Cons

The main disadvantage of popcorn ceilings is that they are difficult to remove. If you decide to remove a popcorn ceiling, you will need to use special tools and techniques to avoid damaging the ceiling or releasing asbestos fibers into the air. Additionally, popcorn ceilings can be difficult to paint, as the texture can make it difficult for the paint to adhere properly. Finally, popcorn ceilings can be difficult to clean, as the texture can trap dust and dirt.

In conclusion, popcorn ceilings can be a good choice for those who are looking for an inexpensive and easy-to-install ceiling option. However, it is important to consider the difficulty of removing them and the difficulty of painting and cleaning them before making a decision.

DIY Tips for Removing Popcorn Ceilings: What You Need to Know Before You Start

Popcorn ceilings, also known as acoustic ceilings, are a common feature in many homes. While they may have been popular in the past, many homeowners now find them outdated and unsightly. Fortunately, removing popcorn ceilings is a relatively straightforward process that can be done with a few simple tools. Before you begin, however, there are a few important things to consider.

First, it is important to determine whether the popcorn ceiling contains asbestos. Asbestos was commonly used in popcorn ceilings prior to the 1980s, and it can be hazardous to your health if disturbed. If you suspect that your popcorn ceiling contains asbestos, it is best to contact a professional for removal.

Second, you will need to prepare the area for removal. This includes covering furniture and floors with plastic sheeting and taping off any areas that you do not want to be affected. You will also need to turn off the electricity to the room and remove any light fixtures.

Third, you will need to gather the necessary tools for removal. This includes a spray bottle, a putty knife, a scraper, a vacuum cleaner, and a dust mask. You may also want to use a steamer to help loosen the popcorn texture.

Finally, you will need to begin the removal process. Start by spraying the ceiling with water to help loosen the texture. Then, use the putty knife and scraper to scrape away the popcorn texture. Vacuum up any debris and repeat the process until the ceiling is smooth.

Removing popcorn ceilings can be a messy and time-consuming process. However, with the right preparation and tools, it can be done safely and effectively. Before you begin, make sure to determine whether the ceiling contains asbestos and prepare the area for removal. Gather the necessary tools and follow the steps outlined above to remove the popcorn texture. With a little patience and effort, you can transform your popcorn ceiling into a beautiful, modern surface.Ceiling popcorn, also known as acoustic or textured ceilings, is a popular choice for many homeowners. It is a cost-effective way to add texture and interest to a room, but it can be difficult to clean and repair. If you are considering installing a popcorn ceiling, it is important to understand the pros and cons of this type of ceiling and how to properly maintain it. With the right care and maintenance, a popcorn ceiling can be a great addition to any home.

Quick Delights: Easy Microwave Desserts for Busy Days

Source : https://homebuildingplus.net

Quick Delights: Easy Microwave Desserts for Busy Days is the perfect cookbook for anyone who loves to indulge in sweet treats but doesn’t have the time to spend hours in the kitchen. This book offers a variety of delicious desserts that can be made in minutes using a microwave. From cakes and pies to cookies and brownies, there is something for everyone. With easy-to-follow instructions and helpful tips, you can whip up a delicious dessert in no time. So, if you’re looking for a quick and easy way to satisfy your sweet tooth, look no further than Quick Delights!

5 Delicious Microwave Desserts You Can Make in Under 10 Minutes

1. Microwave Brownies: Brownies are a classic dessert that can be made quickly and easily in the microwave. All you need is a brownie mix, a microwave-safe bowl, and a few minutes. Simply mix the brownie mix according to the instructions, pour it into the bowl, and microwave for about 5 minutes. Once the brownies are done, let them cool for a few minutes before serving.

2. Microwave Apple Crisp: Apple crisp is a delicious and easy dessert that can be made in the microwave in just a few minutes. Start by combining diced apples, sugar, cinnamon, and butter in a microwave-safe bowl. Then, top with a mixture of oats, flour, and brown sugar. Microwave for about 5 minutes, or until the apples are tender. Serve warm with a scoop of ice cream.

3. Microwave Chocolate Cake: Chocolate cake is a classic dessert that can be made in the microwave in just a few minutes. Start by combining all-purpose flour, cocoa powder, baking powder, sugar, and salt in a bowl. Then, add melted butter, eggs, and milk. Pour the batter into a greased microwave-safe dish and microwave for about 5 minutes. Let the cake cool before serving.

4. Microwave Fudge: Fudge is a delicious and easy dessert that can be made in the microwave in just a few minutes. Start by combining butter, sugar, and cocoa powder in a microwave-safe bowl. Microwave for about 3 minutes, stirring every 30 seconds. Then, add vanilla extract and stir until the mixture is smooth. Pour the fudge into a greased dish and let it cool before serving.

5. Microwave Peanut Butter Cookies: Peanut butter cookies are a classic dessert that can be made in the microwave in just a few minutes. Start by combining peanut butter, sugar, and an egg in a bowl. Then, form the dough into small balls and place them on a greased plate. Microwave for about 2 minutes, or until the cookies are golden brown. Let them cool before serving.

How to Make Quick and Easy Microwave Desserts with Just a Few Ingredients

Making a delicious dessert in the microwave is a great way to satisfy a sweet tooth without spending a lot of time in the kitchen. With just a few simple ingredients, you can create a variety of tasty treats in minutes. Here are some quick and easy microwave desserts that you can make with just a few ingredients.

1. Chocolate Mug Cake: This is a classic microwave dessert that is sure to please. All you need is a mug, a few tablespoons of flour, a tablespoon of cocoa powder, a tablespoon of sugar, a pinch of baking powder, a pinch of salt, a tablespoon of vegetable oil, and a few tablespoons of milk. Mix all the ingredients together in the mug and microwave for one minute. Top with a scoop of ice cream for an extra special treat.

2. Microwave Brownies: This is a great way to satisfy a chocolate craving. All you need is a microwave-safe bowl, a few tablespoons of butter, a few tablespoons of cocoa powder, a few tablespoons of sugar, a pinch of baking powder, a pinch of salt, and a few tablespoons of milk. Melt the butter in the bowl and then mix in the other ingredients. Microwave for one minute and enjoy.

3. Microwave Apple Crisp: This is a delicious and easy dessert that is sure to please. All you need is a microwave-safe bowl, a few tablespoons of butter, a few tablespoons of sugar, a pinch of cinnamon, a pinch of nutmeg, and a few tablespoons of diced apples. Melt the butter in the bowl and then mix in the other ingredients. Microwave for one minute and enjoy.

These are just a few of the many quick and easy microwave desserts that you can make with just a few ingredients. With a little creativity, you can create a variety of delicious treats in minutes. So the next time you’re in the mood for something sweet, try one of these easy microwave desserts.Quick Delights: Easy Microwave Desserts for Busy Days is a great resource for anyone looking for quick and easy dessert recipes. With a wide variety of recipes to choose from, you can find something to satisfy any sweet tooth. Whether you’re looking for a quick snack or a full-on dessert, Quick Delights has something for everyone. With its easy-to-follow instructions and delicious results, Quick Delights is sure to become a go-to resource for busy days.

Exploring the Convenience and Delight of Mail Order Fruit Trees

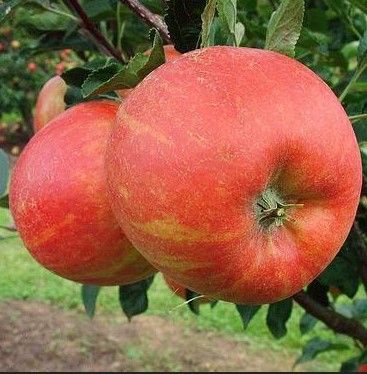
In the realm of gardening, the allure of cultivating one’s own fruits can be irresistible. There’s something deeply satisfying about nurturing a tiny sapling into a thriving tree laden with luscious fruits. However, for many enthusiasts, the challenge lies in finding high-quality fruit trees that suit their specific needs and preferences. This is where the convenience of mail order fruit trees comes into play.

Mail order fruit trees offer a myriad of benefits, making them an appealing option for both novice and seasoned gardeners alike. One of the primary advantages is accessibility. With just a few clicks, gardeners can peruse a vast selection of fruit trees from the comfort of their own homes. This eliminates the need to visit multiple nurseries in search of the perfect specimens, saving both time and effort.

Moreover, mail order fruit trees provide access to a wider variety of species and cultivars than what may be available locally. This opens up a world of possibilities for gardeners looking to diversify their orchards with unique or rare fruits. Whether it’s heirloom apple varieties or exotic citrus trees, the options are virtually endless.

Quality is another key consideration when purchasing fruit trees online. Reputable vendors take great care in sourcing and shipping their plants to ensure they arrive in optimal condition. This often involves meticulous packaging and expedited shipping methods to minimize stress on the trees during transit. As a result, customers can expect to receive healthy, robust specimens that are ready to thrive in their new environment.

Furthermore, mail order fruit trees offer convenience and flexibility in terms of timing. Unlike traditional nurseries, which may have limited inventory or seasonal availability, online vendors typically have fruit trees available year-round. This means gardeners can place orders at their convenience, regardless of the time of year, and receive their trees when it’s most suitable for planting in their region.

For those new to fruit tree gardening, many online vendors also provide valuable resources and guidance to help ensure success. This may include detailed planting and care instructions, as well as access to knowledgeable customer support teams who can address specific questions or concerns. Armed with these resources, even beginners can embark on their fruit-growing journey with confidence.

When considering where to purchase mail order fruit trees, it’s essential to choose a reputable vendor with a track record of excellence. Look for companies that prioritize quality, sustainability, and customer satisfaction. Reading reviews and testimonials from other gardeners can also provide valuable insights into the reliability and professionalism of a vendor.

In conclusion, mail order fruit trees offer a convenient and enjoyable way to enhance any garden with an abundance of fresh, homegrown fruits. From the ease of online browsing to the diversity of available species, there are countless reasons to explore this modern approach to fruit tree shopping. Whether you’re a seasoned gardener or just starting out, the world of mail order fruit trees awaits, promising a fruitful journey ahead.

Tile Transformation: Painting Tips for a Tile Floor Makeover

Tile transformation is a great way to give your tile floor a makeover. Whether you’re looking to update the look of your kitchen, bathroom, or any other room in your home, painting your tile floor can be a great way to add a fresh, new look. With the right preparation and the right paint, you can transform your tile floor into something completely new. In this article, we’ll provide you with some tips and tricks to help you get the best results when painting your tile floor. We’ll cover everything from prepping the tile to choosing the right paint and tools to get the job done. So, if you’re ready to give your tile floor a makeover, let’s get started!

How to Choose the Right Paint for Your Tile Floor Makeover

When it comes to giving your tile floor a makeover, choosing the right paint is essential. The right paint can make all the difference in the look and feel of your floor, so it’s important to take the time to select the best option for your needs. Here are some tips to help you choose the right paint for your tile floor makeover.

First, consider the type of tile you have. Different types of tile require different types of paint. For example, ceramic tile requires a paint that is specifically designed for ceramic surfaces, while porcelain tile requires a paint that is designed for porcelain surfaces. Make sure to select a paint that is designed for the type of tile you have.

Second, consider the type of finish you want. Different types of paint offer different levels of sheen. If you want a glossy finish, choose a paint with a high-gloss finish. If you want a more subtle look, choose a paint with a low-gloss finish.

Third, consider the color you want. Different types of paint come in a variety of colors, so you can choose a color that complements the rest of your decor. If you’re not sure what color to choose, consider consulting a professional designer or color expert.

Finally, consider the durability of the paint. Different types of paint offer different levels of durability. If you want a paint that will last for years, choose a paint that is designed for high-traffic areas.

By following these tips, you can ensure that you choose the right paint for your tile floor makeover. With the right paint, you can give your tile floor a beautiful new look that will last for years to come.

Preparing Your Tile Floor for a Paint Transformation: What You Need to Know

When it comes to transforming the look of a tile floor, painting is a great option. However, before you begin, it is important to understand the steps necessary to properly prepare the tile floor for a paint transformation. This article will provide an overview of the steps you need to take to ensure that your tile floor is ready for a paint transformation.

The first step in preparing your tile floor for a paint transformation is to thoroughly clean the surface. This includes removing any dirt, dust, and debris that may be present. You should also use a degreaser to remove any grease or oil that may have accumulated on the tile. Once the surface is clean, you should use a mild detergent and water to scrub the tile and remove any remaining dirt or debris.

The next step is to sand the tile. This will help to create a smooth surface for the paint to adhere to. You should use a medium-grit sandpaper and sand the tile in a circular motion. Once the tile is sanded, you should vacuum the area to remove any dust or debris that may have been created during the sanding process.

The third step is to apply a primer to the tile. This will help to create a better bond between the paint and the tile. You should use a high-quality primer that is designed for use on tile. Once the primer is applied, you should allow it to dry completely before applying the paint.

Finally, you should apply the paint to the tile. You should use a high-quality paint that is designed for use on tile. You should also use a brush or roller to apply the paint in even strokes. Once the paint is dry, you should seal the tile with a sealant to protect it from moisture and dirt.

By following these steps, you can ensure that your tile floor is properly prepared for a paint transformation. With the right preparation, you can create a beautiful and unique look for your tile floor.Tile transformation is an excellent way to give your tile floor a makeover. With the right tools and techniques, you can easily transform your tile floor into a beautiful and unique space. Painting your tile floor is a great way to add color and texture to your space, and with the right preparation and painting techniques, you can achieve a professional-looking finish. With a little bit of effort and creativity, you can give your tile floor a makeover that will last for years to come.

Concrete Costs: Exploring the Price of Concrete per Square Foot

Source : https://qualityconcretepolishinggrinding.com.au

Concrete is a versatile and durable material used in a variety of construction projects. It is an essential component of many structures, from driveways and patios to foundations and walls. Understanding the cost of concrete is essential for any construction project. This article will explore the cost of concrete per square foot, including factors that affect the price and tips for getting the best deal. We will also discuss the different types of concrete and their associated costs. By the end of this article, you will have a better understanding of the cost of concrete and how to get the best deal for your project.

How to Calculate the Cost of Concrete for Your Project: A Guide to Estimating Concrete Costs

Estimating the cost of concrete for a project can be a difficult and time-consuming task. However, with the right information and a few simple calculations, it is possible to accurately estimate the cost of concrete for any project. This guide will provide an overview of the steps necessary to calculate the cost of concrete for a project.

Step 1: Determine the Volume of Concrete Needed

The first step in calculating the cost of concrete for a project is to determine the volume of concrete needed. This can be done by measuring the length, width, and depth of the area that needs to be filled with concrete. Once these measurements are taken, the volume of concrete needed can be calculated by multiplying the length, width, and depth together.

Step 2: Calculate the Cost of Materials

The next step in calculating the cost of concrete for a project is to calculate the cost of materials. This includes the cost of the concrete mix, any additives, and any other materials needed for the project. The cost of materials can be calculated by multiplying the cost of the materials per cubic yard by the volume of concrete needed.

Step 3: Calculate the Cost of Labor

The third step in calculating the cost of concrete for a project is to calculate the cost of labor. This includes the cost of any labor needed to mix, pour, and finish the concrete. The cost of labor can be calculated by multiplying the cost of labor per hour by the number of hours needed to complete the project.

Step 4: Calculate the Total Cost

The final step in calculating the cost of concrete for a project is to calculate the total cost. This can be done by adding together the cost of materials, the cost of labor, and any other costs associated with the project. Once all of these costs have been added together, the total cost of the project can be determined.

By following these steps, it is possible to accurately calculate the cost of concrete for any project. Knowing the cost of concrete for a project can help to ensure that the project is completed within budget and on time.

The Pros and Cons of Different Types of Concrete: Comparing Costs and Benefits

Concrete is a versatile material that is used in a variety of construction projects. It is strong, durable, and relatively inexpensive, making it an ideal choice for many applications. However, there are several different types of concrete, each with its own unique properties and advantages. In this article, we will compare the costs and benefits of the various types of concrete to help you decide which one is best for your project.

The most common type of concrete is Portland cement concrete, which is made from a mixture of Portland cement, sand, and gravel. This type of concrete is strong and durable, and it is relatively inexpensive to produce. It is also easy to work with and can be used in a variety of applications. However, it is not as strong as other types of concrete and can be prone to cracking and other damage.

Another type of concrete is high-strength concrete, which is made from a mixture of Portland cement, sand, and a special type of aggregate. This type of concrete is much stronger than Portland cement concrete and is often used in applications where strength is a priority. It is also more expensive to produce than Portland cement concrete, but it is more resistant to cracking and other damage.

A third type of concrete is lightweight concrete, which is made from a mixture of Portland cement, sand, and a lightweight aggregate. This type of concrete is much lighter than other types of concrete and is often used in applications where weight is a priority. It is also more expensive to produce than other types of concrete, but it is more resistant to cracking and other damage.

Finally, there is precast concrete, which is made from a mixture of Portland cement, sand, and a special type of aggregate. This type of concrete is much stronger than other types of concrete and is often used in applications where strength is a priority. It is also more expensive to produce than other types of concrete, but it is more resistant to cracking and other damage.

In conclusion, there are several different types of concrete, each with its own unique advantages and disadvantages. When deciding which type of concrete is best for your project, it is important to consider the cost, strength, and durability of each type. By comparing the costs and benefits of the various types of concrete, you can make an informed decision about which type is best for your project.In conclusion, concrete costs vary greatly depending on the type of concrete, the size of the project, and the location of the project. The cost of concrete per square foot can range from $2.50 to $15.00, with the average cost being around $5.00. It is important to consider all of these factors when estimating the cost of a concrete project. Additionally, it is important to research local concrete suppliers to ensure that you are getting the best price for your project.

From the Heart: Nice Things to Do for Your Mom to Show Your Appreciation

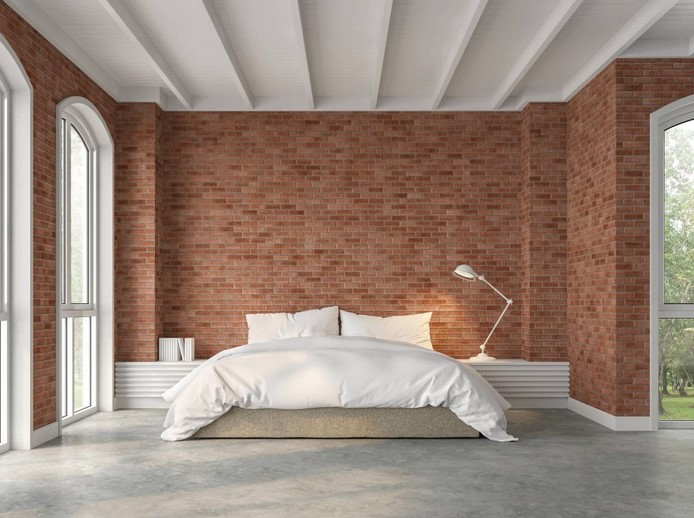
From the Heart: Nice Things to Do for Your Mom to Show Your Appreciation is a guide to help you show your appreciation for your mom. It is filled with thoughtful and creative ideas to make your mom feel special and appreciated. Whether you are looking for a special gift, a heartfelt gesture, or a fun activity, this guide has something for everyone. With these ideas, you can show your mom just how much you care and make her feel loved and appreciated.

5 Creative Ways to Show Your Mom You Care on Mother’s Day

1. Make a Homemade Gift: Show your mom how much you care by making her a homemade gift. This could be anything from a scrapbook of your favorite memories together, to a handmade card, to a special photo frame.

2. Cook Her Favorite Meal: Surprise your mom by cooking her favorite meal. Whether it’s a classic dish or something more creative, your mom will appreciate the effort you put into making her a delicious meal.

3. Give Her a Spa Day: Give your mom the gift of relaxation by treating her to a spa day. Whether it’s a massage, facial, or manicure, your mom will appreciate the chance to take a break and pamper herself.

4. Take Her Out: Show your mom how much you care by taking her out for a special day. This could be anything from a day at the beach, to a picnic in the park, to a shopping trip.

5. Spend Quality Time Together: Show your mom how much you care by spending quality time together. This could be anything from a movie night, to a game night, to a walk in the park.

How to Make Your Mom Feel Special on Her Birthday

On your mother’s birthday, it is important to make her feel special and appreciated. Here are some tips to help you make your mom feel special on her birthday.

First, plan a special day for her. This could include taking her out to lunch or dinner, or planning a day of activities that she enjoys. You could also plan a surprise party for her with her friends and family.

Second, give her a meaningful gift. This could be something that she has been wanting for a while, or something that has sentimental value. You could also make her something special, such as a scrapbook or photo album.

Third, write her a heartfelt card. Let her know how much you appreciate her and how much she means to you. You could also include a poem or a special message that expresses your love and gratitude.

Fourth, spend quality time with her. This could include going for a walk, playing a game, or just talking and catching up.

Finally, show her your appreciation. Let her know how much you appreciate all that she does for you and how much she means to you.

By following these tips, you can make your mom feel special and appreciated on her birthday. Show her how much you care and make her day extra special.

Conclusion

From the Heart: Nice Things to Do for Your Mom to Show Your Appreciation is a great resource for anyone looking for ways to show their appreciation for their mother. It provides a variety of ideas that range from simple gestures to more elaborate gifts. Whether you are looking for a way to show your mom how much you care or just want to make her day a little brighter, this guide has something for everyone. Taking the time to show your mom how much you appreciate her is a great way to show your love and gratitude.

Stylish Backsplash: Lowes Peel and Stick Backsplash for Easy Updates

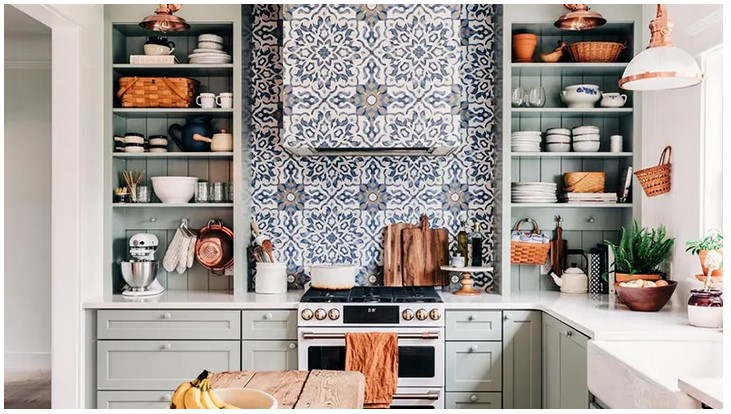
If you’re looking for an easy and affordable way to update your kitchen, then look no further than Lowes Peel and Stick Backsplash. This stylish backsplash is perfect for those who want to add a modern touch to their kitchen without breaking the bank. Lowes Peel and Stick Backsplash is easy to install and comes in a variety of colors and patterns to match any kitchen décor. With its easy installation and low cost, Lowes Peel and Stick Backsplash is the perfect way to give your kitchen a fresh new look.

How to Choose the Right Peel and Stick Backsplash for Your Kitchen: Tips for Finding the Perfect Lowes Peel and Stick Backsplash

When it comes to choosing the right peel and stick backsplash for your kitchen, there are a few key factors to consider. Lowes peel and stick backsplashes offer a great way to update your kitchen without the hassle of traditional tile installation. Here are some tips for finding the perfect Lowes peel and stick backsplash for your kitchen:

1. Consider the size of your kitchen. Before you start shopping for a Lowes peel and stick backsplash, measure the area you want to cover. This will help you determine the size of the backsplash you need.

2. Think about the style of your kitchen. Lowes peel and stick backsplashes come in a variety of colors, patterns, and textures. Consider the overall style of your kitchen and choose a backsplash that complements it.

3. Consider the material. Lowes peel and stick backsplashes are available in a variety of materials, including vinyl, ceramic, and glass. Consider the durability and maintenance requirements of each material before making your decision.

4. Consider the installation process. Lowes peel and stick backsplashes are easy to install, but you should still read the instructions carefully before beginning. Make sure you have all the necessary tools and supplies on hand before you start.

5. Consider the cost. Lowes peel and stick backsplashes are generally more affordable than traditional tile backsplashes. However, you should still compare prices to make sure you’re getting the best deal.

By following these tips, you can find the perfect Lowes peel and stick backsplash for your kitchen. With the right backsplash, you can easily update your kitchen without the hassle of traditional tile installation.

Get Creative with Lowes Peel and Stick Backsplash: Ideas for Stylish and Unique Kitchen Updates

Updating the look of your kitchen can be a daunting task, but with the help of Lowes Peel and Stick Backsplash, you can easily create a stylish and unique look for your kitchen. Lowes Peel and Stick Backsplash is an easy-to-install, affordable, and durable solution for kitchen backsplashes. With a variety of colors, textures, and patterns to choose from, you can create a one-of-a-kind look for your kitchen. Here are some creative ideas for using Lowes Peel and Stick Backsplash to update your kitchen:

1. Create a mosaic pattern. Use different colors and textures of Lowes Peel and Stick Backsplash to create a unique mosaic pattern. This is a great way to add a pop of color and texture to your kitchen.

2. Create a herringbone pattern. Use Lowes Peel and Stick Backsplash to create a herringbone pattern. This is a classic look that will add a timeless touch to your kitchen.

3. Create a chevron pattern. Use Lowes Peel and Stick Backsplash to create a chevron pattern. This is a modern look that will add a contemporary touch to your kitchen.

4. Create a geometric pattern. Use Lowes Peel and Stick Backsplash to create a geometric pattern. This is a great way to add a unique touch to your kitchen.

5. Create a striped pattern. Use Lowes Peel and Stick Backsplash to create a striped pattern. This is a great way to add a bold touch to your kitchen.

With Lowes Peel and Stick Backsplash, you can easily create a stylish and unique look for your kitchen. With a variety of colors, textures, and patterns to choose from, you can create a one-of-a-kind look for your kitchen. So get creative and start updating your kitchen today!

Conclusion

The Lowes Peel and Stick Backsplash is an easy and affordable way to update any kitchen. It is easy to install, and the variety of colors and designs available make it easy to find the perfect backsplash to match any kitchen décor. The peel and stick material is durable and easy to clean, making it a great choice for any kitchen. With its stylish look and easy installation, the Lowes Peel and Stick Backsplash is a great way to give any kitchen a fresh, updated look.

Knobs of Character: Embracing Anthropology Knobs for Cabinet Elegance

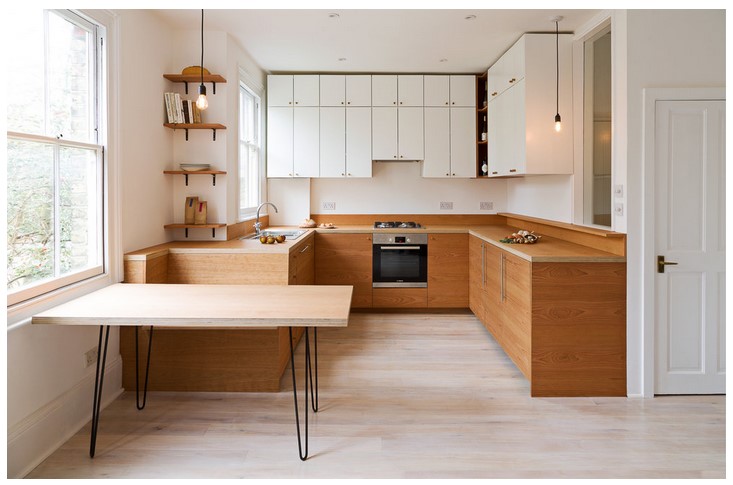
Knobs of Character: Embracing Anthropology Knobs for Cabinet Elegance is a book that explores the use of anthropological knobs to add a unique and elegant touch to cabinets. The book provides an in-depth look at the history and cultural significance of these knobs, as well as how to incorporate them into your own home. It also provides a comprehensive guide to the different types of knobs available, from traditional to modern, and how to choose the right one for your cabinets. With its detailed information and beautiful photographs, Knobs of Character is an invaluable resource for anyone looking to add a touch of character to their cabinets.

Exploring the Cultural Significance of Knobs of Character: How Knobs Can Enhance Your Home Decor

Knobs of character are a unique and stylish way to add a touch of personality to any home. Whether you’re looking to spruce up a piece of furniture or add a bit of flair to a door, knobs of character can be the perfect way to do it. Not only do they add a unique aesthetic to any room, but they can also be a great way to explore the cultural significance of the knobs you choose.

Knobs of character come in a variety of shapes, sizes, and colors, allowing you to customize your home decor to fit your own personal style. From classic designs to more modern and abstract shapes, there’s something for everyone. You can even find knobs that feature symbols or images that are meaningful to you, such as a family crest or a favorite animal.

Knobs of character can also be a great way to explore the cultural significance of the knobs you choose. For example, if you’re looking for a knob to add to a piece of furniture, you might choose one that features a traditional symbol from your culture. This could be a symbol of luck, prosperity, or protection. By choosing a knob with a cultural significance, you’re not only adding a unique touch to your home decor, but you’re also honoring your heritage.

Knobs of character can also be a great way to add a bit of whimsy to your home decor. If you’re looking for a fun and unique way to spruce up a piece of furniture, you might choose a knob with a cartoon character or a funny phrase. This can be a great way to add a bit of humor to your home decor and make it more inviting.

No matter what type of knobs of character you choose, they can be a great way to add a unique touch to your home decor. Not only do they add a unique aesthetic to any room, but they can also be a great way to explore the cultural significance of the knobs you choose. Whether you’re looking for a traditional symbol or a fun and whimsical design, knobs of character can be the perfect way to add a bit of personality to your home.

Crafting a Unique Look with Knobs of Character: Tips for Incorporating Knobs into Your Home Design

When it comes to home design, knobs can be a great way to add a unique touch to your space. Knobs come in a variety of shapes, sizes, and materials, so you can easily find the perfect knob to fit your style. Here are some tips for incorporating knobs into your home design:

1. Consider the Function: Before you choose a knob, think about the function of the piece of furniture or door it will be attached to. If it’s a dresser, you may want a more decorative knob, while a door may require a more functional knob.

2. Choose the Right Material: Knobs come in a variety of materials, from wood to metal to ceramic. Consider the overall look and feel of the room and choose a material that will complement the other elements in the space.

3. Mix and Match: Don’t be afraid to mix and match different knobs. You can create a unique look by combining different shapes, sizes, and materials.

4. Consider Color: Color can be a great way to add a unique touch to your knobs. Choose a color that will complement the other elements in the room, or go bold with a bright color to make a statement.

5. Add Finishing Touches: Once you’ve chosen your knobs, consider adding some finishing touches. You can add a decorative backplate or a unique handle to give your knobs an extra special look.

By following these tips, you can easily incorporate knobs into your home design and create a unique look with knobs of character. With the right knobs, you can add a touch of personality to any room in your home.

Conclusion

Knobs of Character: Embracing Anthropology Knobs for Cabinet Elegance is a great way to add a unique and interesting touch to any home. Not only do these knobs provide a beautiful and unique look, but they also provide a great way to bring a bit of culture and history into the home. With a wide variety of styles and designs to choose from, there is sure to be a knob that will fit any home’s decor. Whether you are looking for a classic look or something more modern, these knobs are sure to add a touch of elegance and style to any room.

Faux Literature: Creating Fake Books for Stylish Display in Your Space

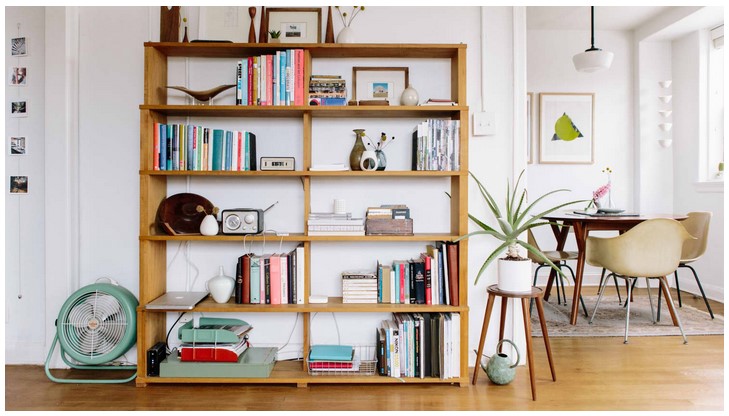
Faux literature is a great way to add a touch of style and sophistication to any space. Whether you’re looking to spruce up a bookshelf or add a unique conversation piece to your living room, faux literature can be a great way to do it. Faux literature is the art of creating fake books that look like real books, but are actually just decorative pieces. They can be used to fill empty shelves, add a touch of color to a room, or even as a conversation starter. With a little creativity and some basic supplies, you can create your own faux literature to add a unique and stylish touch to your home.

How to Create a Faux Library: Tips for Crafting Fake Books for Home Decor

Creating a faux library in your home can be a great way to add a touch of sophistication and style to any room. Whether you’re looking to create a cozy reading nook or just want to add a bit of character to your living space, crafting fake books can be a great way to do it. Here are some tips for crafting faux books for home decor:

1. Choose the right materials. You’ll need some sturdy cardboard, craft paper, and glue to create your faux books. You can also use fabric or felt for the covers.

2. Cut the cardboard into rectangles that are slightly larger than the size of the book you want to create.

3. Cover the cardboard with craft paper or fabric. Make sure to leave a small gap at the top and bottom of the cover so that you can glue the pages together.

4. Cut the pages for your book. You can use plain white paper or craft paper for this.

5. Glue the pages together and then glue them to the cover. Make sure to leave a small gap at the top and bottom of the cover so that you can glue the pages together.

6. Add details to your book. You can use markers, paint, or other craft supplies to add titles, author names, and other details to your book.

7. Place your faux books on a shelf or in a bookcase to complete the look.

Creating a faux library in your home can be a great way to add a touch of sophistication and style to any room. With these tips, you can easily craft your own faux books for home decor.

The Benefits of Faux Literature: Why Fake Books Make Great Home Decor Accents

Faux literature is a great way to add a touch of sophistication and style to any home. Not only do these books look great on shelves and tables, but they also provide a unique and interesting conversation piece. Here are some of the benefits of using faux literature as home decor accents.

First, faux literature is a great way to add a touch of class to any room. Whether you choose to display a set of classic novels or a collection of vintage books, these pieces can instantly transform a room into a more sophisticated and stylish space. Faux literature also adds a unique and interesting conversation piece to any room. Guests will be intrigued by the books and may even ask questions about them.

Second, faux literature is a great way to add a personal touch to any room. Whether you choose to display a set of books that reflect your interests or a collection of books that reflect your family’s history, these pieces can add a personal touch to any room.

Third, faux literature is a great way to add a touch of color to any room. Whether you choose to display a set of brightly colored books or a collection of books with muted tones, these pieces can instantly brighten up any room.

Finally, faux literature is a great way to add a touch of texture to any room. Whether you choose to display a set of leather-bound books or a collection of books with unique covers, these pieces can instantly add a touch of texture to any room.

In conclusion, faux literature is a great way to add a touch of sophistication and style to any home. Not only do these books look great on shelves and tables, but they also provide a unique and interesting conversation piece. Whether you choose to display a set of classic novels or a collection of vintage books, these pieces can instantly transform a room into a more sophisticated and stylish space.

Conclusion

Faux literature is a great way to add a unique and stylish touch to any space. Whether you are looking to create a library-like atmosphere or just want to add a bit of whimsy to your home, faux literature can be a great way to do it. With a few simple materials and a bit of creativity, you can create a beautiful and unique display that will be sure to impress.

Tips on How to Find a Good Window Installer or Replacement in Seattle

<2016/03/Tips-on-How-to-Find-a-Good-Window-Installer-or-Replacement-in-Seattle.jpg" rel="attachment wp-att-710">Tips on How to Find a Good Window Installer or Replacement in Seattle

Window is one of the most tranquil and calming places from a home. Window can give you an instant and constant view to start your new day. There is nothing better than wake up with one or two couples of windows which are properly installed. If you are currently building a new house, a new home for your lovely family, it is important to consider about such thing, about a good installation in every inch of your home. And that includes the window. Then again, if you are currently living and investing in Settle, you might want to check out on how to find a good window replacement Seattle, WA. Here are some guides.

Do Survey

When you want to discover one good window installation service, head out to the machine we called internet first. There, you can find many reviews and other survey written beforehand. Make sure that the survey and the reviews lead to two or three nearest and best installation service for your window. Have a look on some of the testimonials and do it precisely. Don’t put your family’s safety at the risk. After doing some survey and research, make sure that the window installer has some of these criteria. These criteria needs to be your number one standard on looking for one good window installer.

Trust

Window installation is not only about some crew coming to your house and then install the window you have been requesting. It is more valuable than that. It is a trust. The trust that they have for their customer, and vice versa. When you head out to their site and find good reviews from customers, that is when you can start considering to hire it. Trust includes a good taking care of their customers. Trust also includes a neat and great result, probably beyond expectation. Trust also includes a good heart to heart talk between you and the crew. That way, the house is built with so much goodness.

Service

Besides trust, service is also one important aspect you have to see in a window installer slash replacement. This requires you to have a look closer to the work the company has done before your house. So again, survey is crucial. Make sure that they pay attention to the smallest details. In installing windows, one needs to be aware of everything nailed or installed. There is no one who wants to get hurt or even in the installation process. Along the process of installation, also make sure that the communication is managed well between you and the team. That will make a difference, a good one.

When you have got to see the service and the trust, all you can think about now is the quality. Head out to the website and find out more about the installation process and why you should invest on them. But the window installation Seattle is there to be picked. Make sure to check out the whole combination of trust, service, and quality in the official website.

Lazy Susan Shoe Rack: Crafting Space-Saving and Accessible Shoe Storage

The Lazy Susan Shoe Rack is a revolutionary way to store and organize your shoes. This unique design allows you to store up to 24 pairs of shoes in a small space, while still providing easy access to all of your shoes. The rotating design makes it easy to find the perfect pair of shoes for any occasion. The Lazy Susan Shoe Rack is perfect for those who are looking for a space-saving and accessible way to store their shoes. With its unique design, it is sure to be a great addition to any home.

How to Maximize Your Shoe Storage with a Lazy Susan Shoe Rack

Having an organized shoe storage system is essential for any home. A Lazy Susan shoe rack is an ideal solution for maximizing your shoe storage space. This type of shoe rack is designed to fit into a corner of a room and can hold up to 12 pairs of shoes.

The Lazy Susan shoe rack is a great way to store your shoes in an organized and efficient manner. It is designed to fit into a corner of a room and can hold up to 12 pairs of shoes. The rack is made up of two rotating tiers, each with six compartments. The compartments are designed to fit a variety of shoe sizes and styles. The tiers can be rotated to make it easier to access the shoes stored in the back.

The Lazy Susan shoe rack is easy to assemble and requires no tools. It is made of durable plastic and is designed to last for years. The rack is also lightweight and can be moved easily if needed.

The Lazy Susan shoe rack is a great way to maximize your shoe storage space. It is easy to assemble and requires no tools. It is also lightweight and can be moved easily if needed. The two rotating tiers can hold up to 12 pairs of shoes and are designed to fit a variety of shoe sizes and styles. With the Lazy Susan shoe rack, you can keep your shoes organized and easily accessible.

Creative Ways to Organize Your Shoes with a Lazy Susan Shoe Rack

A Lazy Susan shoe rack is an excellent way to organize your shoes and keep them easily accessible. This type of shoe rack is designed to rotate, allowing you to quickly and easily find the pair of shoes you need. Here are some creative ways to organize your shoes with a Lazy Susan shoe rack.

First, consider the size of your shoe collection. If you have a large number of shoes, you may want to opt for a larger Lazy Susan shoe rack. This will give you more space to store your shoes and make it easier to find the pair you need.

Next, think about how you want to organize your shoes. You can organize them by color, style, or season. This will make it easier to find the pair you need and keep your shoes looking neat and organized.

Finally, consider how you want to display your shoes. You can use the Lazy Susan shoe rack to display your shoes in a variety of ways. For example, you can use it to create a shoe wall, or you can use it to create a shoe tower. This will make it easier to find the pair you need and will also add a decorative touch to your home.

By using a Lazy Susan shoe rack, you can easily organize your shoes and keep them looking neat and organized. With a little creativity, you can create a stylish and functional way to store your shoes.

Conclusion

The Lazy Susan Shoe Rack is an excellent way to maximize storage space and make shoes more accessible. It is a great solution for those who have limited space and need to store a large number of shoes. The rotating design allows for easy access to all of the shoes, and the adjustable shelves make it easy to customize the storage to fit any size shoe. The Lazy Susan Shoe Rack is a great way to keep your shoes organized and accessible.

Bidding Farewell to Popcorn: Removing and Updating Ceiling Popcorn Texture

Popcorn ceiling texture, also known as acoustic or cottage cheese ceiling, was a popular choice for interior ceilings in the 1970s and 1980s. It was a cheap and easy way to cover up imperfections in the ceiling and add a bit of texture. However, over time, popcorn ceiling texture has become outdated and is now seen as an eyesore. Removing and updating popcorn ceiling texture can be a daunting task, but it is worth the effort. This article will provide an overview of the process of bidding farewell to popcorn ceiling texture, including the steps involved in removing and updating the texture. It will also provide tips and advice on how to make the process easier and more efficient.

How to Safely Remove Popcorn Ceiling Texture: Tips and Tricks for DIYers

Removing popcorn ceiling texture can be a daunting task for DIYers, but with the right tips and tricks, it can be done safely and effectively. Here are some tips to help you get started:

1. Prepare the Room: Before you begin, make sure the room is well-ventilated and that you have all the necessary safety equipment, such as a dust mask, safety glasses, and gloves.

2. Test for Asbestos: If your popcorn ceiling was installed before 1980, it may contain asbestos. If this is the case, you should have it tested by a professional before attempting to remove it.

3. Wet the Ceiling: To make the popcorn texture easier to remove, wet the ceiling with a garden sprayer or a sponge. This will help to soften the texture and make it easier to scrape off.

4. Scrape the Ceiling: Use a putty knife or a drywall knife to scrape off the popcorn texture. Be sure to scrape in one direction and avoid scraping too hard, as this could damage the drywall underneath.

5. Vacuum the Area: Once you’ve scraped off the popcorn texture, use a vacuum to remove any remaining dust and debris.

6. Sand the Ceiling: Once the popcorn texture is removed, you’ll need to sand the ceiling to create a smooth surface. Use a pole sander or a sanding block to do this.

7. Prime and Paint: Once the ceiling is sanded, you’ll need to prime and paint it. Use a high-quality primer and paint to ensure a professional finish.

Following these tips and tricks will help you safely and effectively remove popcorn ceiling texture. With a little patience and the right tools, you can achieve a smooth, professional-looking finish.

The Benefits of Updating Popcorn Ceiling Texture: A Guide to Modernizing Your Home

Are you looking to modernize your home but don’t know where to start? Updating popcorn ceiling texture is a great way to give your home a fresh, modern look. Popcorn ceiling texture, also known as acoustic or stucco ceiling, was popular in the 1950s and 1960s, but has since fallen out of favor. This guide will explain the benefits of updating popcorn ceiling texture and provide tips on how to do it.

One of the main benefits of updating popcorn ceiling texture is that it can improve the look of your home. Popcorn ceiling texture can be difficult to clean and can accumulate dust and dirt over time. By removing the popcorn texture, you can give your home a more modern, updated look. Additionally, removing popcorn ceiling texture can also help to reduce the amount of dust and dirt in your home.

Another benefit of updating popcorn ceiling texture is that it can help to improve the acoustics in your home. Popcorn ceiling texture is made of small pieces of Styrofoam, which can absorb sound and make it difficult to hear conversations in a room. By removing the popcorn texture, you can improve the acoustics in your home and make it easier to hear conversations.

Finally, updating popcorn ceiling texture can also help to improve the value of your home. Removing popcorn ceiling texture can make your home look more modern and attractive, which can help to increase its value.

If you’re interested in updating popcorn ceiling texture, there are a few steps you should take. First, you should make sure that the popcorn texture is securely attached to the ceiling. If it is not, you should remove it carefully to avoid damaging the ceiling. Once the popcorn texture is removed, you should clean the ceiling and make any necessary repairs. Finally, you should apply a new texture to the ceiling.

Updating popcorn ceiling texture can be a great way to modernize your home and improve its value. By following the steps outlined above, you can give your home a fresh, modern look and improve its acoustics.

Conclusion

The removal and updating of ceiling popcorn texture is a great way to improve the look and feel of a home. It can be a relatively easy and inexpensive project that can make a big difference in the overall aesthetic of a room. Not only does it improve the look of a room, but it can also help to reduce allergens and improve air quality. With the right tools and materials, anyone can successfully remove and update their ceiling popcorn texture.

Cabinet Heights Unveiled: Optimal Cabinet Heights for Your Kitchen

Cabinet Heights Unveiled is a comprehensive guide to help you determine the optimal cabinet heights for your kitchen. Whether you are remodeling your kitchen or building a new one, this guide will provide you with the information you need to make the best decisions for your space. With detailed information on the different types of cabinets, their sizes, and the best heights for each, you can be sure that your kitchen will be both functional and aesthetically pleasing. With Cabinet Heights Unveiled, you can be sure that your kitchen will be the envy of your friends and family.

How to Measure and Calculate the Optimal Cabinet Height for Your Kitchen

When designing a kitchen, one of the most important considerations is the height of the cabinets. The optimal cabinet height for your kitchen will depend on a variety of factors, including the height of the people who will be using the kitchen, the size of the kitchen, and the type of activities that will take place in the kitchen. To ensure that your kitchen is comfortable and functional, it is important to measure and calculate the optimal cabinet height for your kitchen.

The first step in determining the optimal cabinet height for your kitchen is to measure the height of the people who will be using the kitchen. This will help you determine the ideal height for the countertops and cabinets. Generally, the countertop should be between 36 and 42 inches high, while the cabinets should be between 54 and 60 inches high.

The next step is to measure the size of the kitchen. This will help you determine the amount of space available for the cabinets. If the kitchen is small, you may need to opt for shorter cabinets to maximize the available space. If the kitchen is large, you may be able to install taller cabinets.

Finally, consider the type of activities that will take place in the kitchen. If the kitchen will be used for food preparation, you may want to opt for taller cabinets to provide more storage space for kitchen utensils and appliances. If the kitchen will be used for entertaining, you may want to opt for shorter cabinets to create a more open and inviting atmosphere.

Once you have measured the height of the people who will be using the kitchen, the size of the kitchen, and the type of activities that will take place in the kitchen, you can calculate the optimal cabinet height for your kitchen. To do this, add the height of the countertop to the height of the cabinets. This will give you the total height of the cabinets.

By measuring and calculating the optimal cabinet height for your kitchen, you can ensure that your kitchen is comfortable and functional. With the right measurements and calculations, you can create a kitchen that is both aesthetically pleasing and practical.

Design Tips for Making the Most of Your Kitchen Cabinet Heights

When designing a kitchen, one of the most important considerations is the height of the cabinets. Cabinets that are too low can make the kitchen feel cramped and uncomfortable, while cabinets that are too high can make the kitchen feel unbalanced and awkward. To make the most of your kitchen cabinet heights, here are some design tips to keep in mind:

1. Measure the Ceiling Height: Before you begin designing your kitchen, it is important to measure the ceiling height. This will help you determine the maximum height for your cabinets.

2. Consider the Countertop Height: The height of your countertop should be taken into consideration when determining the height of your cabinets. The countertop should be at least two inches lower than the cabinets to ensure a comfortable working space.

3. Utilize Wall Cabinets: Wall cabinets are a great way to maximize the height of your kitchen cabinets. Wall cabinets can be installed at any height, allowing you to make the most of the available space.

4. Install Open Shelving: Open shelving is a great way to add storage without taking up too much space. Open shelving can be installed at any height, allowing you to make the most of the available space.

5. Utilize Corner Cabinets: Corner cabinets are a great way to maximize the height of your kitchen cabinets. Corner cabinets can be installed at any height, allowing you to make the most of the available space.

By following these design tips, you can make the most of your kitchen cabinet heights and create a beautiful and functional kitchen.

Conclusion

Cabinet Heights Unveiled provides an invaluable resource for anyone looking to optimize their kitchen space. With the help of this guide, you can easily determine the optimal cabinet heights for your kitchen, allowing you to maximize storage and efficiency. Whether you’re remodeling your kitchen or just looking to make the most of your existing space, Cabinet Heights Unveiled is an essential tool for any homeowner.

Find Forklift to Rent Online


Near the summer season, it is a busy time. You are expecting for significant improvement in sales during the summer season and that’s why you are stocking proper amount of products. It is a wise decision and it must be based on precise business forecast. But more products on the stock means significant improvement of items you need to arrange on the warehouse. You need to rearrange the storage more efficiently. Since vertical storage would be more space efficient, you would need a forklift to help arranging storage of those stock products inside the warehouse.

Forklift would be very useful to lift and move stocks of products so you can arrange them efficiently inside the warehouse facility. Using forklift will save a lot of time and also man-hour and that leads to cost efficiency. No matter how crucial the forklift is, many business entities still can’t afford to have one. Small and medium businesses may not have enough financial resources to invest on forklift. Not only the unit price is already expensive, the operation and maintenance costs can also become significant burden. Moreover, business entities like yours may not need forklift on daily operation. You may need it occasionally like what you are dealing now. Renting forklift is a much better option and here at myforkliftrental.com you can find one stop and hassle solution to rent forklift.

There are many forklift rental services you can find on local or online directory listings. But actually, it is easier said than done. First you need to decide which type of forklift to rent. Yes, there are different types of forklift with varieties of rental price and operation cost. Don’t forget that based on OSHA requirements, forklift can only be operated by certified and licensed operator. Unless you have one, it also means you need to hire a licensed forklift operator. But the biggest challenge would be choosing which rental service to rent the forklift. My Forklift Rental makes it easier to find forklift for rent in your local and compare prices to get the best deal.

How this online service works? My Forklift Rental has comprehensive directories of rental companies as well as individual owners providing forklift to rent. This directories cover all 50 states throughout the country to make it easier to find the nearest forklift ready to rent. But it isn’t just finding the forklift. This online service can help you find the ideal forklift including specific weight capacity and lift height to meet your actual needs. It will present list of forklifts near your place complete with specs, features, and rental fees. You can also request for free quotes from leading rental companies and compare the offers to get the right one to rent with the most feasible cost. In any case your business grow bigger and you find the need to invest on forklift, My Forklift Rental is also the right place to find comprehensive buying guide. It can offers complete information to help you compare specifications, features, prices, and deals from different forklift manufacturers.